Search

Powered by Blogger.

Networked Blogs

Showing posts with label simple gift. Show all posts

Monday, January 7, 2013

Crackle Glass Pebble Pendants - Simple Gifts

This is one of those crafts that you make, and it's very gratifying.  These pendants are so pretty, and they are so versatile that they can easily become your favorite accessory.  I made several that were just clear glass, and the people who received them as gifts immediately said they were their go-to item when they needed a simple but elegant accessory. 

These are made with glass pebbles that are found in the floral and decorating department at places like Dollar Tree, Hobby Lobby, and Michaels.  You can find several colors to accessorize your outfits, represent a birth month, or they can look festive and fun for an upcoming holiday.  

Bake them in the oven, shock them into cracking with ice water, glue on a bail, and poof you're done!  See the specific instructions below.  Now have some fun! 

Here's how to make them.  

Crackle Glass Pebble Pendants
  • Glass pebbles (I do many at a time so that I have them ready made)
  • Wire glue-on bails (instructions on how to make these HERE)
  • E6000 glue or Super Glue
  • Chain, ribbon, or leather for necklace 
  • Bowl of ice water 
  • Cookie sheet or aluminum pan 
  • Towel 

INSTRUCTIONS:  Place the glass pebbles in a pan in a single layer.  I do several at a time to save on energy and to make sure I have them ready for future crafts.  Place the glass pebbles in the oven, and turn it to 500 degrees.  Bake for 15-20 minutes.  Have ice water ready.  When pebbles come out of the oven, immediately dump them into the ice water.  They will sizzle, bubble, and some may even break, but the rest will begin to crackle.  Leave in the water for about 5-10 minutes, to allow pebbles to cool completely and finish crackling process.  Remove from water and drain on a towel. 

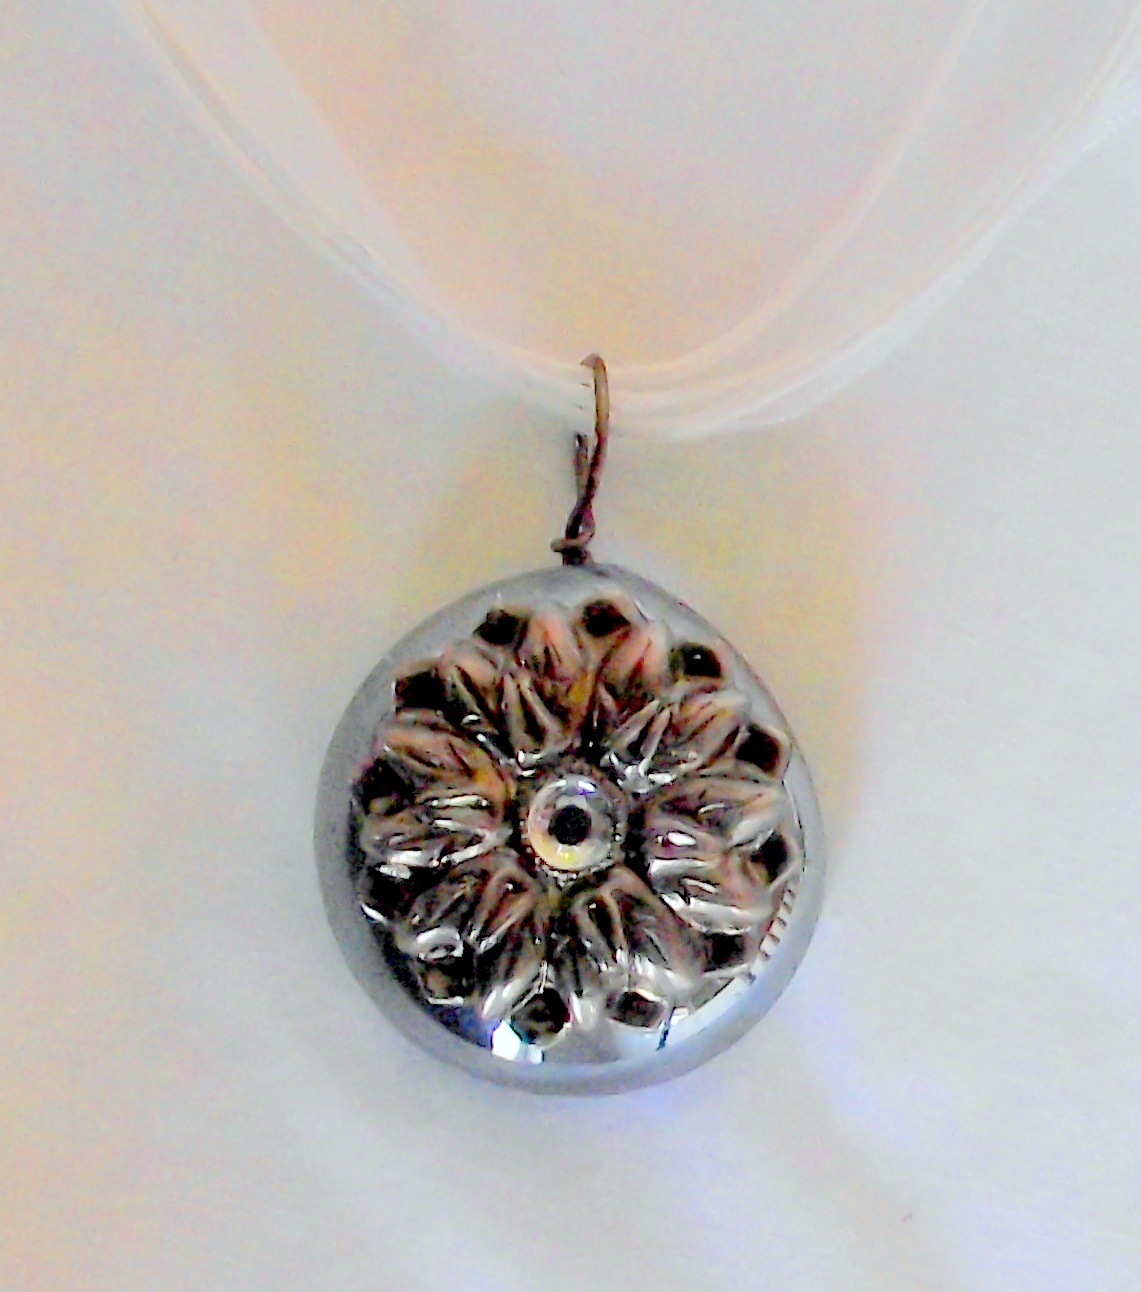
When ready to make, flip pebble over, and glue on one bail using E6000 glue, centering so pendant will hang evenly. 
Allow to dry/cure for 4 hours, preferably 24 hours.  Flip over and add necklace, then wear.  These are adorable as short pendants strung on a ribbon choker, or worn as a long statement necklace.  


Monday, December 24, 2012

DIY Ruffled Scarf - Simple Gifts


I love scarves, particularly the ones that that are dressy/frilly.  I also love infinity scarves.  No worrying about how to do some fancy tie, or what do you do with the ends, etc.  

I was in Hobby Lobby recently and saw this ruffled fabric.  I knew I wanted to use it to make scarves.  It is a pre-ruffled fabric that is light and airy.  They had white, black, turquoise, yellow, and hot pink.  I bought 1 yard each of the black and hot pink.  The fabric was 58 inches wide.  If you are lucky, you may be able to find it in a wider width.  The wider the better!  Also, how you make your scarf will depend on the direction in which the ruffles run.  For the fabric I bought, the ruffles ran across the width of the fabric.  Had the ruffles run the length of the fabric, I would have had to adjust how much I bought. 

For the first scarf, I decided to make it an infinity or circle scarf. I decided to make it 12 inches wide, with the length being 58 inches.  I used a cutting board and rotary cutter, as I found that it was necessary to use something very sharp to cut the fabric.  It tends to slip.  Using 12 inches per scarf, I was able to cut three scarves.  

Trim any weird edges or severed ruffles.  Because this is a knit fabric, it is not necessary to hem it or finish the edges. You'll want to watch as you cut so that you can flip the ruffles back away from the cutting edge. 

Once I had the scarf cut that I was going to use for an infinity scarf, I put the short ends together and pinned them face-to-face. I then sewed across these edges in a straight line. 
That's it!  Turn the scarf right side out.  You now have an infinity or circle scarf that is approximately 57 inches in length and can be worn long or doubled for more of a cowl look.  It can also be pulled up over your head as a hood or headscarf in case of bad weather. 

Don't like infinity scarves?  Not to worry.  The selvage edge of the fabric has finished ends for the ruffles.  You can leave the fabric as is, trim up the long edges, and wear it as a tie type scarf! 

Very easy, very chic, and very afforable!  The fabric I purchased was $10.99, and I had a 40% off coupon for Hobby Lobby.  So the cost was approximately $2.20 cents per scarf!

Wednesday, December 19, 2012

Chocolate Dipped Marshmallows - Simple Gift


You know you've found a winning combination when your teenage son says, "Mom, these are awesome!"  These are so easy to make and the payoff is huge!  I first made these for a food and craft show that I was attending.  I made the larger chocolate dipped marshmallows to sell and we had tiny mini marshmallows dipped in chocolate for samplers.  Both were a hit!  

Make these, then either wrap them in individual plastic sacks over the top and secure with curly ribbon or do as we did and place Styrofoam in a container, arrange like a flower arrangement, then surround with plastic wrap and top with a bow.  These make a decadent, unique gift that is destined to be a favorite.  

Chocolate Dipped Marshmallows:   
  • 1 package candy coating such as Candiquick or Chocolate Bark  
  • OR 1 package milk chocolate morsels with 1 tablespoon solid shortening or coconut oil added
  • 1 package marshmallows 
  • toppings such as candy sprinkles, crushed peppermint/candy canes, colored sugar, crushed nuts, etc. 
  • lollipop sticks (I bought Wilton, located in the cake decorating aisle at Walmart)
  • microwave safe bowl 
  • styrofoam covered with plastic wrap (a must!)
Melt candy coating or morsels and oil in microwave at 30 second intervals, stirring between times.  Place marshmallows on lollipop sticks, then swirl in coating.  Allow to cool for a moment or two, then dunk in toppings.  Stick these in Styrofoam covered with plastic wrap.  This is a must so that these dry right side up.  If you place them coating side down to dry, they do not come out very pretty.  Allow to cool.  Then either secure in individual 2 x 3 inch plastic sacks secured with ribbon or place floral foam into a container and arrange as you would a flower arrangement.  

You can also use white chocolate/almond bark coating or use colored candy melts found in the candy making section of craft stores to make different colored marshmallow coatings.  

My mother and I spent a Saturday making these and arranging them, then delivering them to relatives.  All of them loved the uniqueness and were even more pleasantly surprised that they were so yummy!  The hardest part is not eating all of them yourself! 


Monday, December 17, 2012

Homemade Gift Baskets - Simple Gifts

Ever have that person who's next to impossible to buy for?  A gift basket can be the perfect solution!  There are loads of themes that can be used to make a personalized and fun basket that will be perfect even for the toughest-to-buy-for friend or relative.  Items don't have to be expensive.  They just need to fit the same theme. 

This is one I made for kitchen items.  Everything in it came from Dollar Tree!  The base is a small plastic utility bucket.  In the bottom I placed some crumbled up tissue paper for bulk.  The back items are a scrub brush, long-handled serving spoon, slotted spatula, and rubber spatula.  Then there is a red oven mitt, wash cloths, tea towels, red chip/utility clips, red scrub sponges, and a set of salt and pepper shakers.  Perfect for the person who loves to cook! 

Of note, you can either purchase a container for a base or use wrapping paper or tissue paper to cover a recycled box such as one from powdered laundry detergent, a cereal box that has been cut down and covered in wrapping paper, or tape together boxes of candies in a rectangle to make a gift within a gift. 

Other ideas for themes:  

Car Care:  A utility bucket, microfiber cloths, window cleaner, car wax, Armor All, sponges, Rain-X, and a car air freshener. 
Movie Night:  Single microwave popcorn packets, candies such as Sugar Daddies, M&Ms, Reese's Peanut Butter Cups, Twizzlers, jelly beans, single bottles of sodas, colorful napkins, 3D glasses, a jar of nacho cheese dip, and a sack of tortilla chips.  
Nail Care:  This is great for a smaller gift idea.  It can be as simple as a bottle of nail polish tied together with a nail file or as large as including several bottles of nail polish, nail polish remover, cotton balls, nail clippers, files, foot care lotion, and bath salts.  
Candy:  Create a base with taped-together boxed candies.  Then use other colorful candies to fill the basket. Suckers, pixie sticks, Twizzlers, Red Hots, Sour Patch Straws, bubble gum, or anything else you can find! 
Home Repair Kit:  This is terrific for a housewarming gift.  Find a small bucket and add a hammer, a Philips and flat-head screwdriver, masking tape, duct tape, nails, medium-watt light bulbs, a picture-hanging kit, Goo Gone, and drop cloths. 
Get Well Soon:  Aspirin (Tylenol or Advil), cough drops, heating pad, can of chicken soup and a cute bowl, cloth napkins, place mat, puzzle books (word search, crossword puzzles, Sudoku), pens, notepad, hot tea, bottle of honey, and a cute mug. 

You can customize just about anything into a gift basket.  Use crumbled newspaper, plastic bags, or tissue paper as basket fillers, then begin at the back with taller items, and add things as you move forward, rearranging to make items more visible and pleasing.  Once everything is in place, use either bags made for gift baskets or very long pieces of plastic wrap (placed in an X fashion), place item in the middle, and bring plastic around.  Tie closed with a twist tie, then add a pretty bow.  


Friday, December 14, 2012

Cinnamon Pecan Biscotti

My morning cup of coffee is one of my simple pleasures in life.  I'm not a big breakfast eater, so I tend to like something on the lighter side.  Biscotti (also known as Prato bread or twice-baked biscuits) is made to be dunked in coffee or tea, and is a delicious side to my morning cuppa joe.  

Biscotti is a bit labor intensive, but the rewards are worth it, and it makes a great gift if you're inclined to share it.  The entire process takes about 1-1/2 to 2 hours from start to finish, but the prepared biscotti will store in an air-tight container for at least a month (if it lasts that long!).  

I've been making this specific recipe for years.  It is a delicious combination of pecans, cinnamon, and other spices.  We have an abundance of pecan trees, so there are always plenty of pecans for me to make this.  If you do not have enough pecans for this recipe, it is fine to just use what you have or omit them entirely; however, you may need to add more flour to make up for the loss of volume if you choose to not add nuts. 

We like it as it is, but you can also jazz it up by dipping half of the prepared biscotti into melted white or dark chocolate, and then allowing it to cool.  My family is not fond of this method, but it makes for a beautiful and delicious treat if you choose to try it! 

Cinnamon Pecan Biscotti 
1/2 cup (one stick) butter, room temperature 
1 cup sugar
2 eggs, beaten
1-1/2 teaspoons vanilla OR 3/4 teaspoon vanilla along with 3/4 teaspoon anise extract (traditional)
2 cups flour
1/2 teaspoon baking powder
1/2 teaspoon baking soda 
1 tablespoon ground cinnamon
1-1/2 cups chopped nuts (pecans, walnuts, almonds, pistachios or whatever you have) 

Cook at 375 for 25-30 minutes.

Cream together the butter, sugar, and eggs.  Add vanilla to mixture and blend.  In a separate bowl mix dry ingredients well.  Add to the butter/eggs/sugar mixture a little at a time, stopping periodically to stir dough away from sides and detach it from the mixing blade.  Once finished, the dough should resemble a heavy, sticky cookie dough.  
Cover the dough and allow to rest while gathering supplies for the rest of the recipe and allowing the stove to preheat.  Or, if you wish to finish this recipe later in the day or the next day, stop at this point and refrigerate the dough.  Once you begin cooking, you're in it until the end!

When ready, divide the dough in half.  Turn it out onto a floured surface and roll it into a log, like you were rolling snakes from Play-Doh in school.  

When the logs are ready, place them on a cookie sheet several inches apart and flatten slightly.  

(Don't worry you  OCD folks, I did fix that thumbprint in the log above.)  :-)

Bake at 375 degrees for about 25-30 minutes.  Begin checking the logs at the 15 minute mark, as temperatures can vary for ovens, and your oven may cook faster than my oven.  Loaves are done when the middles are touched lightly and spring back. Do not allow to burn on the bottom.  Remove from the oven and allow to cool for approximately 5 minutes. Do not cool any longer, as once these cool significantly they will not be able to be sliced without breaking apart.

Slice into 1-2 inch slices on the diagonal.  I have found it is easiest to use a long, serrated bread knife and to use a pressing and rocking motion rather than a slicing/sliding motion.  This keeps the sides of the loaves from tearing loose.  Place slices on their sides on the cookie sheet.

Place back in the oven and set oven temperature to 200 degrees.  Allow to dry for 10 minutes.  Remove the slices from the oven, flip all of them over to the opposite side, place back in the oven, and allow them to dry for another 10 minutes.  Remember:  The point of placing them back in the oven is to speed the drying process, not to toast them, thus the low oven temperature.  

Remove biscotti from the oven and allow to cool and dry completely.  Store in tins or covered containers and enjoy dunked in your favorite coffee, tea, or hot chocolate... and it's not bad dunked in milk, either!

This is like cookies and milk for grownups!


Wednesday, December 12, 2012

Homemade Hand Cream/Body Butter - Simple Gifts

I saw this recipe for homemade hand cream/body butter on Pinterest.  (When haven't you heard that phrase?)  However, I have seen it pinned many times with rave reviews and just had to try it for myself.  I followed the pin to the original blog post on Patchwork Times HERE and decided to give it a try.  Except I modified it just a bit to add some things. 

The original recipe called for:
16 oz. baby lotion
8 oz. petroleum jelly (2 of the petroleum jelly jars shown below; this one is 4 oz.)
8 oz. vitamin E cream (again 2 of the jars shown below, as this one is 4 oz.)

Those are great, but I also knew that glycerin would add an extra protective element, and olive oil is very healthy for our skin.  I added those to my recipe.  

For my recipe I used:  
  • 16 oz. generic baby lotion
  • 8 oz petroleum jelly 
  • 8 oz. vitamin E cream
  • 1 Tablespoon extra virgin olive oil 
  • 2 Tablespoons glycerin (found near the pharmacy at Walmart)
Place all the ingredients into a 5 quart bowl and whip at high speed until the mixture has the appearance and consistency of frosting or whipped cream.  This makes about 3-4 quarts of hand cream!! (The photo below is of the bowl from my 5 quart mixer to show just how much this makes!)
Spoon into individual pots or jars and then keep in a cool area.  This will stay in it's wonderfully whipped state unless it is exposed to warm temperatures, and then it will lose its consistency.  However, it can be mixed again into a whipped consistency.  

This is wonderful for hands, feet, and your entire body, especially if you are prone to dry skin.  I've heard it does wonders on dry, cracked feet.  Everyone in my family suffers from dry skin in the wintertime, and this is a blissfully soothing, rich yet light cream that can be applied from head to toe.  It's also wonderful to apply to your hands right after hand washing or doing dishes.  You can also apply it to your entire body straight out of the bath or shower to seal in moisture.  

Put this rich cream into small plastic pots (I found mine at Dollar Tree, my favorite store!) and give as teacher gifts, stocking stuffers, or place in different spots in your home for easy access to hand cream.  Everyone that I've given this to has absolutely loved it!


Monday, December 10, 2012

Turn Your Children's Artwork into Jewelry - Simple Gifts


Do you have a particularly darling piece of artwork that your child has made and would like some way to preserve it and even possibly show it off?  Or how about share it with Grandma or Aunt Susie?  You can easily turn your child's artwork into a pendant!  All it takes is a few art supplies! 

SUPPLIES NEEDED: 
  • Scanned or photographed artwork
  • Glass pebbles or stones from Dollar Tree or other floral supply/aquarium supply places
  • Printed artwork (see below)
  • Aleene's Clear Tacky craft glue
  • One glue-on bail per pendant (see instructions HERE)
  • Mod Podge
  • E6000 adhesive
  • Clear spray paint or clear nail polish.
First, you will need to scan or photograph your child's artwork and save the image to your computer.  You can also take it to Walmart and use their photo printing machines to make tiny photos.  If you download it to your computer, use either Microsoft Word or photo software such as Picasa (free) to resize and retouch the picture.  You will likely need to boost the saturation and contrast to make the colors more vivid. Use the setting that prints showing the entire photo. 

Print out photos in 1 x 1 inch or 1.5 x 1.5 inch squares.  Cut out each photo, and leave enough room so that a little paper is available to stick out on each side of the photo.
Coat the back of the glass marble with the clear tacky glue.  You can use Mod Podge, but it risks smearing the ink because Mod Podge takes longer to dry.  Press the glass to the photo firmly so that the entire photo is adhered to the back of the pebble and there are no bubbles.  


Allow to dry completely, at least a couple of hours.  Once dry, trim excess paper from around glass, and apply 2 thin coats of Mod Podge.  Thin coats are better than thick coats because they take longer to dry and can cause the colors to deteriorate if too much is applied.  
Allow to dry thoroughly between each coat of Mod Podge.  Once dry, secure glue-on bail to the back of the pendant, making sure that the stem and bail stick up at an appropriate point to make the pendant hang straight.  Again, allow to dry thoroughly.  
Once the glue-on bail has completely dried (I recommend 24 hours), coat the entire back of the pendant with either spray-on clear acrylic spray paint (I use Walmart's generic brand) or coat with clear nail polish.  Doing so will give a nearly waterproof seal, as Mod Podge is water soluble and can eventually come off if not sealed.  Allow to dry thoroughly.  

Once completely dry, flip over, and string your wonderful creation on ribbon, chain, a leather cord, or satin rat tail cord.  It will become a darling, personalized keepsake to show off your child's artwork!


Monday, December 3, 2012

Homemade Decorated Mugs - Simple Gifts

Homemade decorated Sharpie mugs are so much fun!  I made this one while I was waiting for my coffee to brew.  Mustaches are popular right now, and they make for a whimsical design added to a coffee mug.  Everyone looks more debonair with a mustache, right? 

To make this you will need: 
1 white coffee mug (I got mine at Dollar Tree)
Sharpie markers in your choice of colors
Cookie Sheet 

Oven temperature and time:  350 degrees for 30 minutes.

Draw your design on your mug.  If you are not steady handed, there are numerous printable templates that you can cut out and tape onto the mug, then color in.  I did my design free-handed.  It's a little lop sided, but sometimes mustaches are, too.  

Place mug(s) on a cookie sheet and place them in the oven.  Cook at 350 degrees for 30 minutes.  I leave my mugs in the oven and allow them to cool down with the oven.  Remember these mugs will be VERY hot and will be very sensitive to temperature changes, so it's best to let them cool completely before handling them. 

Once baked and cooled, the designs will become colorfast.   It is recommended to hand wash the mug, rather than putting it in a dishwasher, as most dishwasher soap contains a mild abrasive and can eventually erode the design. 

I have seen so many cute designs for these mugs.  One was a his and her that had half of a heart on one mug and the other half of the heart on the other mug.  You can write poetry, bible verses, or other inspirational sayings on your mugs.  I saw another where a funny nose shape was drawn on the bottom of the mug so that it looked like a plain white mug, but then turned up for a drink, the funny nose showed. 

Because Sharpies come in numerous colors, your designs can go from simple to elaborate.  HERE is a blog post from Pearls Poppies Pinkies Up showing more elaborate designs.  I've seen some that were goofy to some that were artistically elaborate.  For a truly elaborate design see post HERE from the official Sharpie Marker blog. 

Once your mug is designed, baked, and cooled, you can now either give it as an individual gift or fill it with goodies, wrap it in clear plastic, and tie with a bow.  Sharpie marker painted cups are a simple, unique gift that the receiver can appreciate every time they pour themselves a cup of coffee or enjoy a cup of tea. 

Monday, November 26, 2012

Refrigerator Magnets or Necklace - Simple Gifts

So you're looking for something fun to make that's easy, unique, and can be personalized.  How about refrigerator magnets from glass pebbles?!  The glass pebbles can be purchased at Dollar Tree for $1.00 per bag for 14 oz., which is a lot of pebbles.  You might even have a few of these left over from prior craft projects, such as the hardware store jewelry from a prior post, and this is a great way to use up the remaining pebbles.

These can be personalized with funny sayings, photos, scrapbook paper, or definitions from an old dictionary.  Above is a collection of magnets featuring Mae West, two from a scrapbook paper collection, one photo of my son sitting in my father's lap, and one from the peace sign collection.  

Glue a magnet to the back for refrigerator magnets, or glue a bail to the back of a finished piece and string it on a chain to wear as a necklace pendant.  

SUPPLIES: 
  • Glass pebbles
  • Photos, scrapbook paper, typed sayings, or photos from a magazine.
  • Clear Tacky Glue craft glue such as this:  Duncan 239396 Aleenes Quick Dry in. Tacky in. Glue-4 Ounce (Google Affiliate Ad)
  • Mod Podge
  • Paintbrush or sponge applicator 
  • Packing tape (to seal items that are not color fast)
  • Glue-on magnets (You can use old magnets from business cards and calendars, but they must be a strong magnet, otherwise they will not hold the weight of the glass pebble.)

Pick out the photos or pictures you want to use.  Check how they look by placing the glass pebble over the photo.  The glass tends to act as a lens and magnify the picture a bit.  


 The flower on this chair is very pretty and makes a great focal point!


 Ooooohhhh, who lives in a pineapple under the sea?


The pattern on this shirt is very pretty and would make a wonderful collage of fall themed magnets or a pretty pendant! 

Once you have determined which photos look best, cut out a small portion of the item, leaving enough so that a bit sticks out on the side of the glass. 

Turn your glass pebbles over and coat them with a small bit of the clear tacky glue.  


If you are using photos or other printable items that have ink that would smear or bleed, now is the time to seal those between two pieces of packing tape. These are small photos of family members I printed on my printer and needed to seal so that the ink wouldn't bleed. 
Once the pebble is coated with glue, press it glue side down onto the face of the photo or item.  Press hard so that the glue spreads out and adheres to the entire photo.  Make sure you press firmly enough that there are no bubbles in the glue.  


Once adhered appropriately, flip these over, glass side down, and allow to dry for several hours.  Once completely dry, use scissors to trim away the excess paper.  Using a sponge applicator or paintbrush, apply a couple of thin coats of Mod Podge over the backs of the pebbles, allowing each coat to dry thoroughly.  Several thin coats are better than one large coat of Mod Podge.  Otherwise, strange things happen to the paper once it's very wet. Once dry, glue a magnet to the back.
To turn one of these into a pendant, skip the magnet and instead spray the back of the piece with clear spray paint to provide a waterproof finish.  Unfortunately, Mod Podge is water soluble, so if you sweat and it's next to your skin, the Mod Podge will dissolve.  So a coat or two of clear spray paint will seal this.  Once completely dry, adhere a glue-on bail to the back of the pendant, allow it to set, and string on a pretty chain!


See the photo above of the magazine page with the woman holding the dog.  The pendant above is made from the pattern on the chair in the photo!


Wednesday, November 21, 2012

Simple Gifts - Hardware Store Jewelry


Need a fun, funky, and easy gift idea but don’t want to spend a lot of money?  You may very well have the things you need in your garage or junk drawer!  Here are two necklaces made from components from around the house or that are inexpensive purchases at any local hardware store. 

The first is a metallic, Victorian/steampunk inspired necklace.  Steampunk is known as “industrial Victorian,” as it combines elements of mechanical items, such as gears, wires, and circuitry with Victorian elements such as rhinestones, filigree, and delicate chains. 

The second is a Victorian pendant made with an iridescent glass pebble and hardware store items.  This is very pretty as a choker or short pendant worn on a ribbon.  

Metallic Victorian/Steampunk pendant
Items Needed
One 2 inch fender washer
One floral mirror mount (these are mounts used to hang mirrors in a bathroom)
One external tooth lock washer
One glue-on rhinestone or other flat-backed pretty item
One glue-on wire bail  (instructions on how to make these HERE)
E6000 glue
Ball chain and connector at least 20 inches (found in hardware or plumbing section)


INSTRUCTIONS:  Place fender washer on flat surface.  Glue mirror mount to washer with E600 glue.  Place glue along bottom of mount, just slightly inward from the outside edges to get a firm seal.  Allow to dry.  


Add lock washer to center of mirror mount.  Place glue along the area which will touch mirror mount the most.  Allow to dry. 


Add flat-backed rhinestone to center of lock washer, and allow to dry.    


Once all components are dry, flip washer over and glue bail to back.  In this photo I have the pendant propped up on a toothpick while drying.  Otherwise, if allowed to dry flat, the bail will tip backward, and pendant will not lay flat when attached to a chain.   


String on ball chain, cut to desired length, and wear!


Victorian Iridescent Glass Pendant
Items Needed
One large iridescent glass pebble (I bought these in a bag at Dollar Tree for $1 in the floral section)
One flower mirror mount
One glue-on flat backed rhinestone or other flat-backed item
One glue-on bail (instructions to make these HERE)
E6000 glue
Ribbon, silk cord, or dainty chain


 INSTRUCTIONS:  Glue bail to flat back of pebble and allow to dry. 


Using sandpaper or a nail file, rough up front domed surface of glass pebble slightly.  Check positioning of mirror mount on front of domed glass and use pliers to bend slightly and contour the mirror mount to the shape of the pebble.  Glue mirror mount to glass pebble and allow to dry.  


Glue flat-backed rhinestone to center of mirror mount and allow to dry. 


Place on ribbon, silk cord, or dainty chain and wear! 

The key to both of these pendants and necklaces is to use what you have on hand.  If you've seen something and the thought popped into your mind that it would make a pretty necklace, use it!  Instead of the mirror mount, you might have a pretty pearl button that came from a coat.  Use that!  Have a length of broken chain?  Use it to wrap the circumference of the button using glue.  Have an old broken watch with an interesting watch face?  Take the watch apart and carefully remove the watch face and use it in the place of the mirror mount.  See an old typewriter key that's flat and has an initial on it or words like "caps lock" instead of a letter?  Use that!   Have old bits of broken jewelry?  Use those.  Snip off broken parts and combine the elements by gluing them to the washer or a glass pebble.  The possibilities are endless and are as interesting as your imagination and junk drawer.