Search

Powered by Blogger.

Networked Blogs

Showing posts with label frugal. Show all posts

Tuesday, July 2, 2013

Frugal Vacationing


Everybody loves to take a vacation, but sometimes finances seem like they may be a hindrance to being able to take one.  You CAN take one and have a great time with a little planning and creativity.  We live for our vacation every summer.  It's the one time where we are together as a family without the pressure of everyday life.  Instead, our time is devoted to fun and relaxation.  


You don't have to go far.  Even a staycation can be fun or, if you really want to go somewhere, consider a short drive to either another part of your state or another state that is nearby. 


As soon as we finish one vacation, we start planning and saving for the next year's vacation.  We decide where we want to go, what we want to see, and then begin planning accordingly.  We put a couple of bucks aside every paycheck.  If we do something like have a garage sale or sell a household item, that goes into the vacation fund.  We have pecan trees, and we sell the pecans and bank that.  We've even picked up aluminum cans, cashed them in, and put that into our vacation fund.  It all adds up, even a little at a time.  We guard that vacation fund! 


We are the outdoorsy types.  We love hiking and getting back in the wilderness.   A day spent hiking back into the woods is the ideal ticket for us, but others might enjoy being near the ocean, a lake, a river, or out in the desert.  These are my personal recommendations for what works for us.  Hopefully, you will find some ideas to spark your imagination and help you plan a fun-filled yet inexpensive vacation for your family.


Plan your trip near a state or national park/monument.  Most offer a flat admission price.  That admission includes access to all the visitor centers, information, hiking trails, guided tours, amphitheater programs, and sights.  Some parks don't charge any fee at all!  Our choice, this year, was Rocky Mountain National Park in Colorado.  The admission price is $20 per carload, and that is good for one week.  Also, certain days of the year the National Park Service has free admission days.  Check this link for days:  http://www.nps.gov/findapark/feefreeparks.htm  Other parks we visited were Capulin Volcano National Monument and the Great Sand Dunes. 


Rent something with a full kitchen and cook all your own meals.  See below on how to pack/take food.  Take a pyrex measuring cup and some cheap measuring spoons, just to be sure (this is what's usually missing when we rent). 


Consider renting a townhome, cabin, or condo during the off season at a resort.  For example, in Frisco/Dillon, Colorado (near many ski resorts), you can rent a luxury condo for as little as $149/night.  Durango, near Purgatory Ski Resort and Mesa Verde National Park, has condos for as low as $105 a night.   If it's normally a summer resort, consider going in the winter and vice versa.  Off-season rental prices can be as much as half or more off the usual price. 


Pack as much of your own food as possible.  This may sound daunting, but it's actually fairly easy.  I make sure that anything we rent has a grill and/or an oven.  I plan meals ahead, make a menu, and then freeze almost everything.  Examples of freezable items are:  Boneless/skinless Chicken breasts, hamburger meat, hot dogs, steaks, lunch meat, cheese, butter, and bacon.  I even freeze milk and use it as my major chunk of ice in the ice chest (when it is thawed shake the milk for 1 minute continuously to remix if it separates).  We pack the frozen items into an ice chest, pack it full of ice, and by the time we arrive, some items are partially thawed and ready to be placed in the refrigerator to thaw further. 


For side dishes, I usually take 5 lbs. of potatoes, cans of baked beans, packets of rice/noodle side dishes, canned vegetables, and I usually also pack salt, pepper, sugar, and my own coffee and powdered creamer. 


Hoard packets or small bottles of condiments to take with you.  Jif makes single serving packets of peanut butter that are excellent to take on hikes.   See if a local restaurant would be willing to sell you a few packets of individual jellies to take, as well. 


Pack and take nonperishables such as:  Granola bars, Pop-Tarts, trail mix, peanut butter crackers, bottled water (some local water tastes icky), Capri sun, canned soda, chips, pretzels, and any other snacks you might want.  Think ahead:  If you're tempted to buy it at a convenience store on the way, pack it beforehand and save yourself a ton of money.  Homemade Chex mix tastes just as good, if not better, than Chex mix from a convenience store.  Buy whole packages of candy bars for what you'd pay for one on the road. 


Buy perishables and other unpackable items at  a store just outside the area where you will be staying.  Grocery stores near resorts and tourist attractions tend to be more expensive than in outlying cities, so stop for your perishables before you get too close.  Also, I am an avid couponer, so in the weeks before we go on vacation, I start using my coupons to get items I know we'll need for our trip.  I also keep coupons for perishables that I know we'll need when we arrive.  


On our way to and from, we stay in hotels that offer a free meal of some sort.  Usually breakfast.  Our favorite is Holiday Inn Express.  They offer a free continental breakfast that includes bacon and eggs, biscuits and gravy, sausage, toast, bagels, cinnamon rolls, fresh coffee, oatmeal, and fresh fruit.  Indulging in this can save you a significant amount, as even a run to McDonald's can be $20 or more.  Another place where we stayed offered continental meals for all 3 meals.  It's not gourmet, but it's not half bad, it's free, and it fills you up. 


Save those discount food coupons you get in the mail for places like Arby's, Sonic, A&W, Taco Bell, etc.  Use those if you must stop for food or hit the dollar menu.  

Pack picnic lunches when you go out.  PBJ, lunch meat, bread, chips, and a couple of drinks are all you need for a quick lunch without spending a ton of money.


Redeem any points from websites, credit cards, etc.  I use Swagbucks.  I make purchases and web searches through them and earn points.  I then redeem my points for gift cards.  My favorites are the Walmart E-Gift cards.  You can print out the gift card, take it to Walmart, and use it just like a regular gift card (instructions are on the bottom of the printout).   I used my Walmart gift cards to buy a good portion of the perishables we bought when we got there.   Hubster has an American Express card that he uses for business, and at vacation time he redeems his points, as well.  His favorites are the American Express gift cards.  We use those toward the end of vacation when we want to treat ourselves to eating out once or twice. 


Know your destination.  Do web searches to see what local attractions are in your area and what you can see/do for free.  There might be concerts or plays in the park,  city museums, city or state parks, hot springs, waterfalls, interesting rock formations, festivals, and other things going on that can be extremely fun.  The experiences are what you will remember.  

Be sure to stop at local visitor centers and check for coupon books.  These may be attached to maps of the area, or be on the backside of flyers and pamphlets that are usually in a cubby nearby.  We've found coupons for half off admissions, buy 2 get 1 free admission, percentage off at restaurants and other attractions.  Also, if you will be visiting something specific, check their website to see if they either offer coupons or discounts for purchasing tickets in advance.  


We drive and pack everything into a regular family car.  If you are pressed for space, devote your space to taking food.  If you are going to be gone for a week, pack enough clothes for about 4 days, then pack enough laundry soap and fabric softener sheets to do a couple of loads of laundry.  Some of the cabins we rent have a washer/dryer in them.  Other times, there's a laundromat nearby.  If you wear clothing only slightly, and it's not sweaty or smelly, then hang it up and wear it again.  Don't pack full-size cosmetics or shampoo/conditioner.  Most rental places also usually have a hair dryer available, so it's not necessary to pack that. 


Skip souvenirs; take pictures instead.  Our one indulgence is T-shirts because we wear them until they're worn out.  Each year we each buy one souvenir T-shirt .  If you want proof you visited something, consider stopping and taking a photo of yourself or your kids near the sign announcing the park, state, or sight.  Hang onto maps, ticket stubs, and pamphlets.  These make fun additions to scrapbooks. 


Consider keeping a diary while you travel.  If you are driving, note gas prices in various towns, interesting sights, places where you might get lost, funny things you, your spouse, or your kids do/say.  Note if you stop somewhere to eat, what you had, and the prices.  This may not seem important, but it can help significantly on your return trip and helps you remember why you took that photo of that goofy looking scarecrow in a field. 


Take tons of pictures!  Most cameras are digital now and can be downloaded to a computer.  Use free software to edit your photos, such as Picasa, GIMP, or IrfanView, then upload to some place such as Snapfish, Shutterfly, MyPublisher, or even local places such as Walgreen's.  Before you go, sign up for e-mail newsletters from photo processing places, and they will often send you coupons/discount codes for freebies.  Walgreen's often has a coupon for a free photo collage or 8 x 10.  Get free photo books, mugs, photo magnets, etc., and use those for gifts for grandparents, family, and friends.   I use interesting photographs, turn them into black-and-white, and hang them for decorations in our home. 


Find crazy, out-of-the way places along your route to visit and counteract boredom.  In Kansas, there are old salt mines that are now used for storage of movie archives, called the Kansas Underground Salt Museum.  http://underkansas.org/   There are hundreds of wind farms with huge wind turbines.  Us this as a teaching opportunity to learn about alternative energy sources.  When we come home, we usually journey through the panhandle of Oklahoma.  There is an area called No Mans Land that was at the heart of the Dust Bowl Era, and there are hundreds of abandoned homes on the prairie that make gorgeous photos and have an interesting tale to tell.  There are the Gloss Mountains, which are Oklahoma's own version of the painted desert.  They look like they are covered in sparkly, broken glass because of selenite in the soil.  http://www.travelok.com/listings/view.profile/id.3030


Your vacation can be an adventure and vastly more entertaining than feeling like you have to go to a resort or some place touristy.  You and your kids (if you have them) will long remember the hours spent hiking, learning about wildlife, and discovering interesting rock formations much more than how much money was spent.   These are memories that will last a lifetime. 

Tuesday, February 19, 2013

Easy Spicy Baked Chicken

Spicy baked chicken is a very versatile dish and one that is so easy to make it should be a sin.   We make this in large batches and then store it and use it throughout the week for both hot and cold dishes.  The first night we usually eat it with rice, potatoes, and a salad or other vegetables.  After that, we may slice it into sandwiches, reheat it and eat it with onions and peppers for fajitas, toss it with greens for an easy salad, or reheat it for a quick hot meal.  

We do this on nights when it's crazy around here and want a simple, hearty meal that can be reheated as needed. We work such varied schedules that many times we eat at different times.  By making this dish, it's a way that we can make sure we all have a nice meal no matter what time we arrive home.  I make my own all-purpose spicy seasoning mix, and combine this with butter or olive oil for a savory seasoning that comes out just right.  The chicken falls apart when it comes out of the oven, and there will also be a savory au jus when baking is finished that is a wonderful seasoning for a baked potato, rice, or noodles.

Easy Spicy Baked Chicken
3-4 boneless skinless chicken breasts (or as many as you want), cut into 2 inch wide strips 
My all-purpose seasoning (recipe HERE) or seasoned salt plus ground black pepper
Butter or olive oil 

Spray a large baking pan with nonstick cook spray.  Coat both sides of chicken strips with seasoning.  Place in pan.  Either dot with 1/2 teaspoon spots of butter or drizzle with olive oil.  Cover pan with foil.  Place in 350 degree oven and bake for 1 hour to 1 hour 15 minutes.  


Sunday, February 17, 2013

Frugal Versus Cheap

Frugality has become very popular over the last several years due to the economy, job market, and rising cost of things like groceries and utilities.  A change in a person's living situation, or simply a desire to be debt free or spend less can set off a chain of events that lead to an examination of lifestyles and ways that money is being spent.  Frugality is a mindset.  It is a way to look at the money you have available to you, what you desire in your life, and using your resources wisely.  Unfortunately, sometimes, people can become overzealous with their frugality and go over to cheap.  What's the difference?  For some people, it's semantics.  One person's cheap is the other person's frugal.  My personal definition of cheap is when your actions take away from others or from your or someone else's quality of life.  While it's great to save, moderation in all things is best.  

So how do you know the difference?  Here are some examples below: 


Frugal:  Buying paper towels on sale with a coupon.
Cheap:  Hanging up paper towels to dry that have been used for “wet only” items.

Frugal:  Using a 2-for-1 coupon to purchase meals at a restaurant or splitting a meal.
Cheap:  Failing to tip the server or only tipping for the 1-meal price.

Frugal:  Using wrapping paper from the dollar store or buying it on sale after Christmas and storing it.
Cheap:  Using birthday, wedding, or happy anniversary wrapping paper for Christmas because you’re too cheap to buy more. 

Frugal:  Having a pot luck meal, making the main entrée, and asking others to bring sides. 
Cheap:  Having a pot luck meal and assigning things to bring so that you don’t have to do anything except set the table…. And then keeping the leftovers. 

Frugal:  Agreeing to dinner and then splitting the tab.
Cheap:  Agreeing to split a dinner tab but ordering an expensive meal, drinks, appetizer, and dessert while the other person bought an inexpensive entrée and drank water.  

Frugal:  Purchasing an outfit on sale, at a thrift store, or by using a discount coupon.
Cheap:  Buying an expensive outfit, wearing it, and then returning it to the store.

Frugal:  Agreeing to carpool to an event and splitting the cost of gas.   
Cheap:  Agreeing to a carpool and then not chipping in for gas when everyone else does.

Frugal:  Buying vegetables on sale or that are marked down and close to their expiration date to be used immediately.
Cheap:  Going home and exchanging your fresh vegetables you just bought for ones that are starting to go bad and then taking them back to the store and demanding a refund, claiming your fresh veggies went bad too quickly.

Frugal:  Buying an item on sale, and enjoying it to its fullest extent, being sad if that item tears up or becomes defective after receiving a lot of use from the item.
Cheap:  Buying an item, using it well, then having it tear up.  Going into a store, buying the same item but repacking the well-used and broken item in the box, claim it’s defective, and then demanding your money back.

Frugal:  Saving leftover condiment packages such as ketchup, mustard, hot sauce, etc., from carryout or drive through meals for later use (i.e., items that were voluntarily given to you along with your meal).
Cheap:  Entering a restaurant and stuffing your pockets with sugar, salt, pepper, plastic utensils, napkins, ketchup packets, hot sauce packets, etc. (i.e., not given to you but offered to go along with meals in a restaurant and putting the restaurant at a disadvantage by taking them). 

Frugal:  Using coupons to get discounts at a restaurant.
Cheap:  Going to a restaurant and asking the cashier to use coupons other people have turned in.   

Frugal:  Learning to cut your family's hair. 
Cheap:  Taking your kids to free haircut days at JCPenney, having the kids' heads shaved so they can go 3 months without having a haircut, and then failing to tip the hair stylist. 


These are but a few very real examples of things that people have done in the name of saving money.  You have to decide for yourself how far you are willing to go to save money, but keeping the above examples in mind can help decide if you're being truly frugal or cheap. 

Saturday, February 9, 2013

Homemade Laundry Soap Using Liquid Castile Soap

Have you ever tried making homemade laundry soap?  I have, many times, with varying results.  I finally found a recipe that works for me that I'm going to share here.  Most recipes use simple, easily obtained ingredients that are sold in either local grocery/department stores or available online. I like being able to make my own laundry soap because it gives me a sense of accomplishment that I've made something useful.  (I am woman, hear me roar and all that!)  I also like knowing that, in a pinch, if I need to, I can whip up something to do a load or two of laundry in case I run out of laundry soap. 

I've found, however, that homemade laundry soap is one of those things that people either love or hate.  They have mixed reasons for trying it.  Some people do it for economic reasons, some for environmental reasons, and some for personal reasons such as having sensitive skin. Other people have tried it and rejected it because they felt it didn't clean their clothes well, it didn't smell right, or it was more work than they were willing to do.  If you are willing to stick with the process, you can often adjust the ingredients to develop a laundry detergent that works for you and your situation. 

Most recipes call for a grated bar of some sort of soap such as Fels Naptha, Zote, Kirk's Castile soap, or Ivory Soap along with water softeners and laundry boosters such as washing soda or borax.  Grating a big old bar of soap can be tedious, even with a food processor, because once everything is mixed, most people prefer to run it through the food processor yet again to grind the mixed ingredients into a fine powder. That's kind of pain.  If you don't have a food processor, you'll have big curls of soap shavings in your dry mix.  That is unless you use the liquid soap recipe.    That tends to make a big, gooey bucket of laundry soap akin to slime.  However, there are recipes using liquid soap that are very easy to make, work well, and are very gentle.  

My favorite recipe uses Dr. Bronner's liquid castile soap.  It comes together very quickly.  It's easily mixed, it's not messy, it's not slimy, and it is has concentrated cleaning power in a very pourable consistency.  The recipe is below, with some notes.  

HOMEMADE LIQUID LAUNDRY SOAP WITH CASTILE SOAP
1 cup very hot water
1 cup Dr. Bronner's castile soap, any scent 
1/2 cup washing soda*
1/2 cup borax*
1 gallon clean, empty container

INSTRUCTIONS:  Place borax and washing soda in a small pitcher or cup (easier to pour).  Add 1 cup very hot water (or more) and stir until washing soda and borax have dissolved.  Pour into gallon container.  Add castile soap.  Do not shake!  Cap container and tilt back and forth to mix soap, washing soda, and borax.  Remove cap and slowly add cold water until container is full, leaving enough room to mix.  Again cap container and tilt back and forth to mix.  Allow to cool, shaking periodically to blend.  This will be a very thin, watery detergent, but it works very, very well and has a wonderful scent.  

If you shake the ingredients before filling the container with water, it will make suds.  Then when you add the cold water, it may overflow the container.  Tilting the container back and forth several times will mix the ingredients without generating suds.

TO USE:  Measure out 1-2 tablespoons of laundry soap into dispenser or bottom of washing machine, and launder as usual. You may need as much as 1/4 cup if there are tough stains or the laundry is extra dirty. 

*NOTE:  The standard recipe calls for 1/2  cup each of washing soda and borax.  I have found that for our type of water, it is better to adjust the ingredients to be 3/4 cup washing soda and 1/4 cup borax because we have a high calcium content in the water so need a laundry additive that has a higher acidity.  If you use the regular recipe and find your clothes are not getting clean, try adding 1/2 cup of white vinegar or 1/2 cup lemon juice to the wash to further soften water and chelate any metals present in your local water supply.  

Tuesday, January 29, 2013

Soap Nuts for Laundry

I am always searching for new ways of doing things, less expensive things, things that are also ecologically friendly, and things that are just awesome.  Soap nuts are delightful natural cleaning product that is excellent for use in the laundry or for making all-natural cleaning products! Ever since I saw mention of them on an internet forum which I visit, I've been curious, so I did some research and decided to give them a try. 

Soap nuts are berries, or technically a drupe, from the Sapindus tree or shrub (Sapindus Mokorossi).  They grow naturally in the Himalayas and produce saponin.  That is a natural surfactant that changes the surface tension of water and allows the water to get into the fibers of clothing, break down dirt, and float it away.  If you use soap nuts in your laundry, there are no suds.  Instead, the dirt breaks down, the water looks dirty, but the clothes are clean.  The dirt simply goes down the drain with the rest of the waste water.  There is no smell/scent, and soap nuts are very gentle, so they're perfect for baby clothes, diapers, or for those who have sensitivities to soaps, detergents, or fragrances. They are "green," eco-friendly, and are safe for septic and sewage systems. 

The best part is that you can get multiple uses from just a few of the berries.  They can be reused up to 10 times before they disintegrate and need to be replaced.   Just remove the berries from the load of laundry once it's finished, leave them in their bag, allow them to dry, and reuse with your next load.  When the berries become very thin and crumble, it's time to replace them.

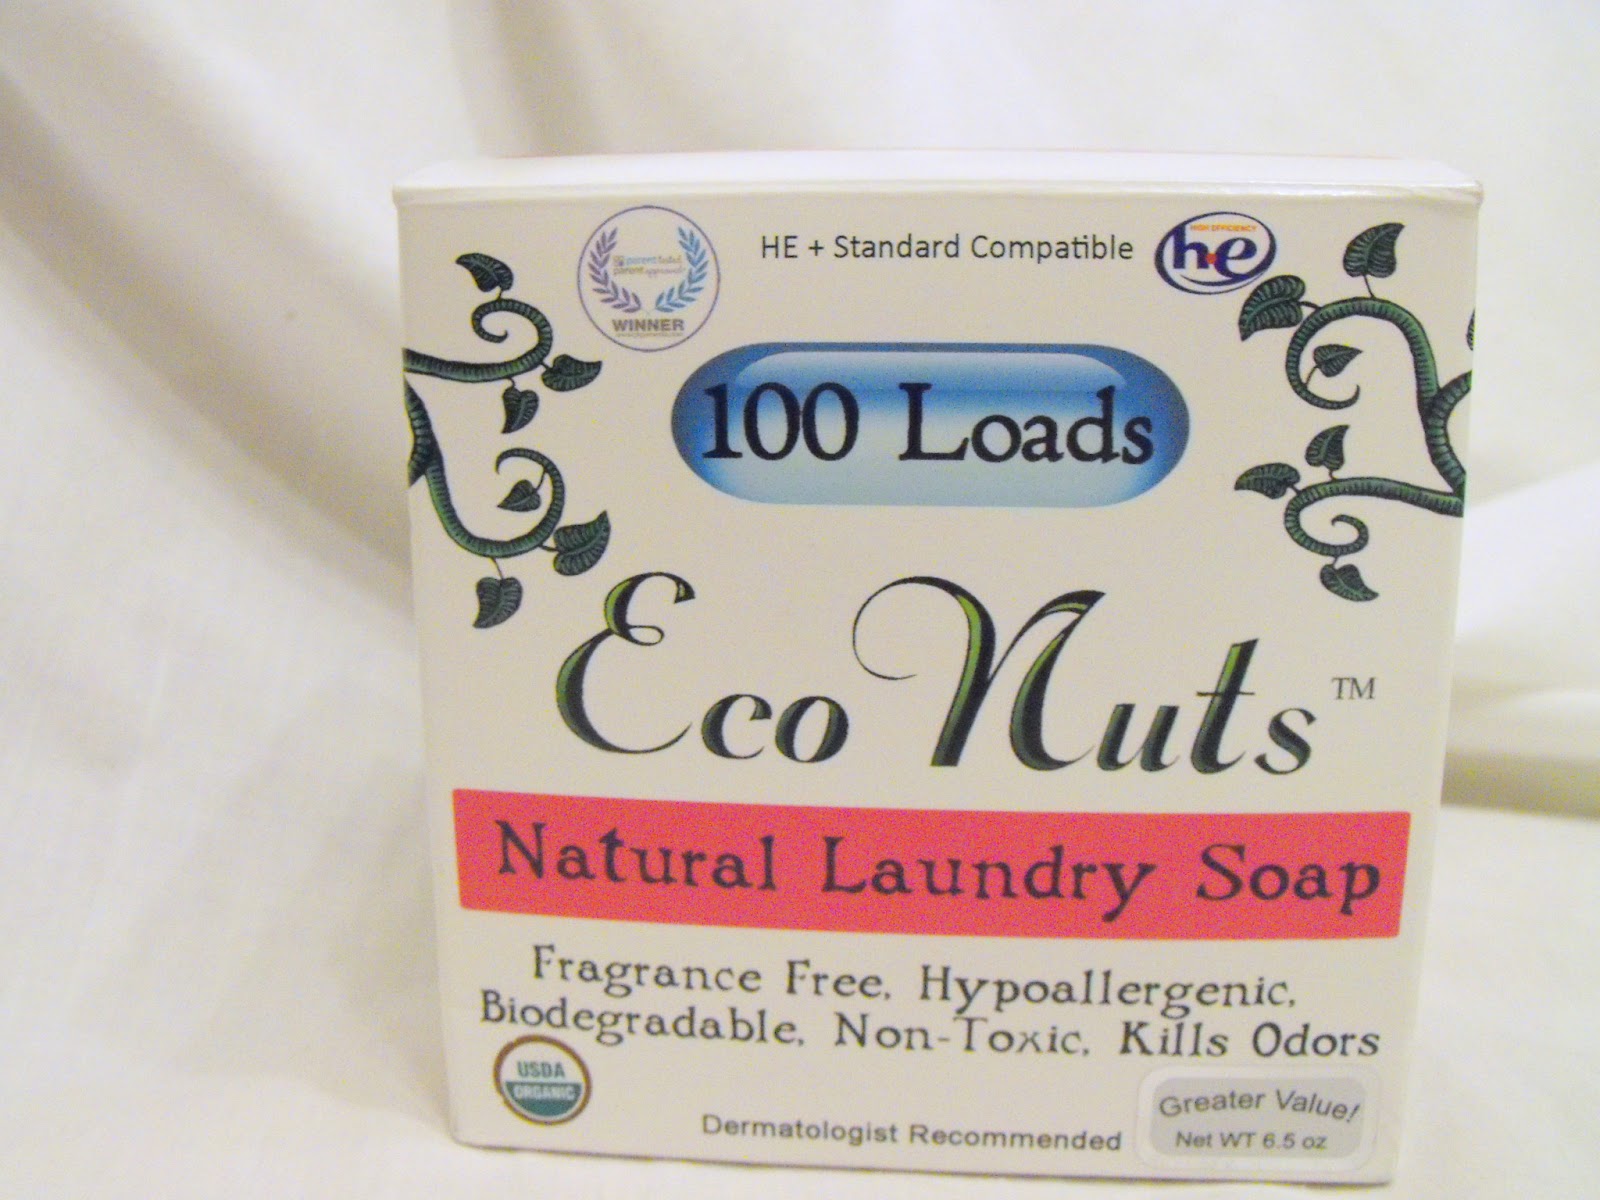
I bought my first batch of soap nuts from Amazon.  I had a $5 credit that was burning a hole in my pocket, so I purchased the 100 load box of Eco-Nuts.  It's a relatively small box packed full of these shiny, brownish-tan dried berries, along with 2 muslin sacks in which to place the berries. 
 
I just tried my first load of laundry, and I must say that I'm impressed!  The clothes came out clean, soft, and scent free straight out of the washing machine.  I did add a Gain fabric softener sheet to the dryer.  This is not necessary, as the saponin in the berries acts as a natural fabric softener; however, I have guys in my household, and let's just say that sometimes you NEED scented laundry. 

The berries work best in hot water or warm water but will also work in cold water, although there may not be as much saponin released.  So if you want to do a load of laundry in cold water but want to make sure there's enough saponin to ensure a clean load, try soaking or steeping the bag of berries in a cup of hot water for about 10 minutes prior to starting the wash load.  Then add the entire batch of water plus the bag containing the berries to the wash and proceed as usual.  

Overall, I thought they worked very well for a first- time use, and I am curious to see how well they work using them numerous times.  Regardless, this is a very economical and eco-friendly way to do laundry! 

Thursday, January 24, 2013

Beer Bread - Broke Food

Beer bread is an excellent quick bread that has just a few ingredients.  Bake it, allow it to cool, and it is great to have with sandwiches or make an egg batter and turn it into French toast.  We like this as just a bread to snack on with real butter and honey.  It also is a great budget stretcher if you're coming up on the end of the week and need bread to go with meals or make sandwiches. 

The recipe calls for Bisquick, but you can also use a substitute for that, which I will list below.  There are only 3 ingredients (my favorite kind!), and it's easy to whip up a batch and have it ready for your next meal.  

Beer Bread 
4 cups Bisquick (this equals one 20 oz. box)*
4 teaspoons sugar 
1 12 oz. can of beer

*If you do not have Bisquick, use 4 cups all-purpose flour, 1 Tablespoon baking powder, 1 teaspoon salt.  

Mix ingredients in a  mixing bowl until it forms a sticky batter. 
Pour into a loaf pan and allow to set for approximately 30 minutes.  This may or may not rise.  Your mileage may vary.  
Bake at 375 degrees for approximately 30-40 minutes or until loaf has risen and turned a golden brown.   
Allow to cool for approximately 10-15 minutes, then remove from pan and allow to cool completely before slicing. 

Thursday, January 17, 2013

Tuna Croquettes - Broke Food

While tuna croquettes are listed as today's broke food, they are secretly one of my favorite things to eat.  Most people know salmon croquettes, but if you're really trying to save, croquettes made with tuna are just the ticket.  

I learned this recipe from my late mother-in-law, Judy, and it's been a favorite of ours ever since.  Most people have tuna in their cupboards, and oftentimes if you match coupons with sales, you can get tuna for a great price.  It keeps well, and it's versatile.  

These also make great mock filet-o-fish sandwiches.  Save a patty, and the next day heat in the microwave and serve with lettuce and tartar sauce as a sandwich. 

The recipe below is for 1-2 people.  If you need to feed more people, double or triple the recipe to suit your needs.  Now, on with the recipe! 

Tuna Croquettes (Makes 2-3)
One 2.6 oz. pouch of tuna (or an equivalent size can), drained 
1/2 cup crushed saltine crackers or bread crumbs
1 egg, beaten 
1-2 tablespoons finely minced onion or 1-2 teaspoons dried minced onion 
Salt and pepper

Combine all ingredients.  Allow to rest for about 10 minutes so the crumbs soften a bit.  Form into patties and fry in oil over medium-high heat.  Serve with tartar sauce or cocktail sauce (recipes below). This will make 2 large patties, 3 medium patties, or 4 very small patties.

Homemade Tartar Sauce
1/4 cup mayonnaise 
1 tablespoon sweet or dill relish
Dash onion powder 
Salt and pepper to taste 

Combine all ingredients and serve with fish.  My very first job was in a local fish house restaurant, and this was how they made their tartar sauce and their cocktail sauce.

Homemade Cocktail Sauce
1 cup ketchup
1/2 to 1 teaspoon Worcestershire sauce (to taste)
dash of garlic powder 
dash of Tabasco hot sauce

Mix all ingredients and chill before serving. 


Saturday, January 12, 2013

Homemade Disinfecting Sprays Like Lysol

It's that time of year again.  Time for colds, flu, and just general crud.  Everybody is cooped up, and it's easy to spread germs and viruses.  All three of us have been sick.  I started it, and the hubster and my son now have it.  We've tried hard to wash hands, keep everything swabbed with disinfecting wipes and sprays, but somehow we still managed to pick up a bug.  

The most important thing to remember is that good old soap and water do the best job of removing germs.  The surfaces are clean, and any remaining germs or viruses can be killed with disinfectants and other sanitizing agents.  While I love disinfecting wipes, they can't get everywhere.  That's when disinfecting sprays come in handy.  They form a fine mist that gets into nooks and crannies and can be sprayed so that there is even coverage.

Most disinfecting sprays do their best job when they are allowed to sit for a few minutes.  The optimal time is 5 minutes in order to kill everything.  Unfortunately, some of those sprays are not only expensive, they stink!  No matter how they are fragranced, it seems they still smell like chemicals. Blech! 

You can make your won disinfecting sprays at home and make them suited to your liking.  There are two recipes listed below.  One is an alcohol-based disinfecting spray.  The other is a paracetic acid spray.  The alcohol-based one is easier to make, is very effective at killing the flu virus, and is reasonably safe for all surfaces.  The paracetic acid mixture is acidic and contains peroxide so is not recommended for use on items that will bleach, such as fabrics. The CDC has deemed alcohol, peroxide, iodine-based products, and detergents as suitable substances for killing the influenza virus (link HERE). 

Finally, if you can stand the smell, a simple mixture of 1 tablespoon of bleach to 1 quart water or 1/4 cup bleach to 1 gallon of water is an effective germ and virus killer.  However, it is not safe for all surfaces, and... it stinks.  

Here are some alternative recipes for homemade disinfecting spray.  

Alcohol-Based Disinfecting Spray:
1 spray bottle 
isopropyl (rubbing) alcohol 70% (the regular stuff you buy in the store)
essential oils such as tea tree oil, lavender oil, rosemary oil, or peppermint oil 
OR
1 teaspoon Lysol cleaner or other disinfecting liquid cleaner

In spray bottle put either 15-20 drops of essential oil or 1 teaspoon of disinfecting cleaner.  Fill with alcohol and insert sprayer.  Shake gently to combine.  Spray on surfaces and allow to sit until dry.  

Paracetic Acid Based Disinfecting Spray:  
1 spray bottle
1/4 cup 5% white vinegar
1/4 cup 3% peroxide 
5 drops essential oil 
(Do not use cleaner with this solution.) 

Mix ingredients and carefully pour into a spray bottle and set sprayer to fine mist.  Spritz on hard surfaces that are not easily bleached or prone to damage from liquids.  Allow to sit until dry.  

Note:  This makes a small quantity.  If you need larger amounts, adjust ingredients accordingly by using 1 part vinegar to 1 part peroxide. 


For tips on preventing flu see this post from the CDC:  http://www.cdc.gov/flu/protect/stopgerms.htm


Thursday, January 10, 2013

Unusual Uses for Common Household Things


We all have little tips and tricks that we use.  I love finding unusual uses for items beyond their normal use.  Some of these may be obvious, some may be new, but they are fun and interesting.  

What little item do you use that is out of the ordinary?  I'd love to know what those are.  Here are some of mine: 


1.    Nail polish remover to take labels off plastic containers.  Saturate a paper towel with nail polish remover.  Wrap it around the item that needs the label or printing removed.  Allow to sit.  Periodically redampen the paper towel, then wipe off the label!  May also use furniture-grade acetone, for this, as well, but be sure to wear gloves. 

2.    Use an antiscratch scrubber kitchen sponge (the kind with a loofa on one side and sponge on the other) in the shower to remove calluses from feet.  If it gets icky, either put it on the top shelf of the dishwasher and run through with a load or put it in a zippered bag and wash it with a load of towels to get clean. 

3.    Aspirin, salt, and water paste for canker sore cure.  This is an old trick that my dentist gave to me long ago to treat canker sores.  Crush an adult aspirin into a powder.  Add an equal amount of salt.  Add enough water to make a paste.  Using a dampened Q-tip, dab a little on the canker sore.  This will burn like crazy, but it “cauterizes” the sore, and it will oftentimes be gone the next day.   (See medical disclaimer below.) 

4.    Make a paste of cooking oil and baking soda as a homemade “Goo Gone” to remove stains and other greasy residue. 

5.    Use white vinegar in your dishwasher’s rinse dispenser in stead of expensive commercial rinse products to stop hard water and soap spots.

6.    A crumpled piece of aluminum foil makes an excellent scrubber if no steel wool pads are available. 

7.    A muffin tin with each compartment filled halfway makes an excellent extra ice tray.  Fill with fruit punch, juice, tea, or Kool-aid for ice that won’t dilute in your drink. 

8.    Use Rain-X meant  to use for windshields on shower doors.  Water spots won’t form, and the shower glass will be easier to clean.

9.    Use car wax to wax sinks and showers.  Clean shower stalls and sinks, then apply a coat of car wax and buff.  This will leave a shiny surface, and soap scum won’t stick to it.

10. Use a sheet of Contact paper with the backing removed for furniture, clothes and car seats to make dog hair and lint pickup an extra quick task. 

11. Want extra long eyelashes?  Clean an old mascara wand, and use it to apply either mineral oil, baby oil, or Vaseline to your eyelashes each night.  This will condition them and help them grow. 

12. Aluminum foil makes a great connector/contact point  if a spring breaks inside a battery compartment of a piece of electronics or a toy. 

13. Mix coffee grounds (used or fresh) and olive oil and use for a facial or body scrub.  The grounds provide an exfoliating effect, the caffeine will help tighten skin and improve circulation, and the olive oil provides moisture.  Rinse well after use.

14. Spray Static Guard on your hair brush to relieve static in your hair or use a fabric softener sheet gently rubbed over your hair to help detangle it.

15. Got stuck-on, burned-on food in a pan or casserole dish?  Place a fabric softener sheet in it, then fill the pot or dish with hot water, and allow to sit overnight.  The gunk will wash off!

16. Got an old T-shirt that is a little on the snug side?  Use it to dry your hair!  Pull just the neck over your head, with the shirt going in the wrong direction, then use the remaining T-shirt to wrap up your hair.  This will dry your hair quickly, hold your hair up while you apply makeup, and is even more gentle than a bath towel. 


Medical disclaimer:  Material on this Website is provided for informational purposes only. It is not a substitute for medical care, consultation, or advice.

Monday, January 7, 2013

Crackle Glass Pebble Pendants - Simple Gifts

This is one of those crafts that you make, and it's very gratifying.  These pendants are so pretty, and they are so versatile that they can easily become your favorite accessory.  I made several that were just clear glass, and the people who received them as gifts immediately said they were their go-to item when they needed a simple but elegant accessory. 

These are made with glass pebbles that are found in the floral and decorating department at places like Dollar Tree, Hobby Lobby, and Michaels.  You can find several colors to accessorize your outfits, represent a birth month, or they can look festive and fun for an upcoming holiday.  

Bake them in the oven, shock them into cracking with ice water, glue on a bail, and poof you're done!  See the specific instructions below.  Now have some fun! 

Here's how to make them.  

Crackle Glass Pebble Pendants
  • Glass pebbles (I do many at a time so that I have them ready made)
  • Wire glue-on bails (instructions on how to make these HERE)
  • E6000 glue or Super Glue
  • Chain, ribbon, or leather for necklace 
  • Bowl of ice water 
  • Cookie sheet or aluminum pan 
  • Towel 

INSTRUCTIONS:  Place the glass pebbles in a pan in a single layer.  I do several at a time to save on energy and to make sure I have them ready for future crafts.  Place the glass pebbles in the oven, and turn it to 500 degrees.  Bake for 15-20 minutes.  Have ice water ready.  When pebbles come out of the oven, immediately dump them into the ice water.  They will sizzle, bubble, and some may even break, but the rest will begin to crackle.  Leave in the water for about 5-10 minutes, to allow pebbles to cool completely and finish crackling process.  Remove from water and drain on a towel. 

When ready to make, flip pebble over, and glue on one bail using E6000 glue, centering so pendant will hang evenly. 
Allow to dry/cure for 4 hours, preferably 24 hours.  Flip over and add necklace, then wear.  These are adorable as short pendants strung on a ribbon choker, or worn as a long statement necklace.