Search

Powered by Blogger.

Networked Blogs

Showing posts with label candles. Show all posts

Monday, December 31, 2012

Recycle Used Wax Melts/Tarts into a Candle

If you've joined the craze for the wax warmers such as Scentsy or Pink Zebra or even the ones they have at Walmart, you have probably found scents you love.  However, after the wax scent dissipates, you want to change out the wax, but it seems a waste to just toss it out. 

This is an easy way to reuse the wax, and, believe it or not, the scent is still very much there once it burns.  The great thing about making these candles is that you get a slightly different scent as each layer burns through, and oftentimes it makes interesting scent combinations in the process.

I have different jars started for different scents.  I have one jar that is for the woodsy/spicy/kitchen scents such as Mountain Lodge, pumpkin pie, cinnamon spice, etc., and another that is for flowery/citrusy scents such as lavender, fresh cut grass, lemon, etc.  You can make as many or as few as you want, or even just have one jar into which everything gets dumped.  Whatever you choose, it's a great way to reuse the wax!

To make these you will need:
1 empty jar that is relatively heat safe (a Mason jar is perfect)
1 premade wick with base (I got mine at Hobby Lobby $2.99 for 5 click HERE to see)
Some type of adhesive, such as E6000, Super Glue, etc.
Melted wax
Pen, pencil, or dowel to hold the wick in place and steady while the jar is being filled.

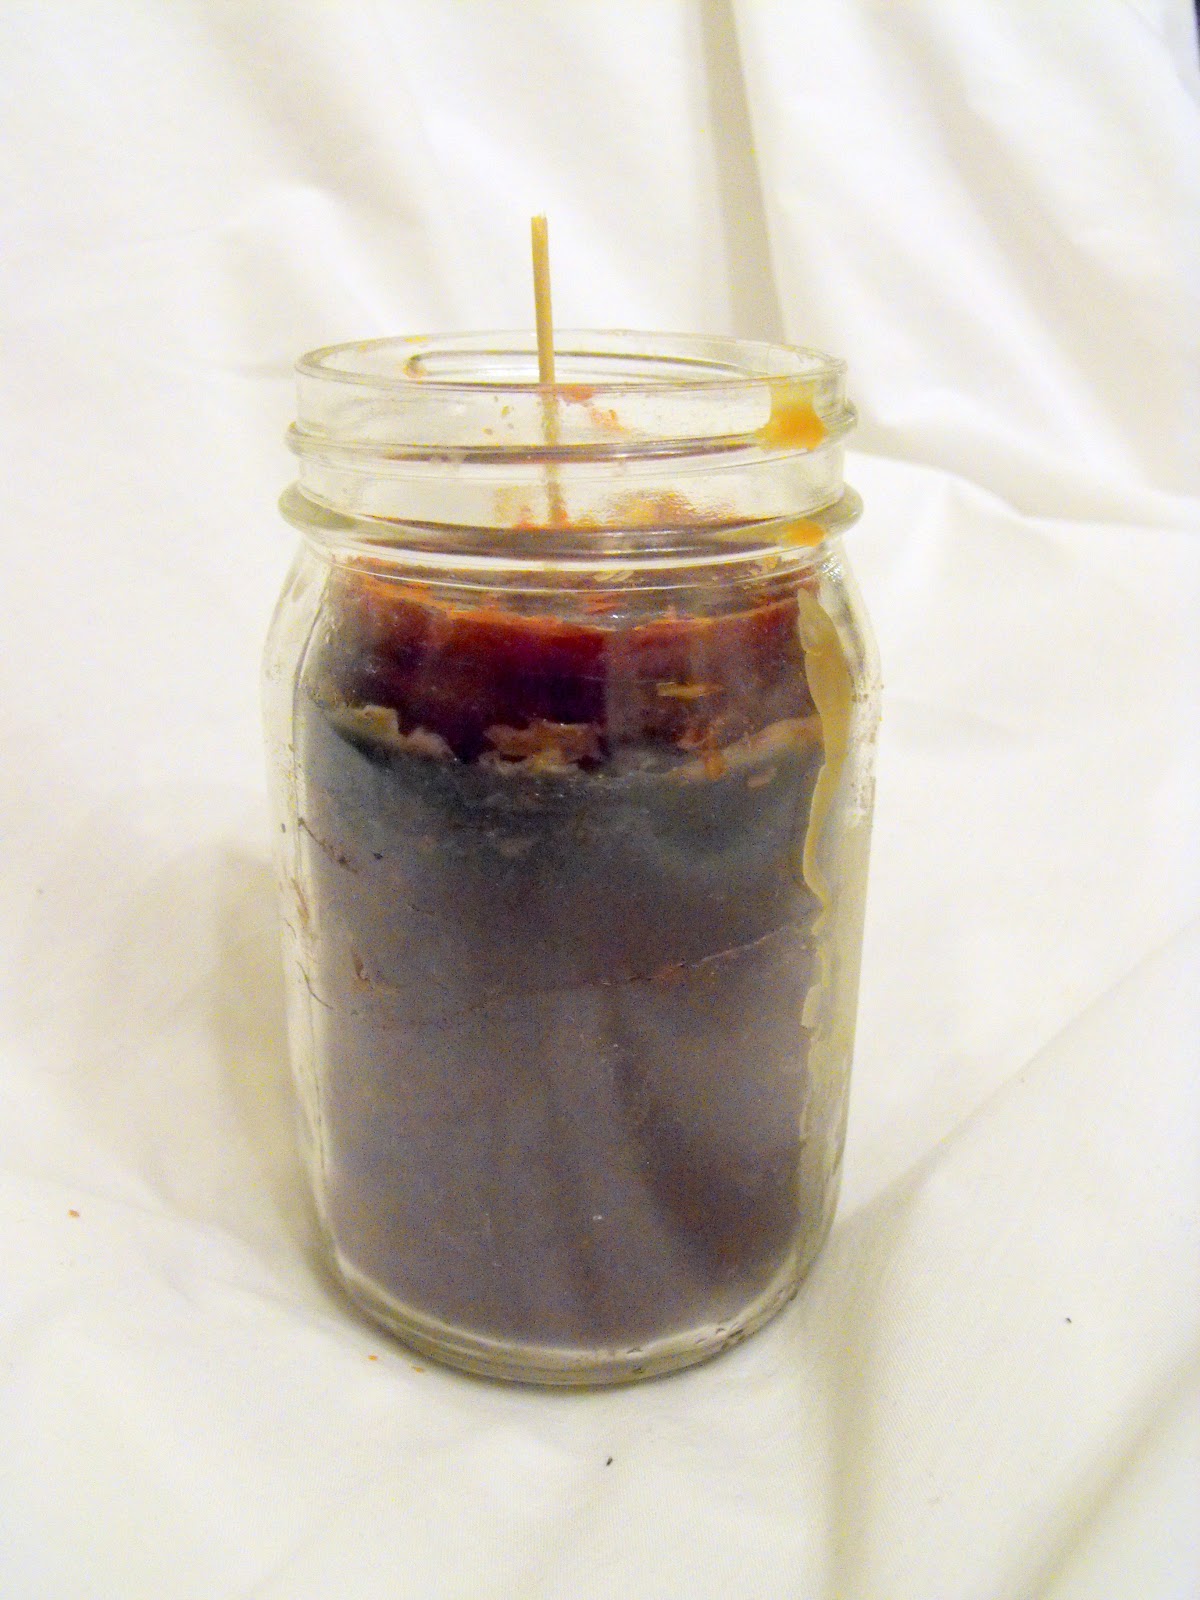
Clean the jar and make sure it is dried.  Put a dab of adhesive on the bottom of the metal premade wick and poke it down into the jar, centering it, and then use a long object to press it to the bottom of the jar to make sure it's adhered.  

Once the wick has set, take the dowel, pencil, or pen, and wind the wick around it a couple of times until the dowel sits flush on top of the jar.  This will hold the wick centered until the jar is filled.  Next, begin pouring the melted wax.  

It's not necessary to do this all at once.  You can stick the jar in an out of the way spot and add to it whenever you change out wax in your warmer or if you've come to the end of a candle and need to pour off the remaining melted wax.  Add to this layer by layer.  

When the wax is to approximately the bottom of the threads on the jar, cut the wick off and trim to approximately 1/2 inch in length.  Now it's ready to use! (The photo below is of another candle made this way with darker wax.)


Monday, November 5, 2012

Beautiful Vases and Candle Holders from Dollar Store Glass


I love beautiful, sparkling glass vases during the holidays.  However, the price in some of the fancy stores can be astronomical.  You can achieve the same effect with dollar store glassware!

My favorite place to find glassware is Dollar Tree.  The components of these homemade vases and candle holders are usually in different parts of the store.  Some may be in floral and crafts.  Some may be with the candles, and still more may be in the cooking/drinking glass section. 

You will need something like candleholders for the bases and fluted or flared vases or glasses for the tops.  You will also need a strong glue like E6000 or Gorilla Glue.  I prefer E6000 for glassware, but Gorilla Glue will work, too. Do not use Super Glue, as it tends to not bond well with the glass and can be sensitive to heat/cold temperature changes.

Candleholders can be glued end to end to provide height.  Keep in mind, when you are designing your glassware, that the taller the item, the wider the base will need to be for balance and support. 

Make sure your glass is clean and free of any stickers or adhesives before starting.  I place the larger piece top down onto my work surface.  Find the center of the largest piece of glass as a visual marker.  You can use a tiny dot from a Sharpie to mark the center.  Then place glue along the edge of the smaller piece you're going to glue to the larger piece.  Place it on the piece, center it (I just eyeball it), and then allow the glue to harden.  For me, it's easier to have the pieces on a bit of a low workbench so that I can look straight down at the item.  

E6000 is supposed to be dry in around 4 hours.  I always like to let my items cure for around 24 hours before using them just to be sure, since we're in a humid climate.  

That's it!  Turn your pieces upright and use as a decoration!  For the glassware shown in the photos, I used two fluted edge tumblers, one nut dish, and 4 candle holders.  For the tallest piece, I glued two candle holders end-to-end, with the smallest ends matching, then glued it to the tumbler.  For the remaining two pieces, I just used one candle holder to glue to the glass.  The snowy looking stuff in the picture with the candle is epsom salts!  Just pour in, center the candle, and you can add other decorations.  My poor candle was a little dusty from being hauled around the house to get good photos.

You can also paint these with Krylon glass paint for a different look, which I will show in a later post.  I have a new batch of glassware with different shapes that I'll be using for decorations this holiday season and will show those in a later post. 

Use your imagination, as the possibilities are endless!