Search

Powered by Blogger.

Networked Blogs

Showing posts with label homemade. Show all posts

Wednesday, February 20, 2013

Tomato Basil Parmesan Soup

A couple of days ago, I was craving soup.  I love cheese soups, but unfortunately I'm the only one in my household who does like them, so I usually share whatever I make with my mom.  Tomato Basil Parmesan soup filled the bill.  

It does take a bit of time to make, but the payoff is worth it!  It's spicy.  It's creamy.  It's tomatoey.  It's yummy, and it is filling!  What's not to like?  Plus, it makes a ton of soup, so there is plenty to eat and plenty to share.  Serve this with an antipasto side, such as olives and cheese, plus a crusty bread or just good old-fashioned crackers.  


Tomato Basil Parmesan Soup

 ½ stick butter

1 cup minced onion (about 1 medium onion)

1 cup chopped celery (about 4 stalks)

1 cup chopped carrots

2 cans (14 to 14.5 oz.) diced tomatoes, undrained

3 cups chicken broth or reconstituted bouillon

1 teaspoon dried oregano

1  Tablespoon dried basil

1 bay leaf

2 cans cream of chicken soup

1 can 12 oz. can evaporated milk

1 cup parmesan cheese     

Salt and pepper to taste


In very large sauce pan, melt butter over medium-low heat.  Add onion, celery, and carrots and allow to cook until onions are translucent.  Increase heat and add tomatoes, broth, oregano, basil, and bay leaf.  Cover, bring to boil, then reduce heat and simmer for 30 minutes.  Remove lid and add cream of chicken soup.  Blend well.  Add milk and blend.  Add parmesan cheese and blend.  Cover, reduce heat to low and allow to heat through for approximately 5 minutes.  Salt and pepper to taste.


Tuesday, February 19, 2013

Easy Spicy Baked Chicken

Spicy baked chicken is a very versatile dish and one that is so easy to make it should be a sin.   We make this in large batches and then store it and use it throughout the week for both hot and cold dishes.  The first night we usually eat it with rice, potatoes, and a salad or other vegetables.  After that, we may slice it into sandwiches, reheat it and eat it with onions and peppers for fajitas, toss it with greens for an easy salad, or reheat it for a quick hot meal.  

We do this on nights when it's crazy around here and want a simple, hearty meal that can be reheated as needed. We work such varied schedules that many times we eat at different times.  By making this dish, it's a way that we can make sure we all have a nice meal no matter what time we arrive home.  I make my own all-purpose spicy seasoning mix, and combine this with butter or olive oil for a savory seasoning that comes out just right.  The chicken falls apart when it comes out of the oven, and there will also be a savory au jus when baking is finished that is a wonderful seasoning for a baked potato, rice, or noodles.

Easy Spicy Baked Chicken
3-4 boneless skinless chicken breasts (or as many as you want), cut into 2 inch wide strips 
My all-purpose seasoning (recipe HERE) or seasoned salt plus ground black pepper
Butter or olive oil 

Spray a large baking pan with nonstick cook spray.  Coat both sides of chicken strips with seasoning.  Place in pan.  Either dot with 1/2 teaspoon spots of butter or drizzle with olive oil.  Cover pan with foil.  Place in 350 degree oven and bake for 1 hour to 1 hour 15 minutes.  


Saturday, February 9, 2013

Homemade Laundry Soap Using Liquid Castile Soap

Have you ever tried making homemade laundry soap?  I have, many times, with varying results.  I finally found a recipe that works for me that I'm going to share here.  Most recipes use simple, easily obtained ingredients that are sold in either local grocery/department stores or available online. I like being able to make my own laundry soap because it gives me a sense of accomplishment that I've made something useful.  (I am woman, hear me roar and all that!)  I also like knowing that, in a pinch, if I need to, I can whip up something to do a load or two of laundry in case I run out of laundry soap. 

I've found, however, that homemade laundry soap is one of those things that people either love or hate.  They have mixed reasons for trying it.  Some people do it for economic reasons, some for environmental reasons, and some for personal reasons such as having sensitive skin. Other people have tried it and rejected it because they felt it didn't clean their clothes well, it didn't smell right, or it was more work than they were willing to do.  If you are willing to stick with the process, you can often adjust the ingredients to develop a laundry detergent that works for you and your situation. 

Most recipes call for a grated bar of some sort of soap such as Fels Naptha, Zote, Kirk's Castile soap, or Ivory Soap along with water softeners and laundry boosters such as washing soda or borax.  Grating a big old bar of soap can be tedious, even with a food processor, because once everything is mixed, most people prefer to run it through the food processor yet again to grind the mixed ingredients into a fine powder. That's kind of pain.  If you don't have a food processor, you'll have big curls of soap shavings in your dry mix.  That is unless you use the liquid soap recipe.    That tends to make a big, gooey bucket of laundry soap akin to slime.  However, there are recipes using liquid soap that are very easy to make, work well, and are very gentle.  

My favorite recipe uses Dr. Bronner's liquid castile soap.  It comes together very quickly.  It's easily mixed, it's not messy, it's not slimy, and it is has concentrated cleaning power in a very pourable consistency.  The recipe is below, with some notes.  

HOMEMADE LIQUID LAUNDRY SOAP WITH CASTILE SOAP
1 cup very hot water
1 cup Dr. Bronner's castile soap, any scent 
1/2 cup washing soda*
1/2 cup borax*
1 gallon clean, empty container

INSTRUCTIONS:  Place borax and washing soda in a small pitcher or cup (easier to pour).  Add 1 cup very hot water (or more) and stir until washing soda and borax have dissolved.  Pour into gallon container.  Add castile soap.  Do not shake!  Cap container and tilt back and forth to mix soap, washing soda, and borax.  Remove cap and slowly add cold water until container is full, leaving enough room to mix.  Again cap container and tilt back and forth to mix.  Allow to cool, shaking periodically to blend.  This will be a very thin, watery detergent, but it works very, very well and has a wonderful scent.  

If you shake the ingredients before filling the container with water, it will make suds.  Then when you add the cold water, it may overflow the container.  Tilting the container back and forth several times will mix the ingredients without generating suds.

TO USE:  Measure out 1-2 tablespoons of laundry soap into dispenser or bottom of washing machine, and launder as usual. You may need as much as 1/4 cup if there are tough stains or the laundry is extra dirty. 

*NOTE:  The standard recipe calls for 1/2  cup each of washing soda and borax.  I have found that for our type of water, it is better to adjust the ingredients to be 3/4 cup washing soda and 1/4 cup borax because we have a high calcium content in the water so need a laundry additive that has a higher acidity.  If you use the regular recipe and find your clothes are not getting clean, try adding 1/2 cup of white vinegar or 1/2 cup lemon juice to the wash to further soften water and chelate any metals present in your local water supply.  

Sunday, February 3, 2013

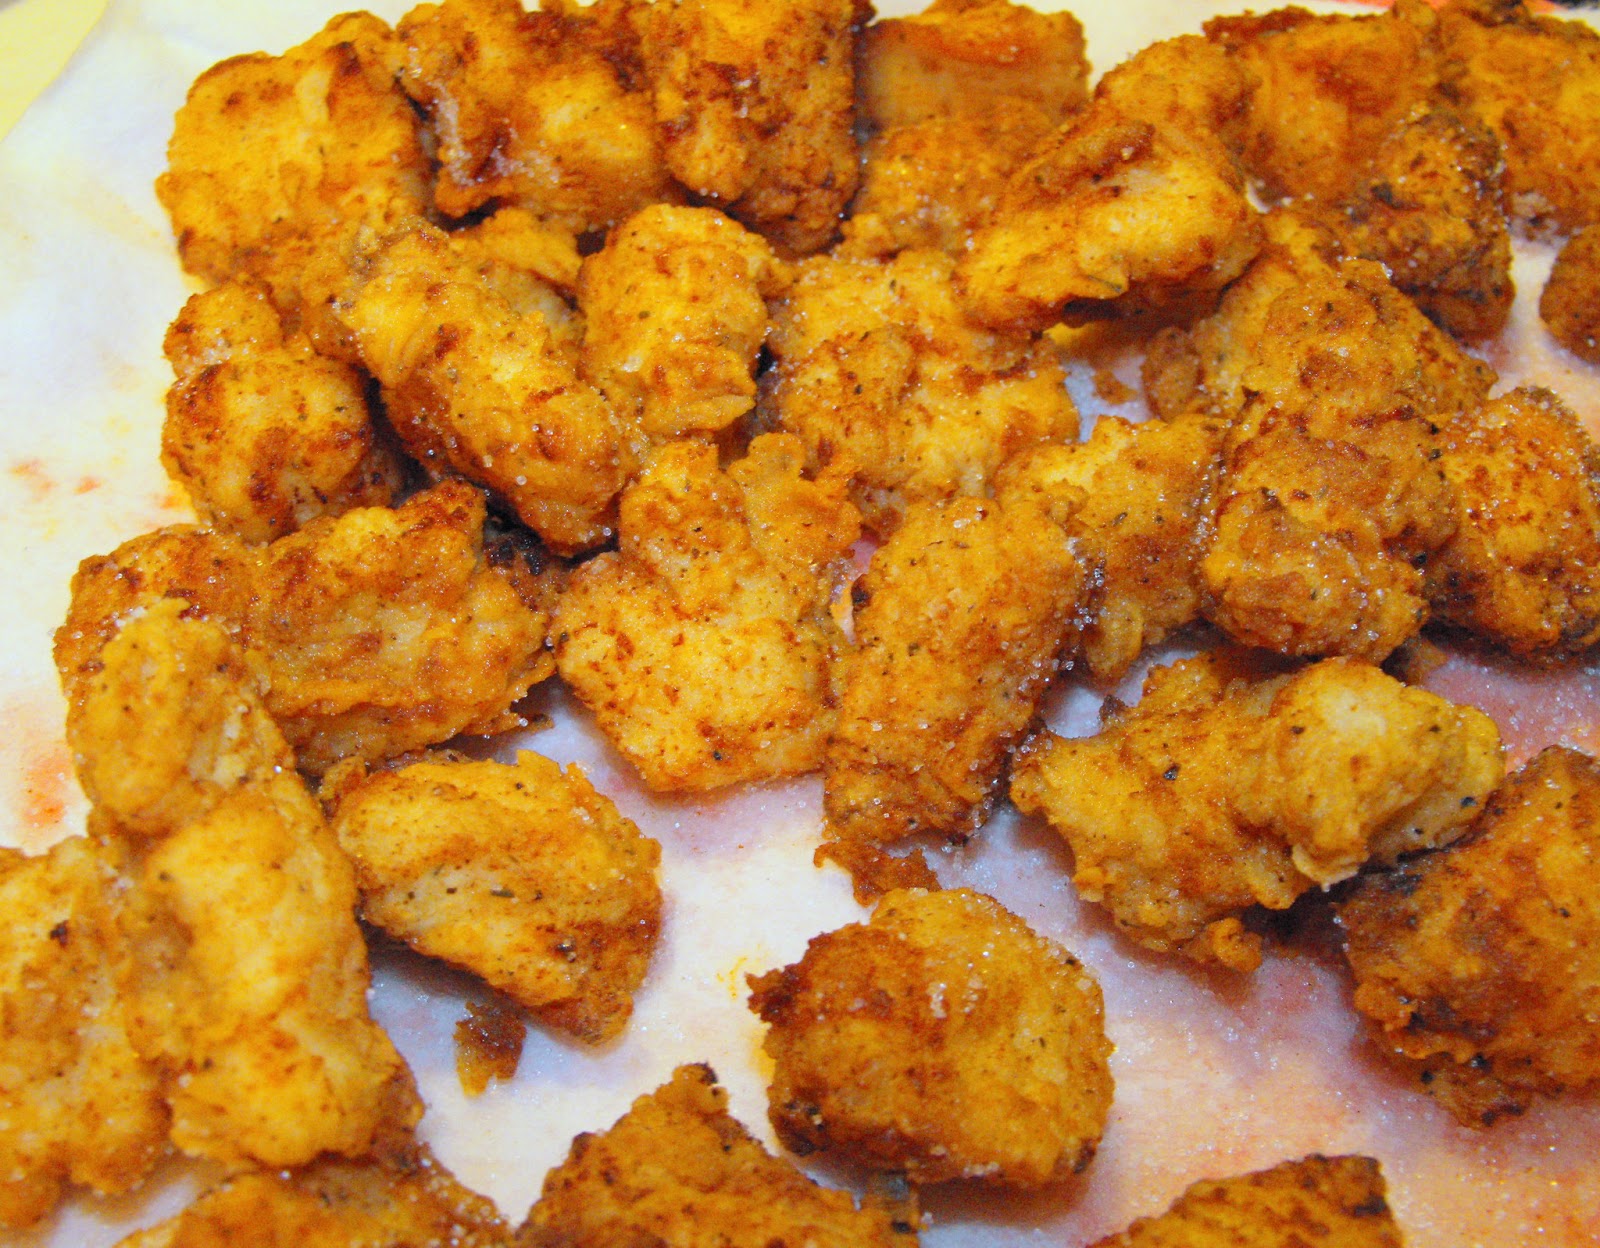
Homemade Popcorn Chicken/Chicken Nuggets

Popcorn chicken is something that my family can always agree to eat.  Even my son, who is a very picky eater, loves it.  You can make a batch of this, and it is excellent so serve for a meal, as a snack, or serve alongside other goodies for a potluck type dinner.  We have a local chicken place that makes chicken chunks/nuggets, but they are just a little too big.  These are a perfect size to pop in your mouth, especially after dunking them in your favorite sauce.  As my son says, "Mom, these are the BOMB!" 

This is my own recipe that I developed over time.  I know most chefs would say that there is something special about the ingredients, but truthfully I just based them on trial, error, and what tastes good.  We like these served with ketchup or honey mustard dipping sauce, but they're also great smothered with gravy alongside mashed potatoes.  

Homemade Popcorn Chicken 
3-4 pounds of boneless skinless chicken breasts cut into 1 to 1.5 inch cubes 
1-2 cups milk 
2 cups of flour (eyeball it)
2 Tablespoons of my all-purpose seasoning or seasoning of your choice
1-2 teaspoons ground black pepper 
1 to 1.5 inches of oil in frying pan (or use a deep fryer) 

Instructions and are photos below.   
Cut chicken into 1 to 1.5 inch pieces (no bigger).  Place them in a large flat container. 
Pour in approximately 1-2 cups of milk.  Eyeball it, as the chicken just needs to be covered so that it can soak for a bit in a milk bath.  (Discard milk after all chicken has been removed from it.  Do NOT reuse this milk!)
While chicken is soaking, add oil to skillet (or turn on deep fryer) and allow oil to heat until a droplet of water flicked into the oil sizzles and turns to steam.    In another flat pan place flour, all-purpose seasoning, and black pepper.  Blend.  
When oil is heated, take pieces of chicken from the milk, place them in the flour mixture, and coat well.  Then fry batches of chicken in oil. Allow to cook 2-3 minutes, and then flip chicken pieces over so that both sides cook well.  Remove when chicken is a light golden brown.  Place on paper towels to drain and soak up any excess oil.  The color will deepen to a darker brown when removed from oil and allowed to cool. 
And there you have them.  Tender, golden, bite-sized chunks of yumminess just waiting to be popped into your mouth and enjoyed. 

Friday, January 25, 2013

Using Reason When Following Blog Posts

I have several bloggers and websites that that I follow, and I enjoy their posts and insights.  I am particularly fond of do-it-yourself or make-it-from-scratch posts.  I like the thrill of making something that is just as good as or comparable to something that is store bought.  It's even more thrilling if that item is significantly less expensive than store bought.  However, I've noticed a few things about some of these blogs.  The bloggers and writers find an idea on the internet, and they repeat it.  On and on and on.  If you were to do an internet search about making an item and use your favorite search engine, you will find post after post all repeating the same "recipe" or idea. 

Very few posts show much research to go along with the post.  No links to what an ingredient does, what purpose the whatchamacallit serves, how it mimics another product, etc.  In some posts, the recipe or item du jour seems like it would be a good idea but hasn't been truly tested.  Yet it gets passed on.  One blogger posted it, people raved about it, and then the next blogger posted it to rave reviews, and so on.  These posts talk about how brilliant the idea is, but there are very few commentators who actually post AFTER they tried whatever is mentioned in the post.  If they do, most are met with criticism and backlash from other commentators or even the writer of the post.  How dare they not follow the crowd?!!  Also, oftentimes a blog post may not be complete but simply links back to an original post on another blog.  I understand doing that.  We all want to give credit where credit is due and avoid presenting an idea as our very own.  That's honorable. However, many times the reposter hasn't tried the idea/item.  They just think it sounds neat so posted the idea themselves with a link back to the original.  It's as if back linking absolves them of any responsibility if the item/technique/recipe/whatchamacallit doesn't work.  

It's easy to jump on a bandwagon, though.  A reader looks at all those positive comments, rave reviews, and kudos for a popular post and thinks that it MUST be true.  It MUST work.  Sometimes a post is believed even when a reader has this little niggling doubt in the back of his/her mind.  That little voice might be saying, "This doesn't sound right," but we see all these positive comments and praise.  Then we shove that little voice aside and jump right in. 

My advice?  Listen to that voice!!  Do NOT take what is on a blog as gospel truth.  Be skeptical.  Seek truth. Research!  Even for MY POSTS here, please, be skeptical.  I am not an expert nor is anyone else out there unless they have a Ph.D. in whatchamacallits along with 40 years experience.  While I try to research and show my own personal outcomes via photos and such, some bloggers don't.  They repeat prior posts, and oftentimes don't show failures.  It takes other blogs showing failures to get an idea of how well some of these things don't work.  I can also personally attest to the fact that just because it appeared on a blog doesn't mean it really works!

I can think of two recent examples.  The first is a post by a local blogger/website owner that explained how to make your own fabric softener.  This recipe called for vinegar, baking soda, and essential oils.  The directions said to mix the vinegar and baking soda, wait until the bubbling stops, then add the essential oils for scent.  Store this concoction in a glass jar, then add to your laundry for a clean, fresh, softening scent in the place of liquid fabric softener. 

Sounds great and easy, right?  But wait!  Have you ever mixed baking soda and white or cider vinegar?  Besides creating a great volcano of froth and foam, do you know what you have left when the chemical process stops?  Water.  That's right.  Water with a very small amount of sodium acetate.  Here is a great article from Everyday Einstein that explains this process and how, really, you're not accomplishing much other than making some really neato, very mildly buffered water that has some smelly-good stuff in it.  You could have saved yourself some time and just put the essential oils in the laundry, but that wouldn't be as fun! 

Now, sometimes this bubbling/volcanic action is what you're looking for.  It's great for unclogging a drain, and it's also great for getting stains out of clothing or carpeting.  The bubbling action can work debris loose as a prewash.  I have no problem with that. It's the implication that the processed solution does anything snazzy.  Because, after all, you just created water, albeit fizzy water, and water is the best cleaner of all! It was just created in a rather spectacular way. 

Then I saw another post from another popular online blogger talking about how Epsom salts combined with essential oils makes a great substitute for Purex scent crystals.  NO!!!  Dear sweet crying baby Jesus... no!   Purex crystals contain scent, sodium chloride (table salt), bentonite (clay), and color.  List of ingredients HERE (click on the +fragrances, sizes, and ingredients link). Epsom salts are made up of hydrated magnesium sulfate.  As you can see, Purex crystals and Epsom Salts are definitely not the same!  

If you add Epsom salts to water, you are, in essence, creating hard water.  Hard water contains calcium and magnesium and other dissolved minerals and metals.  Your detergents, soaps, and other things you add to your laundry to get items clean will not work very well in hard water. Why would you want to create hard water?  Especially if you already have hard water?   Adding Epsoms salts to the laundry will do just that! It will worsen an issue, not make it better.  With a little research, the blogger would have known that.  However, there was the post, bigger than daylight, with all these comments praising the brilliance of this new use for an old product. 

These are just two examples of blog posts that look like they are fantastic but when researched reveal that they either won't do much, if anything, and might even make things worse. Why these bloggers, both of whom are very popular, failed to actually research is beyond me.  Now, maybe they just like what they made and like using it.  That is perfectly fine.  I'm all for it because everyone has a right to do as they please.  However, I think it's also a great example of reader beware.  Just because you read it on the internet doesn't make it true! 


Wednesday, January 23, 2013

Homemade Aromatic Rub Like Vicks Vapor Rub

Normally I make things from scratch because they are less expensive.  However, sometimes I make them out of necessity.  Such is the case with this aromatic rub.  Our entire family has been ill.  I've had a respiratory illness, my hubster had it, and then our son got it.  While we were using lots of good old fashioned Vicks Vapor Rub, nobody had time to get any from the store!  

Homemade to the rescue!  I looked up the ingredients for the original, and discovered that they consisted of camphor, menthol (peppermint), and eucalyptus in a petroleum base.  A ha!  I had all that!  I mixed some up, experimented with quantities, and came up with a mixture that looked, smelled, and worked exactly like the name brand stuff. 

I like this because you can add as much or as little of the scent as you like.  If you find the name brand is too strong, you can cut back slightly on the oils and then add them in a mixture that is pleasing to you.  I have known people who have also substituted lavender, rosemary, or other oils for the camphor listed because they liked a different scent. 

Homemade Vapor Rub:  
Approximately 1/4 cup unscented petroleum jelly (like Vaseline)
10-12 drops eucalyptus essential oil
10-12 drops peppermint oil 
1/8 teaspoon Campho-Phenique ointment or liquid (this is camphor and makes it more authentic)
OR 
10-12 drops rosemary essential oil  

In a microwave safe bowl, microwave the petroleum jelly in 30 second increments, stirring until melted.  When melted enough, add essential oils and stir well to combine.  Pour into container, place lid on, and allow to cool.  

Use as you would Vicks Vapor Rub!  

Medical Disclaimer:  This post is not a substitute for medical care, advice, or consultation.  Please use these recipes and tidbits with common sense, and please be aware of your own allergies and sensitivities and use (or don't use) accordingly.  Thank you! 

Sunday, January 13, 2013

Headache/Migraine Relieving Aromatherapy Lotion

Ever have a horrific headache or even a migraine?  If you have, you'll never forget it.  I suffer from them as do many members of my family.  Luckily, I only get a migraine about once a month (more often if I am sleep deprived), but I also get terrible tension headaches.  Working at a computer 8+ hours a day, I tend to hold tension in my shoulders and neck. This can result in excruciating tension headaches.  

One way that I have discovered for relieving headaches is through a combination of aromatherapy and acupressure.  I'm going to share my solution here. The lotion uses peppermint (menthol) and eucalyptus essential oils.  Peppermint used topically and as aromatherapy is known to help relax muscles and increase circulation.  This makes it excellent for headaches, particularly tension headaches. 

I have included the recipe below for making your own headache relieving lotion.  This is for use on your hands in combination with acupressure.  See instructions, below the recipe, for how to use this lotion in combination with acupressure for headache relief.  My hubby loves acupressure so much that if he has a headache, he will wave his hand at me and ask me if I'll rub it to relieve a headache!

Headache Relieving Aromatherapy Lotion:
 4 oz. (1/2 cup) of lotion of choice or homemade hand lotion (recipe HERE or dollar store vitamin E lotion is also excellent for this)
15-20 drops peppermint essential oil
10 drops eucalyptus essential oil 

Combine all ingredients, mix well, and store in air-tight container. 

To use:  Place a small amount of lotion on both hands and massage all over hands.  Concentrate on the part of your hand where your thumb joins to your hand.  Put pressure on both sides of this area by placing the thumb on the top part of the area and your fingers underneath (see link below for photo).  Use firm pressure and massage in a circular motion.  You may even find that, surprisingly, it is sore and that the degree of soreness directly relates to the severity of your headache.  Continue to massage this area for 5 minutes.  If you are experiencing nausea with your headache, place three fingers together (as if you were going to show someone you're 3 years old), place your fingers on the inside of your wrist, and measure 3 fingerbreadths down from the base of your hand.  Begin massaging at that point on the inside of your wrist/forearm.  This is an acupressure point to relieve nausea.  Alternate these massages, using the lotion liberally.  Relax, breathe deeply, and your headache should ease. 

For further information on the use of peppermint for headaches, see link HERE

For further information on the use of acupressure to relieve headaches, see link HERE

Medical Disclaimer:  The information provided here is for personal use only.  It is not a substitute for professional medical advice, treatment, or consultation.  

Saturday, January 12, 2013

Homemade Disinfecting Sprays Like Lysol

It's that time of year again.  Time for colds, flu, and just general crud.  Everybody is cooped up, and it's easy to spread germs and viruses.  All three of us have been sick.  I started it, and the hubster and my son now have it.  We've tried hard to wash hands, keep everything swabbed with disinfecting wipes and sprays, but somehow we still managed to pick up a bug.  

The most important thing to remember is that good old soap and water do the best job of removing germs.  The surfaces are clean, and any remaining germs or viruses can be killed with disinfectants and other sanitizing agents.  While I love disinfecting wipes, they can't get everywhere.  That's when disinfecting sprays come in handy.  They form a fine mist that gets into nooks and crannies and can be sprayed so that there is even coverage.

Most disinfecting sprays do their best job when they are allowed to sit for a few minutes.  The optimal time is 5 minutes in order to kill everything.  Unfortunately, some of those sprays are not only expensive, they stink!  No matter how they are fragranced, it seems they still smell like chemicals. Blech! 

You can make your won disinfecting sprays at home and make them suited to your liking.  There are two recipes listed below.  One is an alcohol-based disinfecting spray.  The other is a paracetic acid spray.  The alcohol-based one is easier to make, is very effective at killing the flu virus, and is reasonably safe for all surfaces.  The paracetic acid mixture is acidic and contains peroxide so is not recommended for use on items that will bleach, such as fabrics. The CDC has deemed alcohol, peroxide, iodine-based products, and detergents as suitable substances for killing the influenza virus (link HERE). 

Finally, if you can stand the smell, a simple mixture of 1 tablespoon of bleach to 1 quart water or 1/4 cup bleach to 1 gallon of water is an effective germ and virus killer.  However, it is not safe for all surfaces, and... it stinks.  

Here are some alternative recipes for homemade disinfecting spray.  

Alcohol-Based Disinfecting Spray:
1 spray bottle 
isopropyl (rubbing) alcohol 70% (the regular stuff you buy in the store)
essential oils such as tea tree oil, lavender oil, rosemary oil, or peppermint oil 
OR
1 teaspoon Lysol cleaner or other disinfecting liquid cleaner

In spray bottle put either 15-20 drops of essential oil or 1 teaspoon of disinfecting cleaner.  Fill with alcohol and insert sprayer.  Shake gently to combine.  Spray on surfaces and allow to sit until dry.  

Paracetic Acid Based Disinfecting Spray:  
1 spray bottle
1/4 cup 5% white vinegar
1/4 cup 3% peroxide 
5 drops essential oil 
(Do not use cleaner with this solution.) 

Mix ingredients and carefully pour into a spray bottle and set sprayer to fine mist.  Spritz on hard surfaces that are not easily bleached or prone to damage from liquids.  Allow to sit until dry.  

Note:  This makes a small quantity.  If you need larger amounts, adjust ingredients accordingly by using 1 part vinegar to 1 part peroxide. 


For tips on preventing flu see this post from the CDC:  http://www.cdc.gov/flu/protect/stopgerms.htm


Monday, December 31, 2012

Recycle Used Wax Melts/Tarts into a Candle

If you've joined the craze for the wax warmers such as Scentsy or Pink Zebra or even the ones they have at Walmart, you have probably found scents you love.  However, after the wax scent dissipates, you want to change out the wax, but it seems a waste to just toss it out. 

This is an easy way to reuse the wax, and, believe it or not, the scent is still very much there once it burns.  The great thing about making these candles is that you get a slightly different scent as each layer burns through, and oftentimes it makes interesting scent combinations in the process.

I have different jars started for different scents.  I have one jar that is for the woodsy/spicy/kitchen scents such as Mountain Lodge, pumpkin pie, cinnamon spice, etc., and another that is for flowery/citrusy scents such as lavender, fresh cut grass, lemon, etc.  You can make as many or as few as you want, or even just have one jar into which everything gets dumped.  Whatever you choose, it's a great way to reuse the wax!

To make these you will need:
1 empty jar that is relatively heat safe (a Mason jar is perfect)
1 premade wick with base (I got mine at Hobby Lobby $2.99 for 5 click HERE to see)
Some type of adhesive, such as E6000, Super Glue, etc.
Melted wax
Pen, pencil, or dowel to hold the wick in place and steady while the jar is being filled.

Clean the jar and make sure it is dried.  Put a dab of adhesive on the bottom of the metal premade wick and poke it down into the jar, centering it, and then use a long object to press it to the bottom of the jar to make sure it's adhered.  

Once the wick has set, take the dowel, pencil, or pen, and wind the wick around it a couple of times until the dowel sits flush on top of the jar.  This will hold the wick centered until the jar is filled.  Next, begin pouring the melted wax.  

It's not necessary to do this all at once.  You can stick the jar in an out of the way spot and add to it whenever you change out wax in your warmer or if you've come to the end of a candle and need to pour off the remaining melted wax.  Add to this layer by layer.  

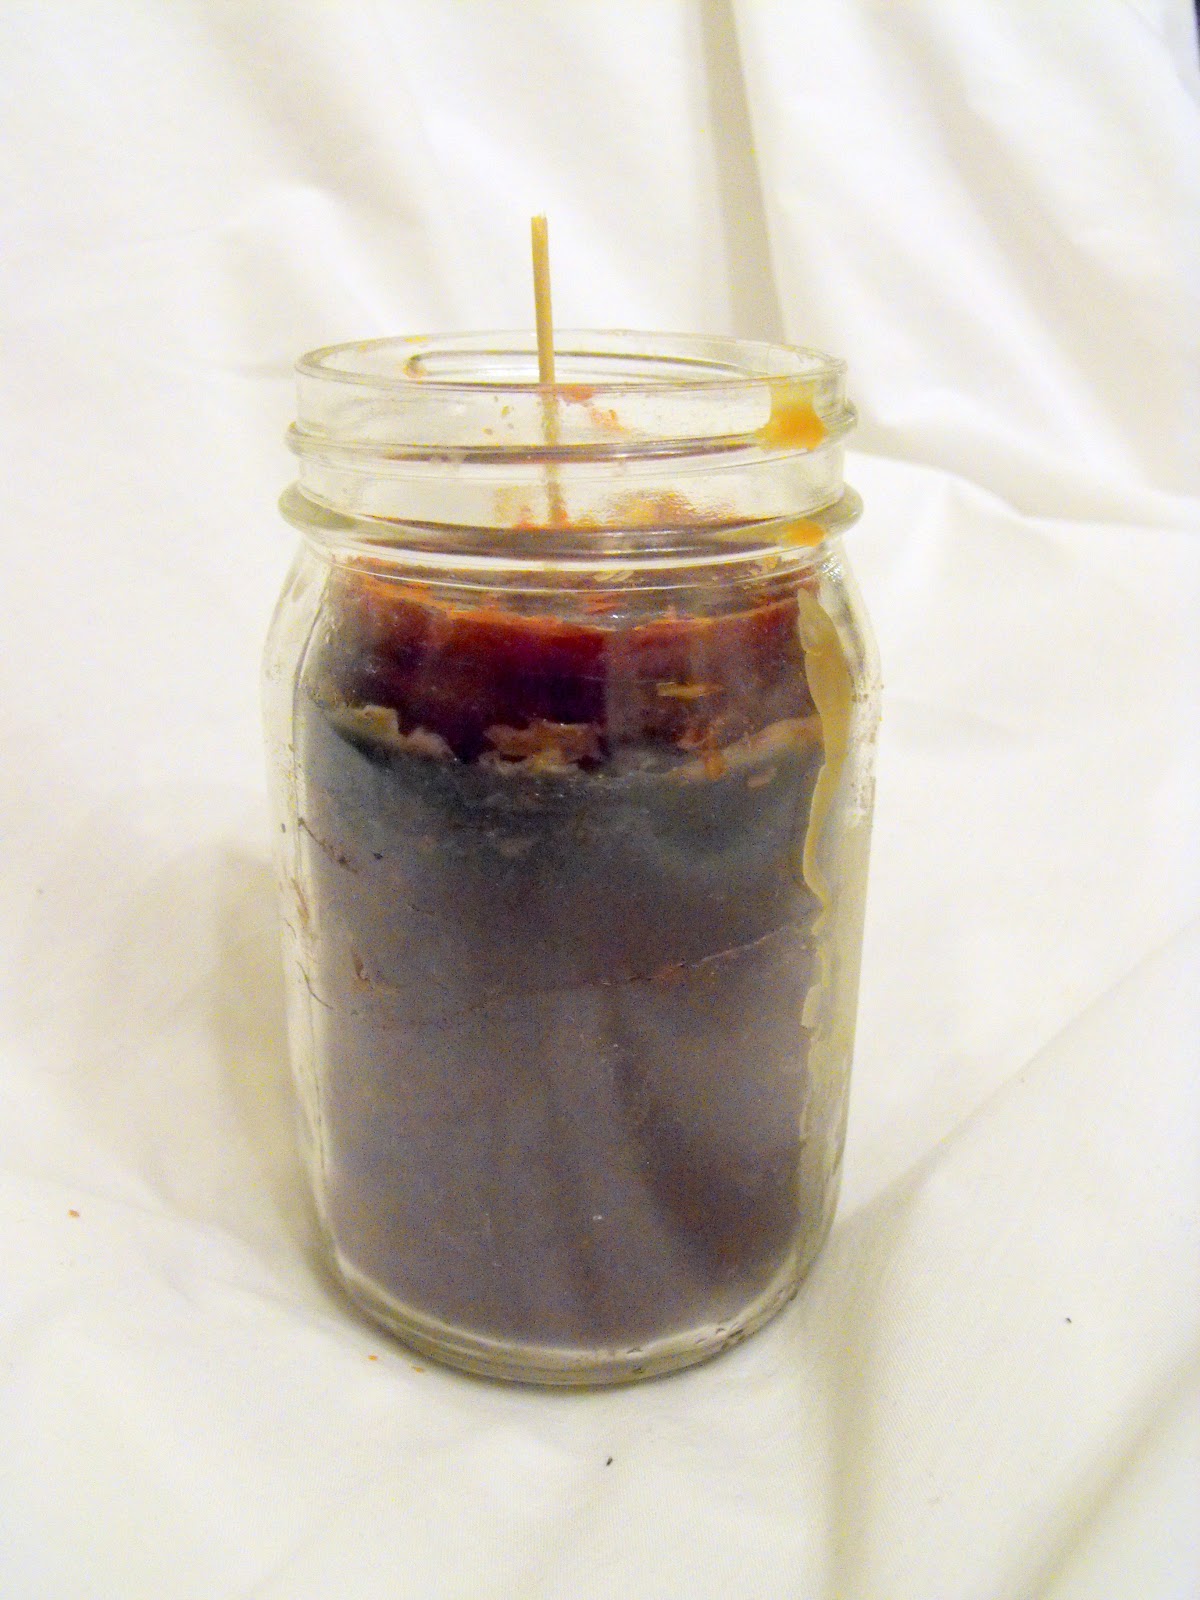
When the wax is to approximately the bottom of the threads on the jar, cut the wick off and trim to approximately 1/2 inch in length.  Now it's ready to use! (The photo below is of another candle made this way with darker wax.)


Saturday, December 29, 2012

Easy Deep Conditioner for Hair

Olive oil is known for its benefits as a food substance because it is flavorful and is known to help lower cholesterol.  It is also terrific as a topical application for skin and hair.  I love making this easy conditioner recipe listed below and using it a couple of times a week for a deep conditioning hair treatment.

Olive oil is biologically closest to sebum, which is the oil naturally produced by our bodies.  Why don't we just leave the natural oils there?  Well, that sounds great, but unfortunately sweat, bacteria, and skin cells tend to collect in the oils present on our body, so it's necessary for us to take a shower or bath, grab our favorite soap, and get squeaky clean.  Unfortunately, soap tends to strip those natural oils and can sometimes leave us with overly dry skin or hair.  That's where conditioners and lotions come in.

This is another beauty tip that was given to me by my brother.  Use this 2-3 times a week (or less, depending on your hair).  Keep it in the shower for easy use, and make sure that you blow dry your hair afterwards to help the conditioner "set."  Otherwise, you may seem to have an oily residue on your hair. 

OLIVE OIL DEEP CONDITIONER:
1 bottle of inexpensive conditioner, your choice
1 teaspoon of olive oil per 8 oz. of conditioner
(Example:  If your bottle is 12 oz., you will need 1-1/2 teaspoons of olive oil.  If it is 16 oz., you will need 2 teaspoons of olive oil, and so on.)

Open the conditioner and squirt out just enough to give you some "shaking room" in the bottle.  Add the olive oil, and shake for 1 minute. Store the conditioner in the shower or wherever you wash your hair.  Apply liberally to freshly shampooed hair and allow to sit for 2-3 minutes.  Try to keep away from scalp.  Rinse well, then blow dry.  Blow drying is a MUST in order for the conditioner to set. 

That's it!  This conditioner will leave your hair silky smooth and well conditioned without spending a ton of money! 

Sunday, December 23, 2012

Best Homemade Stain Remover

Ever been tempted to throw away a perfectly good article of clothing just because it has a stain?  There are times when clothes get grungy looking, or you find yellow armpit stains, or there is a ring-around-the-collar issue.  Maybe you dropped a dollop of tomato sauce on your favorite white shirt.  Or maybe you have a grease stain on that pretty turquoise blouse.  Rather than buying expensive stain removers, you might have everything you need right in your kitchen cabinets. 

I had seen this post at One Good Thing by Jillee for armpit stain remover.  It works great for whites and takes out more than yellowed armpit stains.  BUT, if you have colored clothing, hydrogen peroxide is not the ideal thing as peroxide can bleach colors.  Never fear!  There are alternative solutions.  

Here is the recipe for the original stain remover for white clothing:
  • original blue Dawn dish soap
  • hydrogen peroxide 
  • baking soda
Mix the Dawn dish soap and baking soda to form a paste.  Using an old toothbrush or other type of brush, work the Dawn/baking soda mixture into the stain.  Let it sit for a bit.  Then saturate the area with hydrogen peroxide.  This will bubble like crazy.  Allow this to sit, again, for about 10-15 minutes.  Throw in the washing machine with other whites and launder on the hottest setting the fabric can tolerate.  Stains should be gone.  

I also keep a mixture of equal parts Dawn and peroxide in an opaque spray bottle to use as a pretreatment prior to washing.  An opaque bottle is important, as peroxide begins to break down or deteriorate if exposed to light.  That's why it comes in a dark brown bottle in the store.  

Now, for the color-fast stain remover!

Color-fast stain remover: 
  • original blue Dawn dish soap
  • white vinegar
  • baking soda
Make a paste with the Dawn and baking soda.  Using a toothbrush or other bristled brush, work into the stain.  Allow to sit for about 10-15 minutes.  Once time is up, saturate stained area with white vinegar.  This will bubble considerably.  Once bubbling has stopped, launder clothing as directed.  

There you have it!  These are two inexpensive and easy ways to get stains out of clothing without resorting to expensive laundry pretreatments at the store! 

Monday, December 17, 2012

Homemade Gift Baskets - Simple Gifts

Ever have that person who's next to impossible to buy for?  A gift basket can be the perfect solution!  There are loads of themes that can be used to make a personalized and fun basket that will be perfect even for the toughest-to-buy-for friend or relative.  Items don't have to be expensive.  They just need to fit the same theme. 

This is one I made for kitchen items.  Everything in it came from Dollar Tree!  The base is a small plastic utility bucket.  In the bottom I placed some crumbled up tissue paper for bulk.  The back items are a scrub brush, long-handled serving spoon, slotted spatula, and rubber spatula.  Then there is a red oven mitt, wash cloths, tea towels, red chip/utility clips, red scrub sponges, and a set of salt and pepper shakers.  Perfect for the person who loves to cook! 

Of note, you can either purchase a container for a base or use wrapping paper or tissue paper to cover a recycled box such as one from powdered laundry detergent, a cereal box that has been cut down and covered in wrapping paper, or tape together boxes of candies in a rectangle to make a gift within a gift. 

Other ideas for themes:  

Car Care:  A utility bucket, microfiber cloths, window cleaner, car wax, Armor All, sponges, Rain-X, and a car air freshener. 
Movie Night:  Single microwave popcorn packets, candies such as Sugar Daddies, M&Ms, Reese's Peanut Butter Cups, Twizzlers, jelly beans, single bottles of sodas, colorful napkins, 3D glasses, a jar of nacho cheese dip, and a sack of tortilla chips.  
Nail Care:  This is great for a smaller gift idea.  It can be as simple as a bottle of nail polish tied together with a nail file or as large as including several bottles of nail polish, nail polish remover, cotton balls, nail clippers, files, foot care lotion, and bath salts.  
Candy:  Create a base with taped-together boxed candies.  Then use other colorful candies to fill the basket. Suckers, pixie sticks, Twizzlers, Red Hots, Sour Patch Straws, bubble gum, or anything else you can find! 
Home Repair Kit:  This is terrific for a housewarming gift.  Find a small bucket and add a hammer, a Philips and flat-head screwdriver, masking tape, duct tape, nails, medium-watt light bulbs, a picture-hanging kit, Goo Gone, and drop cloths. 
Get Well Soon:  Aspirin (Tylenol or Advil), cough drops, heating pad, can of chicken soup and a cute bowl, cloth napkins, place mat, puzzle books (word search, crossword puzzles, Sudoku), pens, notepad, hot tea, bottle of honey, and a cute mug. 

You can customize just about anything into a gift basket.  Use crumbled newspaper, plastic bags, or tissue paper as basket fillers, then begin at the back with taller items, and add things as you move forward, rearranging to make items more visible and pleasing.  Once everything is in place, use either bags made for gift baskets or very long pieces of plastic wrap (placed in an X fashion), place item in the middle, and bring plastic around.  Tie closed with a twist tie, then add a pretty bow.  


Wednesday, December 12, 2012

Homemade Hand Cream/Body Butter - Simple Gifts

I saw this recipe for homemade hand cream/body butter on Pinterest.  (When haven't you heard that phrase?)  However, I have seen it pinned many times with rave reviews and just had to try it for myself.  I followed the pin to the original blog post on Patchwork Times HERE and decided to give it a try.  Except I modified it just a bit to add some things. 

The original recipe called for:
16 oz. baby lotion
8 oz. petroleum jelly (2 of the petroleum jelly jars shown below; this one is 4 oz.)
8 oz. vitamin E cream (again 2 of the jars shown below, as this one is 4 oz.)

Those are great, but I also knew that glycerin would add an extra protective element, and olive oil is very healthy for our skin.  I added those to my recipe.  

For my recipe I used:  
  • 16 oz. generic baby lotion
  • 8 oz petroleum jelly 
  • 8 oz. vitamin E cream
  • 1 Tablespoon extra virgin olive oil 
  • 2 Tablespoons glycerin (found near the pharmacy at Walmart)
Place all the ingredients into a 5 quart bowl and whip at high speed until the mixture has the appearance and consistency of frosting or whipped cream.  This makes about 3-4 quarts of hand cream!! (The photo below is of the bowl from my 5 quart mixer to show just how much this makes!)
Spoon into individual pots or jars and then keep in a cool area.  This will stay in it's wonderfully whipped state unless it is exposed to warm temperatures, and then it will lose its consistency.  However, it can be mixed again into a whipped consistency.  

This is wonderful for hands, feet, and your entire body, especially if you are prone to dry skin.  I've heard it does wonders on dry, cracked feet.  Everyone in my family suffers from dry skin in the wintertime, and this is a blissfully soothing, rich yet light cream that can be applied from head to toe.  It's also wonderful to apply to your hands right after hand washing or doing dishes.  You can also apply it to your entire body straight out of the bath or shower to seal in moisture.  

Put this rich cream into small plastic pots (I found mine at Dollar Tree, my favorite store!) and give as teacher gifts, stocking stuffers, or place in different spots in your home for easy access to hand cream.  Everyone that I've given this to has absolutely loved it!


Monday, December 10, 2012

Turn Your Children's Artwork into Jewelry - Simple Gifts


Do you have a particularly darling piece of artwork that your child has made and would like some way to preserve it and even possibly show it off?  Or how about share it with Grandma or Aunt Susie?  You can easily turn your child's artwork into a pendant!  All it takes is a few art supplies! 

SUPPLIES NEEDED: 
  • Scanned or photographed artwork
  • Glass pebbles or stones from Dollar Tree or other floral supply/aquarium supply places
  • Printed artwork (see below)
  • Aleene's Clear Tacky craft glue
  • One glue-on bail per pendant (see instructions HERE)
  • Mod Podge
  • E6000 adhesive
  • Clear spray paint or clear nail polish.
First, you will need to scan or photograph your child's artwork and save the image to your computer.  You can also take it to Walmart and use their photo printing machines to make tiny photos.  If you download it to your computer, use either Microsoft Word or photo software such as Picasa (free) to resize and retouch the picture.  You will likely need to boost the saturation and contrast to make the colors more vivid. Use the setting that prints showing the entire photo. 

Print out photos in 1 x 1 inch or 1.5 x 1.5 inch squares.  Cut out each photo, and leave enough room so that a little paper is available to stick out on each side of the photo.
Coat the back of the glass marble with the clear tacky glue.  You can use Mod Podge, but it risks smearing the ink because Mod Podge takes longer to dry.  Press the glass to the photo firmly so that the entire photo is adhered to the back of the pebble and there are no bubbles.  


Allow to dry completely, at least a couple of hours.  Once dry, trim excess paper from around glass, and apply 2 thin coats of Mod Podge.  Thin coats are better than thick coats because they take longer to dry and can cause the colors to deteriorate if too much is applied.  
Allow to dry thoroughly between each coat of Mod Podge.  Once dry, secure glue-on bail to the back of the pendant, making sure that the stem and bail stick up at an appropriate point to make the pendant hang straight.  Again, allow to dry thoroughly.  
Once the glue-on bail has completely dried (I recommend 24 hours), coat the entire back of the pendant with either spray-on clear acrylic spray paint (I use Walmart's generic brand) or coat with clear nail polish.  Doing so will give a nearly waterproof seal, as Mod Podge is water soluble and can eventually come off if not sealed.  Allow to dry thoroughly.  

Once completely dry, flip over, and string your wonderful creation on ribbon, chain, a leather cord, or satin rat tail cord.  It will become a darling, personalized keepsake to show off your child's artwork!


Saturday, December 8, 2012

Homemade All Purpose Seasoning


Sometimes I start to cook, and I'm trying to figure out exactly what seasonings to put in a dish or to use for grilling, broiling or baking.  I finally discovered that I could make an all-purpose seasoning using the spices I like, make it in a batch, and have it at the ready. 

I found myself using the same basic ingredients, so I started with those four and then I created a second all-purpose seasoning that included additional spices we like.  You can make several different versions of this.  The basic all-purpose seasoning is great just as it is.  However, if you want something more in your spice mix, you can add Italian spices for a more Mediterranean flavor or add chili powder, red pepper flakes, cumin, and cilantro for a more Tex-Mex flavored seasoning. 

Basic All-Purpose Seasoning:
2 Tablespoons salt (may be cut significantly for a lower sodium version)
2 Tablespoons garlic powder
2 Tablespoons onion powder
2 Tablespoons ground black pepper

Mix and store in clean shaker container.  

For specialized all- purpose seasoning mix you will need:
1 batch of basic all-purpose seasoning mix (see above)
1 Tablespoon paprika
1 Tablespoon oregano
1 Tablespoon basil
1 Tablespoon Cilantro
1 Tablespoon Cumin

You may use thyme, rosemary, cinnamon, nutmeg, marjoram, red pepper, chili powder, or any other spice as a substitute for those listed in the specialized seasoning mix.  Adjust to your taste. 

Mix and store in clean container. 

I use these seasonings mostly for grilling or broiling, but I also use them in soups and sauces.  I use the dry specialized seasoning as a dry rub for grilling.  You can turn it into a marinade by mixing it with oil and vinegar.  

Both seasoning mixes are great sprinkled on pan-fried hamburger patties, in the batter for fried chicken, and added to soups to kick things up a notch.  I make homemade fried popcorn chicken, and I mix some of the specialized all-purpose seasoning in with my flour to make it extra spicy. 

By having your favorite spices premixed, you can have them at the ready and use them while cooking without having to decide which spices you'd like to try while in the middle of cooking.