Search

Powered by Blogger.

Networked Blogs

Showing posts with label handmade. Show all posts

Saturday, December 8, 2012

Homemade All Purpose Seasoning


Sometimes I start to cook, and I'm trying to figure out exactly what seasonings to put in a dish or to use for grilling, broiling or baking.  I finally discovered that I could make an all-purpose seasoning using the spices I like, make it in a batch, and have it at the ready. 

I found myself using the same basic ingredients, so I started with those four and then I created a second all-purpose seasoning that included additional spices we like.  You can make several different versions of this.  The basic all-purpose seasoning is great just as it is.  However, if you want something more in your spice mix, you can add Italian spices for a more Mediterranean flavor or add chili powder, red pepper flakes, cumin, and cilantro for a more Tex-Mex flavored seasoning. 

Basic All-Purpose Seasoning:
2 Tablespoons salt (may be cut significantly for a lower sodium version)
2 Tablespoons garlic powder
2 Tablespoons onion powder
2 Tablespoons ground black pepper

Mix and store in clean shaker container.  

For specialized all- purpose seasoning mix you will need:
1 batch of basic all-purpose seasoning mix (see above)
1 Tablespoon paprika
1 Tablespoon oregano
1 Tablespoon basil
1 Tablespoon Cilantro
1 Tablespoon Cumin

You may use thyme, rosemary, cinnamon, nutmeg, marjoram, red pepper, chili powder, or any other spice as a substitute for those listed in the specialized seasoning mix.  Adjust to your taste. 

Mix and store in clean container. 

I use these seasonings mostly for grilling or broiling, but I also use them in soups and sauces.  I use the dry specialized seasoning as a dry rub for grilling.  You can turn it into a marinade by mixing it with oil and vinegar.  

Both seasoning mixes are great sprinkled on pan-fried hamburger patties, in the batter for fried chicken, and added to soups to kick things up a notch.  I make homemade fried popcorn chicken, and I mix some of the specialized all-purpose seasoning in with my flour to make it extra spicy. 

By having your favorite spices premixed, you can have them at the ready and use them while cooking without having to decide which spices you'd like to try while in the middle of cooking. 


Monday, November 12, 2012

Wire Wrapped Glass Pebble Pendant - Easy Christmas Gift


Wire wrapped glass pendants are a fun and easy gift you can make with relatively inexpensive items.  The sloppier the design, the prettier it is, and despite how complicated they look, they're really easy to make.  They make beautiful gifts, and you can whip them out in just a few minutes once you get the hang of this.  

I'll give a list of items below, and then try to show step-by-step how it's done.  The only part I do not have pictures of is the actual placement of the wires simply because I needed two hands to hold everything in place and couldn't really take photos.  So here we go! 


Materials Needed 
**or **
  • Needle-nose pliers (may need to wrap the tips with tape if using on jewelry wire so the wire doesn't get scarred)
  • Wire Snips 
  • Tweezers 
  • Necklace chain, silk cord, leather cord, or ribbon, about 24 inches in length.
INSTRUCTIONS (Click on Photos for Larger views):
Cut two lengths of wire approximately 1 foot long.
Begin bending them in a loopy zigzag pattern, leaving tails on either end.  


(Photos show loopy wire and sizes of glass pebbles. )


Lay wires in a cross pattern, and center one pebble in the middle. 

This is the trickiest part of this whole thing, but it will be fine. The glass can be slippery!  

Begin folding the wires up and over the pebble, overlapping the wires, bending and smooshing them together.  The wires need to be enmeshed.  Form a cage around the stone.  Grab the pliers or tweezers and bend the wires around each other.  For example, bring a loop up through another and then bend it back over.  Leave two wires long at the top for use to make the bail later on.  If needed, use the loose ends for the bottom and side pieces to loop back through or snip off and use elsewhere.  Curl the ends of any loose wires, and tuck them in against the glass.  

Cut short lengths of wire from the spool and use to bridge a gap between two loops of wire if there is a space where the glass could "escape."  Again, curl the ends under, then twist the wire and tuck it snug against the glass (see photo below).  The piece is sticking out so that you could see how I passed the short wire piece between the two.  I curled it further and tucked in the pieces.

Once the wire is shaped around the glass the way that you like, it's time to make the bail at the top of the pendant.  

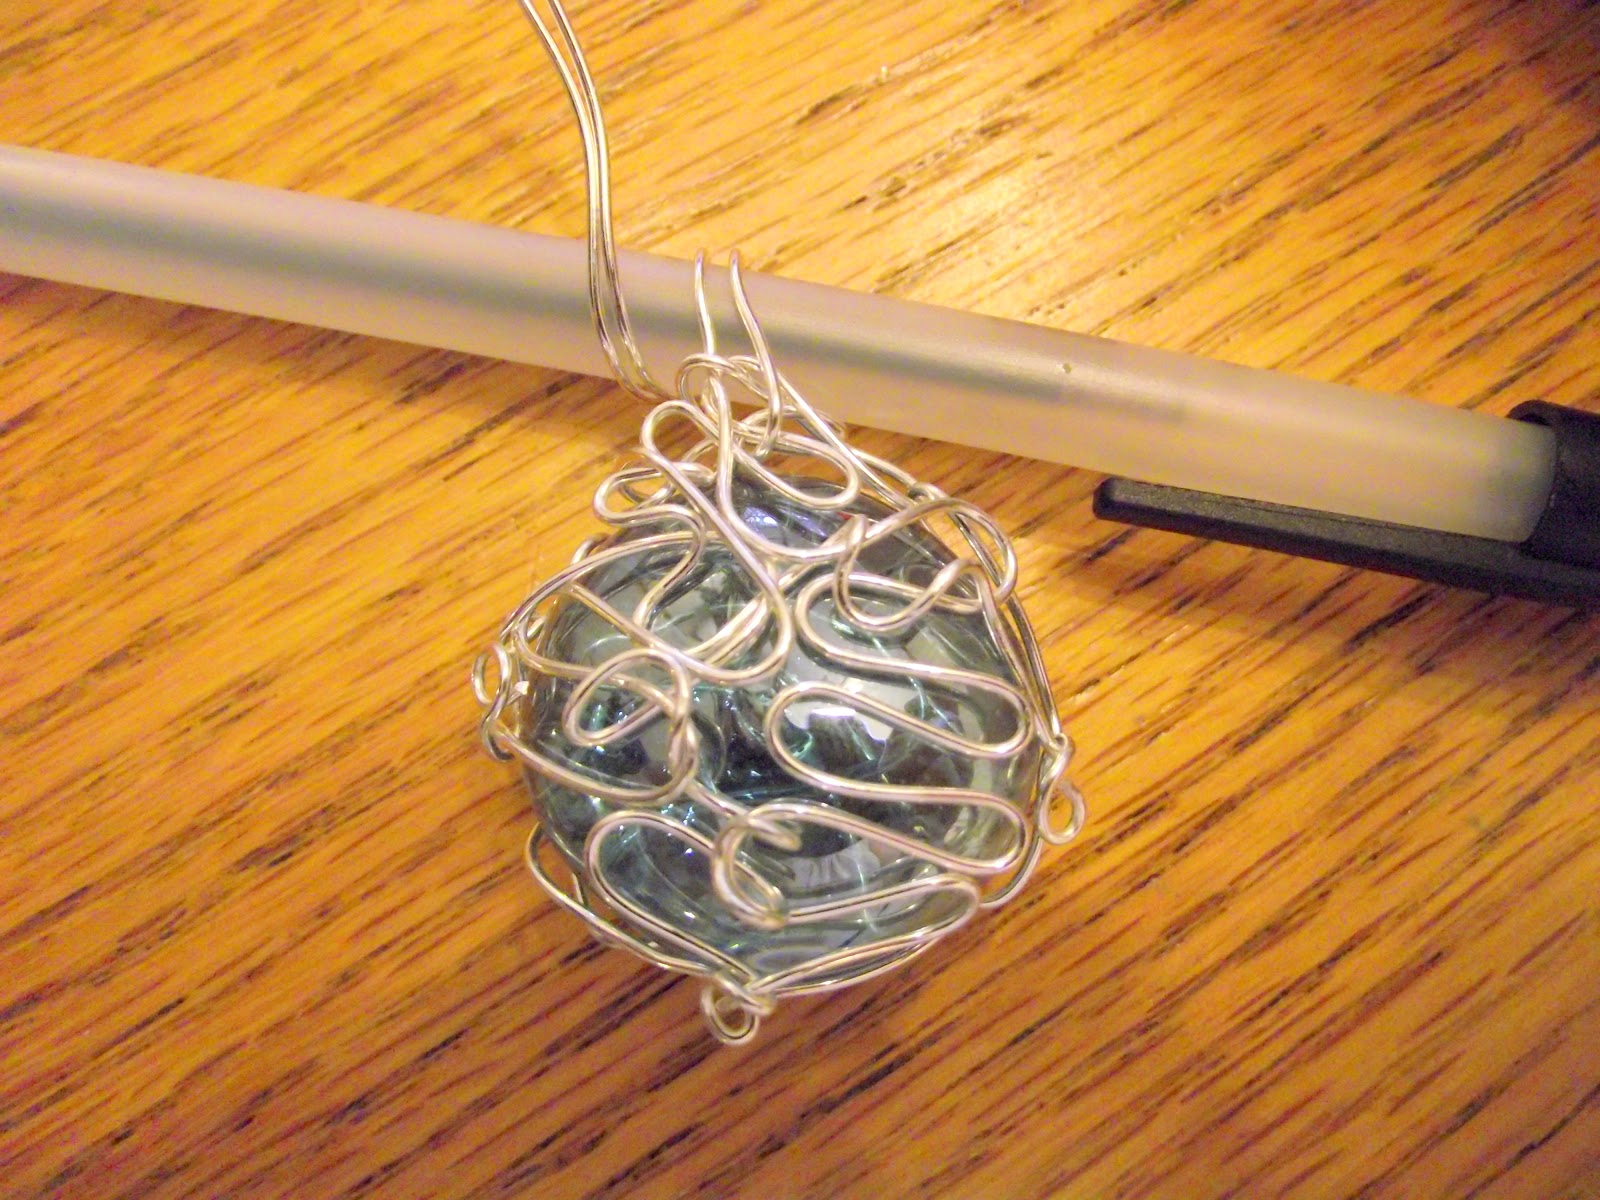
I used a ball-point pen and wrapped the two wires around it one full wrap.  I have exaggerated how the wires come off this so that you can see how they come back around.  You'll want the wire to be as close to the base as possible.  


With the pen still inside the wire loop, begin wrapping the two wires around the base in a concentric spiral fashion until all of the remaining wire has been used.  Curl ends of wire and tuck under the bottom of the bail.  Straighten and center bail as necessary. 

This doesn't have to be neat, just so long as it is held securely. 

If you feel this needs a little more security for the glass, use tiny dabs of E6000 glue on a toothpick.  Place it between the wire and the glass. A little E6000 goes a very long way.  Allow to dry/cure for approximately 24 hours before wearing.  

Another way to "tighten" wires is to put the pliers (or tweezers) in the middle of a piece of wire and twist slightly to form a crook.  See before and after photos below.  This takes up any excess slack in the wire and lends an artistic appearance. 

Suspend this from a chain, ribbon, silk cord, or strip of leather tied off.  These are very pretty, unique, and no two are alike.  

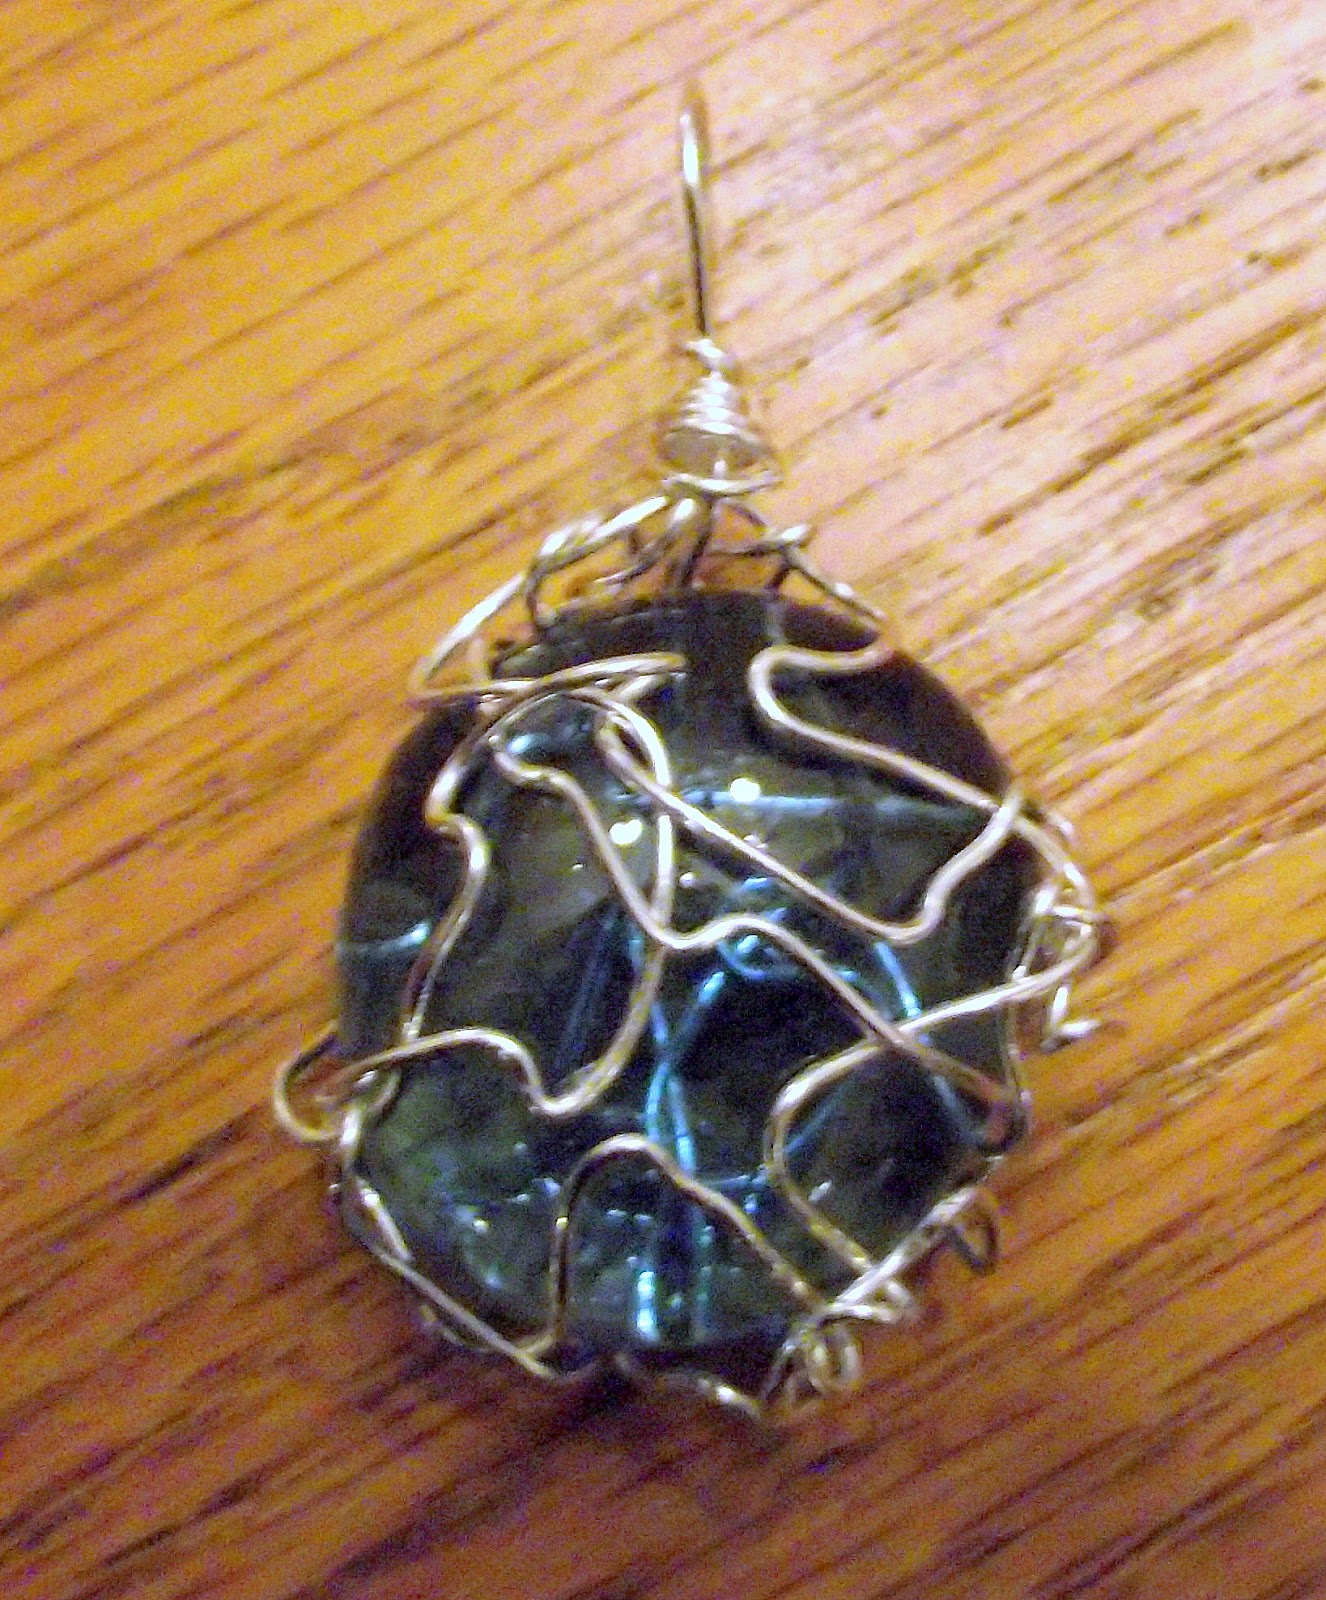
Here is another pendant that I made using one strip of wire in the zigzag pattern, then wrapped around the glass pebble.   It has a single-loop bail.  I made it, thought that it needed a little bit more umph, and put some artistic crooks in the wire with the tightening technique I talked about above.

ONE FINAL NOTE:   You will always be your own worst critic, so do not be overly critical of your design.  If you feel like it doesn't look good, put it away for a day or so, and then look at it again or show someone else to gauge their opinion.  You can always add more wire or bend the wires in a different way that is more pleasing.  Remember, have fun, and don't be afraid to ad lib!

That's it!!