Search

Powered by Blogger.

Networked Blogs

Showing posts with label milk. Show all posts

Sunday, February 3, 2013

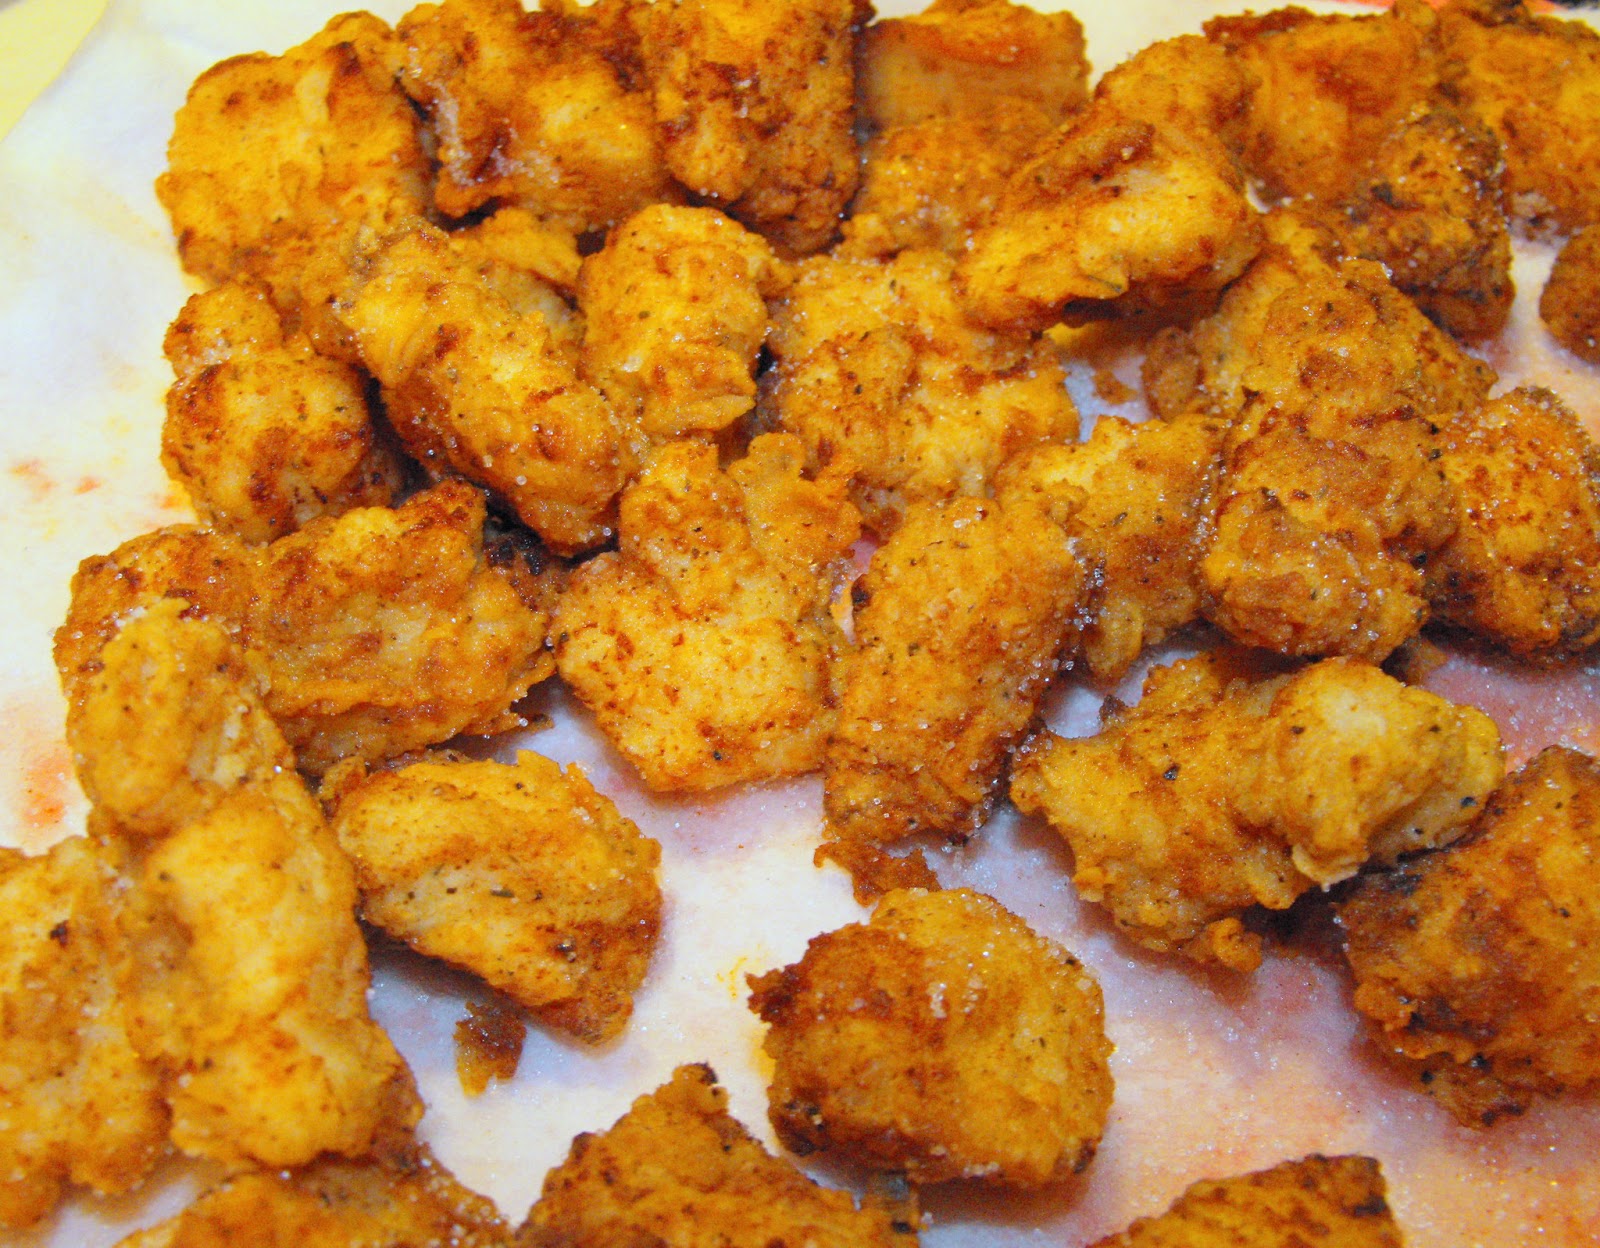
Homemade Popcorn Chicken/Chicken Nuggets

Popcorn chicken is something that my family can always agree to eat.  Even my son, who is a very picky eater, loves it.  You can make a batch of this, and it is excellent so serve for a meal, as a snack, or serve alongside other goodies for a potluck type dinner.  We have a local chicken place that makes chicken chunks/nuggets, but they are just a little too big.  These are a perfect size to pop in your mouth, especially after dunking them in your favorite sauce.  As my son says, "Mom, these are the BOMB!" 

This is my own recipe that I developed over time.  I know most chefs would say that there is something special about the ingredients, but truthfully I just based them on trial, error, and what tastes good.  We like these served with ketchup or honey mustard dipping sauce, but they're also great smothered with gravy alongside mashed potatoes.  

Homemade Popcorn Chicken 
3-4 pounds of boneless skinless chicken breasts cut into 1 to 1.5 inch cubes 
1-2 cups milk 
2 cups of flour (eyeball it)
2 Tablespoons of my all-purpose seasoning or seasoning of your choice
1-2 teaspoons ground black pepper 
1 to 1.5 inches of oil in frying pan (or use a deep fryer) 

Instructions and are photos below.   
Cut chicken into 1 to 1.5 inch pieces (no bigger).  Place them in a large flat container. 
Pour in approximately 1-2 cups of milk.  Eyeball it, as the chicken just needs to be covered so that it can soak for a bit in a milk bath.  (Discard milk after all chicken has been removed from it.  Do NOT reuse this milk!)
While chicken is soaking, add oil to skillet (or turn on deep fryer) and allow oil to heat until a droplet of water flicked into the oil sizzles and turns to steam.    In another flat pan place flour, all-purpose seasoning, and black pepper.  Blend.  
When oil is heated, take pieces of chicken from the milk, place them in the flour mixture, and coat well.  Then fry batches of chicken in oil. Allow to cook 2-3 minutes, and then flip chicken pieces over so that both sides cook well.  Remove when chicken is a light golden brown.  Place on paper towels to drain and soak up any excess oil.  The color will deepen to a darker brown when removed from oil and allowed to cool. 
And there you have them.  Tender, golden, bite-sized chunks of yumminess just waiting to be popped into your mouth and enjoyed. 
Tuesday, January 22, 2013

Easy Broccoli Cheese Soup

I love broccoli cheese soup.  It's warm, it's comforting, it's tasty, and it makes a great lunch.  I have seen so many recipes that call for an elaborate cooking process for making this yummy soup.  Upon examining the ingredients, I discovered that it was a cream soup base with broccoli, cheese, and other spices added in.  It didn't take me long to figure out there was an easier way!  So here it is.  My "recipe" for easy broccoli cheese soup. 

And it has only two pre-packaged ingredients! Actually three if you include the milk. 

Here's how it you make it. You use the two items shown above. Yes, that's really it!  It's so easy, and it tastes wonderful. 

EASY BROCCOLI CHEESE SOUP
1 box frozen broccoli and cheese sauce (10 oz.)
1 can cream of chicken soup (10 oz.) 
1 can milk 
Milk to thin to desired consistency 

Microwave broccoli and cheese sauce as directed on package.  While that is cooking, in a medium saucepan over low heat, begin preparing cream of chicken soup.  I recommend using milk because water will make the cheese and cream separate.  Whisk soup in sauce pan until thoroughly mixed.  Once broccoli and cheese are finished cooking, open the plastic package and add broccoli and cheese sauce to soup.  Stir thoroughly to combine.  Thin with more milk to desired consistency.  Serve with bacon bits, fresh ground pepper, salt, and crusty bread. 

If you would like to make this a little more homemade tasting, prior to making soup, you can sautee about 1 tablespoon minced onion in butter.  Then add soup and prepare as usual. 

That is it.  The easiest broccoli-cheese soup you will ever make!


Thursday, January 3, 2013

Creamy Potato Soup - Broke Food

I love a hot bowl of potato soup, especially considering how cold it's been lately.  Also, for me, this is comfort food.  When I was a kid and didn't feel well, my mom would make me a bowl of "tater soup."  It was a very soothing soup, especially if you have a stuffy nose or have the flu, and it's extremely easy to make in under an hour. 

As my recipes are prone to be, this is a simple one that can be gussied up or left plain in order to suit your taste, budget, and what you have in your pantry.  Also, as I'm prone to do, I don't follow any "rules" with regard to what is or isn't the right kind of potato to use.  I use what I have and make it work for what I need.  The soup pictured reflects that.  I used Yukon Gold for the soup photographed above.  Some might recommend a red potato or say not to use a white potato.  I believe in your food working for you, not having to go out and buy a bunch of fancy stuff in order to make a meal.  If the type of potato is a hard or very firm potato, slice it thinner and then cook longer, checking consistency of the potatoes while boiling until they're the right consistency.  After all, we're broke!  That's why we're making this soup!

The basic ingredients needed are potatoes, onions in some form (fresh or dried both work), some form of milk product, water, and salt and pepper.  The rest can be added to your taste, based on what you have.  I'm going to list the basic recipe, and then below I will list variations/additions that you may want to try.   The variation shown in the photo above includes:  Potatoes, onions, celery, chopped ham, evaporated milk, and butter. 

Creamy Potato Soup Basic Recipe
3-4 medium to large potatoes peeled and cut into small chunks (or one potato per person)
1 medium onion, minced (or equivalent dried minced onion)
Water to cover
2/3 to 3/4 cup milk, cream, half-and-half, canned evaporated milk, or powdered milk
Salt and Pepper to taste 
3-4 tablespoons butter or Margarine

In a large saucepan, place potatoes and onions.  Add just enough water to cover.  Place lid on sauce pan and bring to a rolling boil.  Reduce heat and simmer until potatoes are soft. Scoop out about 1/2 cup of cooked, drained potatoes.  Mash these thoroughly, then return to the pot and stir in order to thicken the soup.  Turn fire back on under mixture and add milk and butter or margarine.  Heat until steaming, then add salt and pepper to taste. 

Note, if you use powdered milk you may want to only reconstitute it with half the water necessary in order to help the soup's consistency not be too thin. 

Variations/Additions
Meat:  Add any cooked meat that you may have such as leftover ham, cooked and crumbled bacon, grilled chicken, chopped turkey, cooked Spam, cooked hamburger meat, kielbasa, and even finely chopped leftover deli meat. 
Vegetables:  Celery, green onions, carrots, corn, chopped sauteed bell peppers, broccoli, cauliflower, or whatever is left in the fridge from prior meals. 
Broth:  If available, you may substitute chicken or vegetable broth for some of the water in this recipe.  
Cheese/Sour Cream:   If desired and available, you can either top the soup with cheese or stir in up to 1/2 cup finely shredded cheese of any type (stir well and do not boil if this is added) or sour cream to add richness and protein to the soup.  
Spices:  You may also add garlic, a small bit of red pepper flakes, rosemary, basil, marjoram, tarragon, or other spices (not all at once; choose wisely).

This is a taste-as-you-go recipe.  Start with the basic recipe, then add ingredients to your liking.  If you have doubts about how an ingredient will taste in the soup, remove a small amount of soup to a cup or bowl, add the ingredient, taste, and see how things are shaping up.  Once you get the recipe to your liking, write down your additions for use the next time.  

Serve with crusty bread, a salad, crackers, or Fry Bread.  This makes a very filling meal.  It keeps well and reheats well, so it's great to take in a lunch the next day or warm up for a quick meal. 


Friday, December 14, 2012

Cinnamon Pecan Biscotti

My morning cup of coffee is one of my simple pleasures in life.  I'm not a big breakfast eater, so I tend to like something on the lighter side.  Biscotti (also known as Prato bread or twice-baked biscuits) is made to be dunked in coffee or tea, and is a delicious side to my morning cuppa joe.  

Biscotti is a bit labor intensive, but the rewards are worth it, and it makes a great gift if you're inclined to share it.  The entire process takes about 1-1/2 to 2 hours from start to finish, but the prepared biscotti will store in an air-tight container for at least a month (if it lasts that long!).  

I've been making this specific recipe for years.  It is a delicious combination of pecans, cinnamon, and other spices.  We have an abundance of pecan trees, so there are always plenty of pecans for me to make this.  If you do not have enough pecans for this recipe, it is fine to just use what you have or omit them entirely; however, you may need to add more flour to make up for the loss of volume if you choose to not add nuts. 

We like it as it is, but you can also jazz it up by dipping half of the prepared biscotti into melted white or dark chocolate, and then allowing it to cool.  My family is not fond of this method, but it makes for a beautiful and delicious treat if you choose to try it! 

Cinnamon Pecan Biscotti 
1/2 cup (one stick) butter, room temperature 
1 cup sugar
2 eggs, beaten
1-1/2 teaspoons vanilla OR 3/4 teaspoon vanilla along with 3/4 teaspoon anise extract (traditional)
2 cups flour
1/2 teaspoon baking powder
1/2 teaspoon baking soda 
1 tablespoon ground cinnamon
1-1/2 cups chopped nuts (pecans, walnuts, almonds, pistachios or whatever you have) 

Cook at 375 for 25-30 minutes.

Cream together the butter, sugar, and eggs.  Add vanilla to mixture and blend.  In a separate bowl mix dry ingredients well.  Add to the butter/eggs/sugar mixture a little at a time, stopping periodically to stir dough away from sides and detach it from the mixing blade.  Once finished, the dough should resemble a heavy, sticky cookie dough.  
Cover the dough and allow to rest while gathering supplies for the rest of the recipe and allowing the stove to preheat.  Or, if you wish to finish this recipe later in the day or the next day, stop at this point and refrigerate the dough.  Once you begin cooking, you're in it until the end!

When ready, divide the dough in half.  Turn it out onto a floured surface and roll it into a log, like you were rolling snakes from Play-Doh in school.  

When the logs are ready, place them on a cookie sheet several inches apart and flatten slightly.  

(Don't worry you  OCD folks, I did fix that thumbprint in the log above.)  :-)

Bake at 375 degrees for about 25-30 minutes.  Begin checking the logs at the 15 minute mark, as temperatures can vary for ovens, and your oven may cook faster than my oven.  Loaves are done when the middles are touched lightly and spring back. Do not allow to burn on the bottom.  Remove from the oven and allow to cool for approximately 5 minutes. Do not cool any longer, as once these cool significantly they will not be able to be sliced without breaking apart.

Slice into 1-2 inch slices on the diagonal.  I have found it is easiest to use a long, serrated bread knife and to use a pressing and rocking motion rather than a slicing/sliding motion.  This keeps the sides of the loaves from tearing loose.  Place slices on their sides on the cookie sheet.

Place back in the oven and set oven temperature to 200 degrees.  Allow to dry for 10 minutes.  Remove the slices from the oven, flip all of them over to the opposite side, place back in the oven, and allow them to dry for another 10 minutes.  Remember:  The point of placing them back in the oven is to speed the drying process, not to toast them, thus the low oven temperature.  

Remove biscotti from the oven and allow to cool and dry completely.  Store in tins or covered containers and enjoy dunked in your favorite coffee, tea, or hot chocolate... and it's not bad dunked in milk, either!

This is like cookies and milk for grownups!


Friday, October 19, 2012

Broke Food - German Pancake


German pancake, Big Egg, Missionary Pancake, Dutch baby... these are all names for this simple, scrumptious, and filling recipe. It seems that every ethnicity has a version of this recipe, and they all contain the same basic 4 ingredients.  This is very is easy to whip together, and makes a yummy breakfast or even dessert.  

When baking, this resembles a cross between a pancake and souffle.  It puffs up and rises during baking, but then when removed from the oven flattens into a shape that can be cut.  

This can be eaten sliced like a pizza and sprinkled with powdered sugar or served with fresh fruit.  Our favorite way to eat it is with syrup, as it is not a sweet bread and has a very light texture when eaten with syrup or honey.  

Here's the recipe I use.  


German Pancake

2 Tbsp. butter or margarine (prefer butter but margarine is OK)
3 eggs whipped until frothy*
1/2 cup flour
1/2 cup milk 

Place butter in a 8 or 9 inch pie pan and place into a cold oven.  Turn oven to 400 degrees.  This allows the butter to melt in the pan and for the pan to heat up, as well.  

Whip eggs until frothy (see note below).  Add in milk and flour, and mix until smooth.  Remove pan from oven and pour batter into hot buttered pan.  Place back in the oven and cook at 400 degrees for 25-30 minutes.  

Remove and slice into sections.  Serve with syrup, honey, powdered sugar, or fresh fruit in syrup.  

*NOTE:  An easy way to do this is to just place all the ingredients into either a blender or food processor and process for about 30 seconds.  You want a frothy, bubbly consistency to the batter.  Then pour into the hot buttered pan and cook as above. 

Saturday, October 6, 2012

Nutella Hot Chocolate

This was perfect for today because it is cold, rainy, and blustery.  Hot chocolate sounded so good.

I stumbled on this recipe and couldn't believe it.  Nutella hot chocolate?  Seriously?  I could eat Nutella straight from the jar, but making hot chocolate with it?  Swoon!! And, it is a 2-ingredient recipe.  I had to try it! 

I found this recipe here at The Heavenly Hearth.

Nutella Hot Chocolate:
1 cup hot milk
2 tablespoons Nutella*

I warmed the milk in the microwave for about 1-1/2 minutes (you want to make sure it doesn't boil), then stirred in the Nutella a tablespoon at a time.  I tasted it to see if it needed any sugar, and it was just right.  No additional sugar was needed. 

This definitely rates high on the wow factor!

*I've heard you can substitute the Jif Chocolate PB, but I have not tried it.