Search

Powered by Blogger.

Networked Blogs

Showing posts with label christmas. Show all posts

Friday, December 14, 2012

Cinnamon Pecan Biscotti

My morning cup of coffee is one of my simple pleasures in life.  I'm not a big breakfast eater, so I tend to like something on the lighter side.  Biscotti (also known as Prato bread or twice-baked biscuits) is made to be dunked in coffee or tea, and is a delicious side to my morning cuppa joe.  

Biscotti is a bit labor intensive, but the rewards are worth it, and it makes a great gift if you're inclined to share it.  The entire process takes about 1-1/2 to 2 hours from start to finish, but the prepared biscotti will store in an air-tight container for at least a month (if it lasts that long!).  

I've been making this specific recipe for years.  It is a delicious combination of pecans, cinnamon, and other spices.  We have an abundance of pecan trees, so there are always plenty of pecans for me to make this.  If you do not have enough pecans for this recipe, it is fine to just use what you have or omit them entirely; however, you may need to add more flour to make up for the loss of volume if you choose to not add nuts. 

We like it as it is, but you can also jazz it up by dipping half of the prepared biscotti into melted white or dark chocolate, and then allowing it to cool.  My family is not fond of this method, but it makes for a beautiful and delicious treat if you choose to try it! 

Cinnamon Pecan Biscotti 
1/2 cup (one stick) butter, room temperature 
1 cup sugar
2 eggs, beaten
1-1/2 teaspoons vanilla OR 3/4 teaspoon vanilla along with 3/4 teaspoon anise extract (traditional)
2 cups flour
1/2 teaspoon baking powder
1/2 teaspoon baking soda 
1 tablespoon ground cinnamon
1-1/2 cups chopped nuts (pecans, walnuts, almonds, pistachios or whatever you have) 

Cook at 375 for 25-30 minutes.

Cream together the butter, sugar, and eggs.  Add vanilla to mixture and blend.  In a separate bowl mix dry ingredients well.  Add to the butter/eggs/sugar mixture a little at a time, stopping periodically to stir dough away from sides and detach it from the mixing blade.  Once finished, the dough should resemble a heavy, sticky cookie dough.  
Cover the dough and allow to rest while gathering supplies for the rest of the recipe and allowing the stove to preheat.  Or, if you wish to finish this recipe later in the day or the next day, stop at this point and refrigerate the dough.  Once you begin cooking, you're in it until the end!

When ready, divide the dough in half.  Turn it out onto a floured surface and roll it into a log, like you were rolling snakes from Play-Doh in school.  

When the logs are ready, place them on a cookie sheet several inches apart and flatten slightly.  

(Don't worry you  OCD folks, I did fix that thumbprint in the log above.)  :-)

Bake at 375 degrees for about 25-30 minutes.  Begin checking the logs at the 15 minute mark, as temperatures can vary for ovens, and your oven may cook faster than my oven.  Loaves are done when the middles are touched lightly and spring back. Do not allow to burn on the bottom.  Remove from the oven and allow to cool for approximately 5 minutes. Do not cool any longer, as once these cool significantly they will not be able to be sliced without breaking apart.

Slice into 1-2 inch slices on the diagonal.  I have found it is easiest to use a long, serrated bread knife and to use a pressing and rocking motion rather than a slicing/sliding motion.  This keeps the sides of the loaves from tearing loose.  Place slices on their sides on the cookie sheet.

Place back in the oven and set oven temperature to 200 degrees.  Allow to dry for 10 minutes.  Remove the slices from the oven, flip all of them over to the opposite side, place back in the oven, and allow them to dry for another 10 minutes.  Remember:  The point of placing them back in the oven is to speed the drying process, not to toast them, thus the low oven temperature.  

Remove biscotti from the oven and allow to cool and dry completely.  Store in tins or covered containers and enjoy dunked in your favorite coffee, tea, or hot chocolate... and it's not bad dunked in milk, either!

This is like cookies and milk for grownups!


Monday, November 12, 2012

Wire Wrapped Glass Pebble Pendant - Easy Christmas Gift


Wire wrapped glass pendants are a fun and easy gift you can make with relatively inexpensive items.  The sloppier the design, the prettier it is, and despite how complicated they look, they're really easy to make.  They make beautiful gifts, and you can whip them out in just a few minutes once you get the hang of this.  

I'll give a list of items below, and then try to show step-by-step how it's done.  The only part I do not have pictures of is the actual placement of the wires simply because I needed two hands to hold everything in place and couldn't really take photos.  So here we go! 


Materials Needed 
**or **
  • Needle-nose pliers (may need to wrap the tips with tape if using on jewelry wire so the wire doesn't get scarred)
  • Wire Snips 
  • Tweezers 
  • Necklace chain, silk cord, leather cord, or ribbon, about 24 inches in length.
INSTRUCTIONS (Click on Photos for Larger views):
Cut two lengths of wire approximately 1 foot long.
Begin bending them in a loopy zigzag pattern, leaving tails on either end.  


(Photos show loopy wire and sizes of glass pebbles. )


Lay wires in a cross pattern, and center one pebble in the middle. 

This is the trickiest part of this whole thing, but it will be fine. The glass can be slippery!  

Begin folding the wires up and over the pebble, overlapping the wires, bending and smooshing them together.  The wires need to be enmeshed.  Form a cage around the stone.  Grab the pliers or tweezers and bend the wires around each other.  For example, bring a loop up through another and then bend it back over.  Leave two wires long at the top for use to make the bail later on.  If needed, use the loose ends for the bottom and side pieces to loop back through or snip off and use elsewhere.  Curl the ends of any loose wires, and tuck them in against the glass.  

Cut short lengths of wire from the spool and use to bridge a gap between two loops of wire if there is a space where the glass could "escape."  Again, curl the ends under, then twist the wire and tuck it snug against the glass (see photo below).  The piece is sticking out so that you could see how I passed the short wire piece between the two.  I curled it further and tucked in the pieces.

Once the wire is shaped around the glass the way that you like, it's time to make the bail at the top of the pendant.  

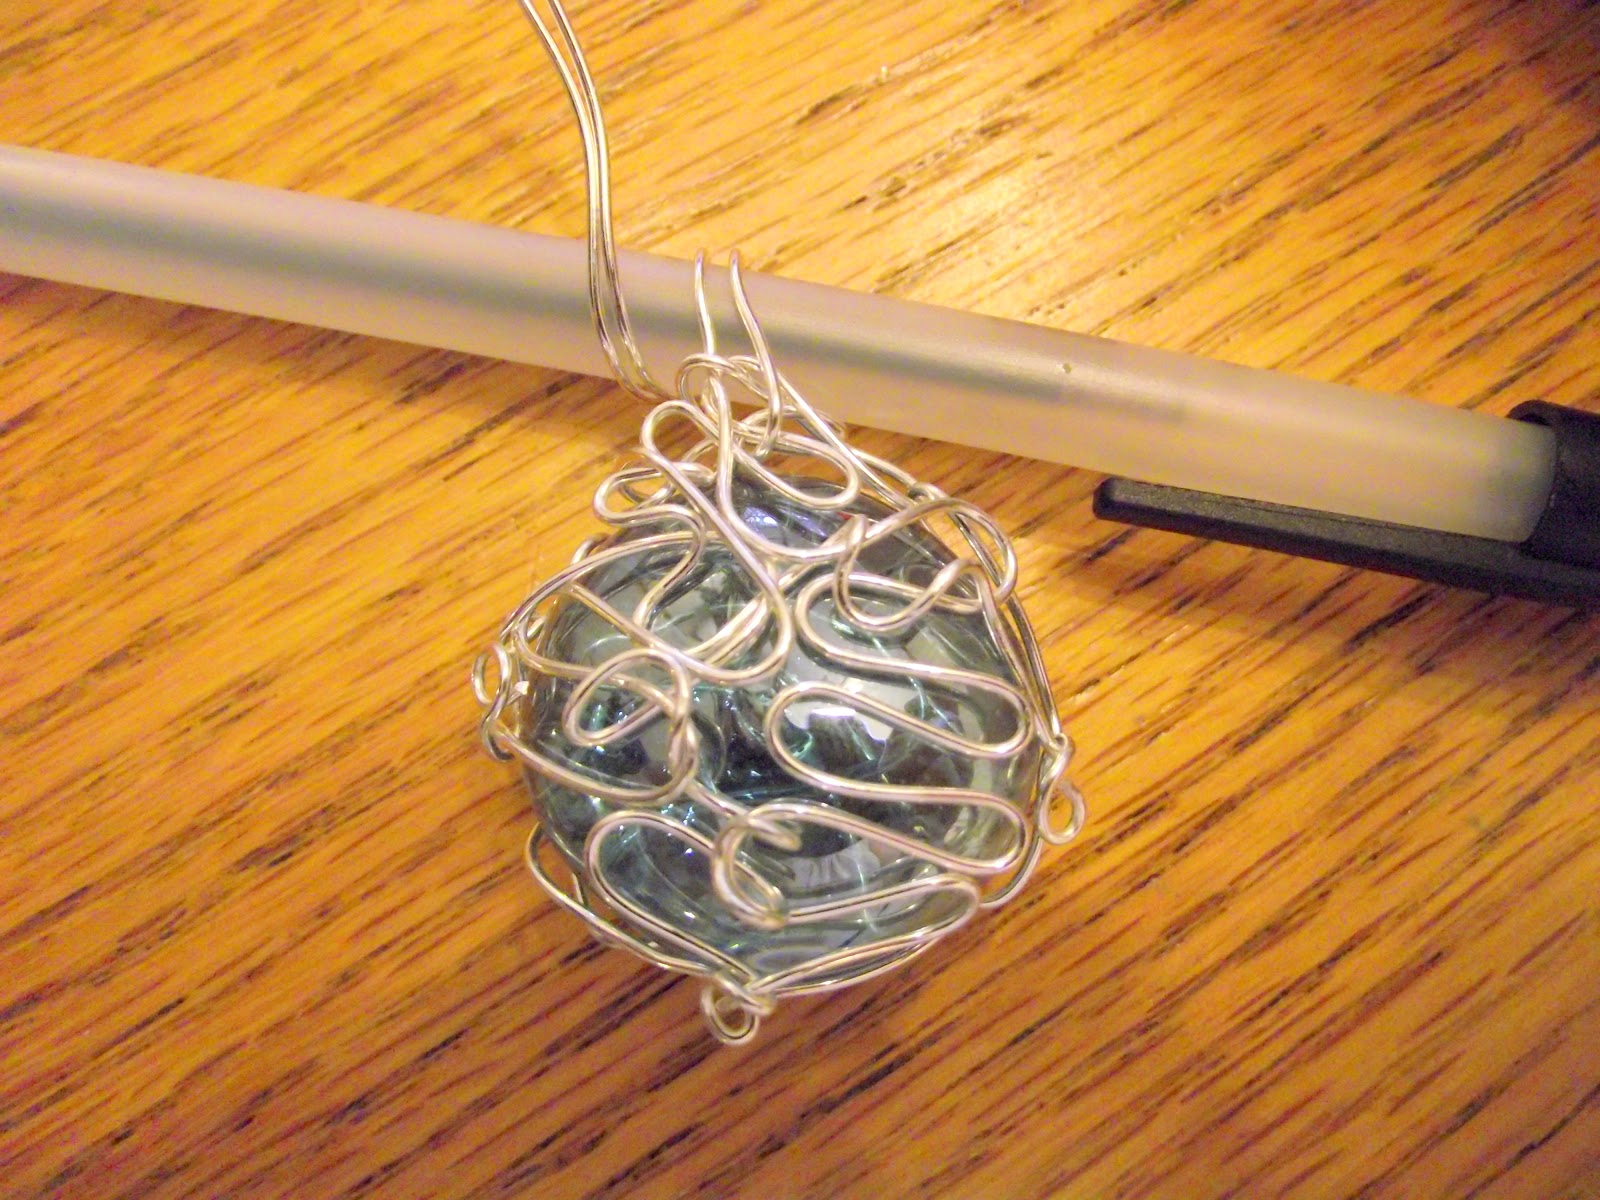
I used a ball-point pen and wrapped the two wires around it one full wrap.  I have exaggerated how the wires come off this so that you can see how they come back around.  You'll want the wire to be as close to the base as possible.  


With the pen still inside the wire loop, begin wrapping the two wires around the base in a concentric spiral fashion until all of the remaining wire has been used.  Curl ends of wire and tuck under the bottom of the bail.  Straighten and center bail as necessary. 

This doesn't have to be neat, just so long as it is held securely. 

If you feel this needs a little more security for the glass, use tiny dabs of E6000 glue on a toothpick.  Place it between the wire and the glass. A little E6000 goes a very long way.  Allow to dry/cure for approximately 24 hours before wearing.  

Another way to "tighten" wires is to put the pliers (or tweezers) in the middle of a piece of wire and twist slightly to form a crook.  See before and after photos below.  This takes up any excess slack in the wire and lends an artistic appearance. 

Suspend this from a chain, ribbon, silk cord, or strip of leather tied off.  These are very pretty, unique, and no two are alike.  

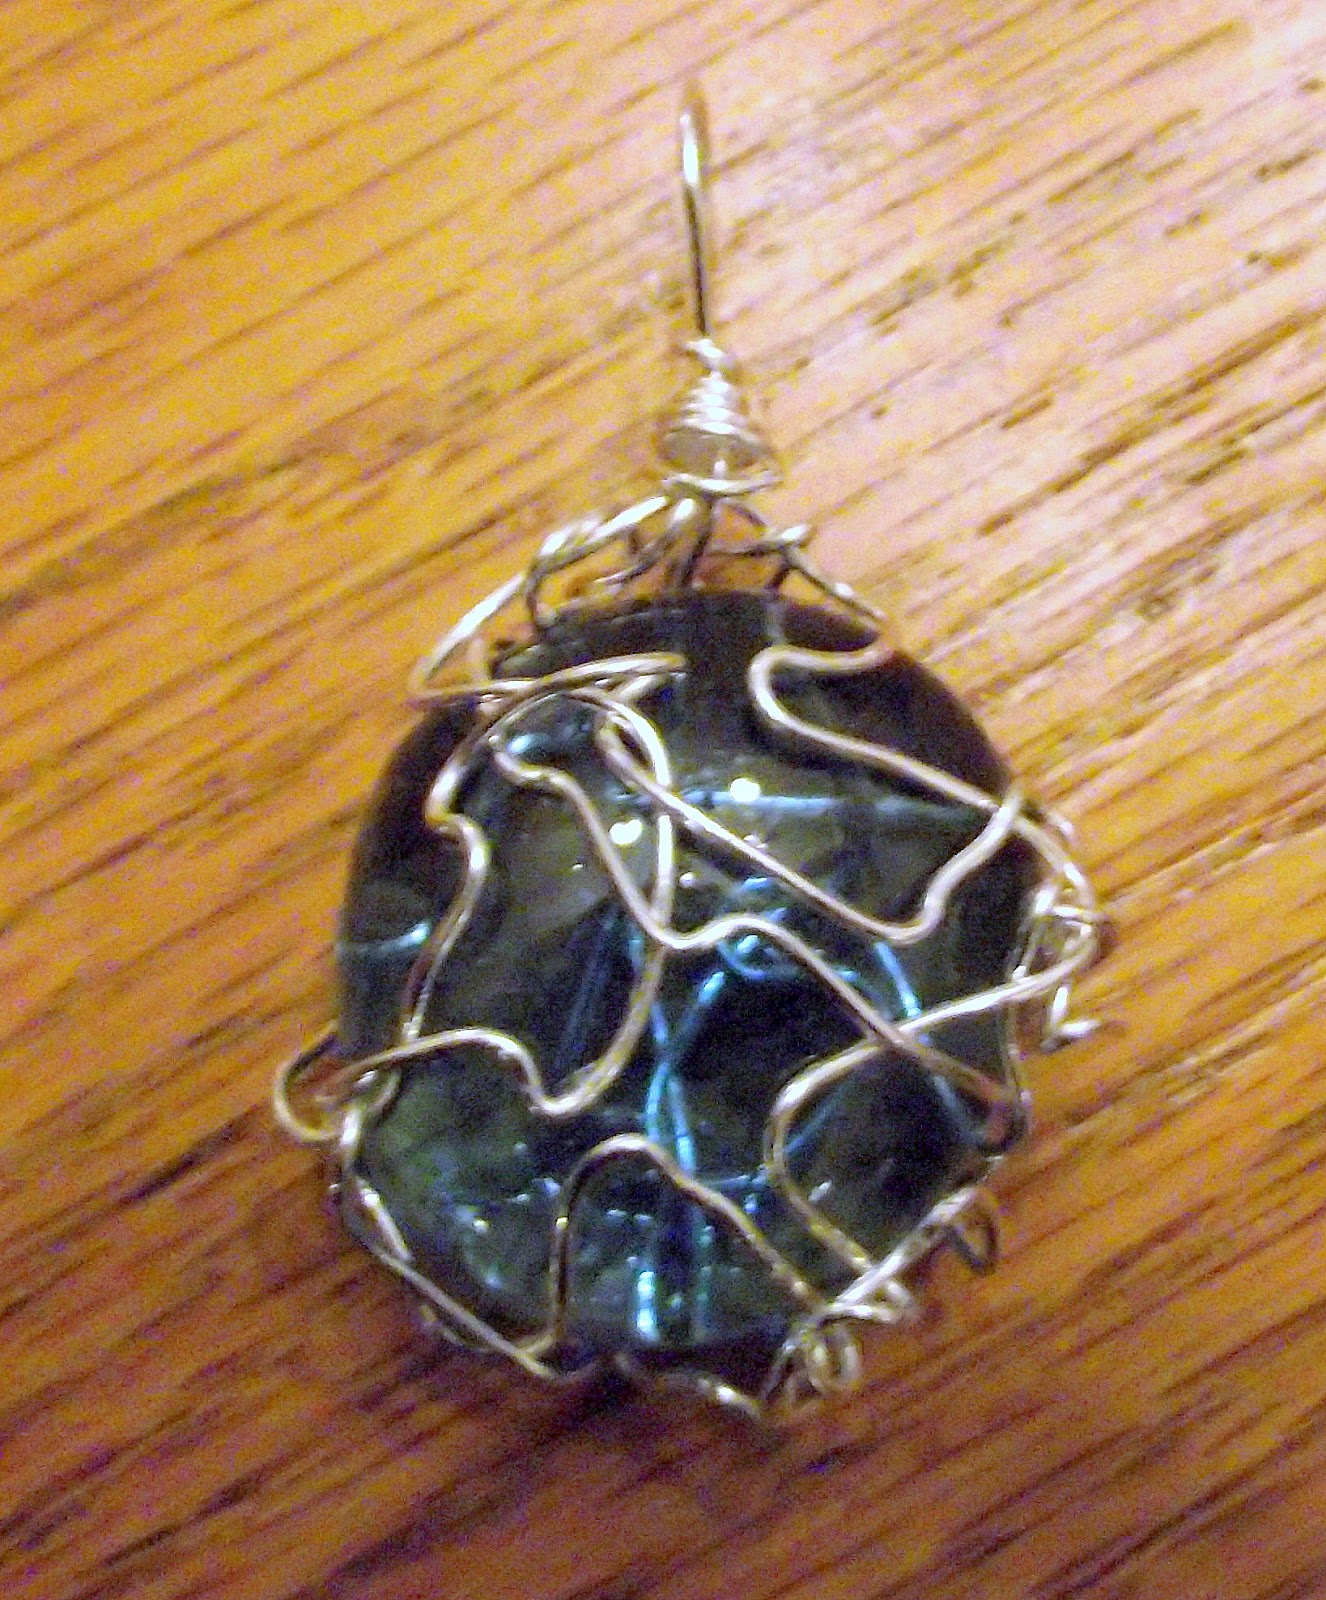
Here is another pendant that I made using one strip of wire in the zigzag pattern, then wrapped around the glass pebble.   It has a single-loop bail.  I made it, thought that it needed a little bit more umph, and put some artistic crooks in the wire with the tightening technique I talked about above.

ONE FINAL NOTE:   You will always be your own worst critic, so do not be overly critical of your design.  If you feel like it doesn't look good, put it away for a day or so, and then look at it again or show someone else to gauge their opinion.  You can always add more wire or bend the wires in a different way that is more pleasing.  Remember, have fun, and don't be afraid to ad lib!

That's it!! 


Monday, November 5, 2012

Beautiful Vases and Candle Holders from Dollar Store Glass


I love beautiful, sparkling glass vases during the holidays.  However, the price in some of the fancy stores can be astronomical.  You can achieve the same effect with dollar store glassware!

My favorite place to find glassware is Dollar Tree.  The components of these homemade vases and candle holders are usually in different parts of the store.  Some may be in floral and crafts.  Some may be with the candles, and still more may be in the cooking/drinking glass section. 

You will need something like candleholders for the bases and fluted or flared vases or glasses for the tops.  You will also need a strong glue like E6000 or Gorilla Glue.  I prefer E6000 for glassware, but Gorilla Glue will work, too. Do not use Super Glue, as it tends to not bond well with the glass and can be sensitive to heat/cold temperature changes.

Candleholders can be glued end to end to provide height.  Keep in mind, when you are designing your glassware, that the taller the item, the wider the base will need to be for balance and support. 

Make sure your glass is clean and free of any stickers or adhesives before starting.  I place the larger piece top down onto my work surface.  Find the center of the largest piece of glass as a visual marker.  You can use a tiny dot from a Sharpie to mark the center.  Then place glue along the edge of the smaller piece you're going to glue to the larger piece.  Place it on the piece, center it (I just eyeball it), and then allow the glue to harden.  For me, it's easier to have the pieces on a bit of a low workbench so that I can look straight down at the item.  

E6000 is supposed to be dry in around 4 hours.  I always like to let my items cure for around 24 hours before using them just to be sure, since we're in a humid climate.  

That's it!  Turn your pieces upright and use as a decoration!  For the glassware shown in the photos, I used two fluted edge tumblers, one nut dish, and 4 candle holders.  For the tallest piece, I glued two candle holders end-to-end, with the smallest ends matching, then glued it to the tumbler.  For the remaining two pieces, I just used one candle holder to glue to the glass.  The snowy looking stuff in the picture with the candle is epsom salts!  Just pour in, center the candle, and you can add other decorations.  My poor candle was a little dusty from being hauled around the house to get good photos.

You can also paint these with Krylon glass paint for a different look, which I will show in a later post.  I have a new batch of glassware with different shapes that I'll be using for decorations this holiday season and will show those in a later post. 

Use your imagination, as the possibilities are endless!