Search

Powered by Blogger.

Networked Blogs

Showing posts with label gift. Show all posts

Monday, December 3, 2012

Homemade Decorated Mugs - Simple Gifts

Homemade decorated Sharpie mugs are so much fun!  I made this one while I was waiting for my coffee to brew.  Mustaches are popular right now, and they make for a whimsical design added to a coffee mug.  Everyone looks more debonair with a mustache, right? 

To make this you will need: 
1 white coffee mug (I got mine at Dollar Tree)
Sharpie markers in your choice of colors
Cookie Sheet 

Oven temperature and time:  350 degrees for 30 minutes.

Draw your design on your mug.  If you are not steady handed, there are numerous printable templates that you can cut out and tape onto the mug, then color in.  I did my design free-handed.  It's a little lop sided, but sometimes mustaches are, too.  

Place mug(s) on a cookie sheet and place them in the oven.  Cook at 350 degrees for 30 minutes.  I leave my mugs in the oven and allow them to cool down with the oven.  Remember these mugs will be VERY hot and will be very sensitive to temperature changes, so it's best to let them cool completely before handling them. 

Once baked and cooled, the designs will become colorfast.   It is recommended to hand wash the mug, rather than putting it in a dishwasher, as most dishwasher soap contains a mild abrasive and can eventually erode the design. 

I have seen so many cute designs for these mugs.  One was a his and her that had half of a heart on one mug and the other half of the heart on the other mug.  You can write poetry, bible verses, or other inspirational sayings on your mugs.  I saw another where a funny nose shape was drawn on the bottom of the mug so that it looked like a plain white mug, but then turned up for a drink, the funny nose showed. 

Because Sharpies come in numerous colors, your designs can go from simple to elaborate.  HERE is a blog post from Pearls Poppies Pinkies Up showing more elaborate designs.  I've seen some that were goofy to some that were artistically elaborate.  For a truly elaborate design see post HERE from the official Sharpie Marker blog. 

Once your mug is designed, baked, and cooled, you can now either give it as an individual gift or fill it with goodies, wrap it in clear plastic, and tie with a bow.  Sharpie marker painted cups are a simple, unique gift that the receiver can appreciate every time they pour themselves a cup of coffee or enjoy a cup of tea. 

Monday, November 26, 2012

Refrigerator Magnets or Necklace - Simple Gifts

So you're looking for something fun to make that's easy, unique, and can be personalized.  How about refrigerator magnets from glass pebbles?!  The glass pebbles can be purchased at Dollar Tree for $1.00 per bag for 14 oz., which is a lot of pebbles.  You might even have a few of these left over from prior craft projects, such as the hardware store jewelry from a prior post, and this is a great way to use up the remaining pebbles.

These can be personalized with funny sayings, photos, scrapbook paper, or definitions from an old dictionary.  Above is a collection of magnets featuring Mae West, two from a scrapbook paper collection, one photo of my son sitting in my father's lap, and one from the peace sign collection.  

Glue a magnet to the back for refrigerator magnets, or glue a bail to the back of a finished piece and string it on a chain to wear as a necklace pendant.  

SUPPLIES: 
  • Glass pebbles
  • Photos, scrapbook paper, typed sayings, or photos from a magazine.
  • Clear Tacky Glue craft glue such as this:  Duncan 239396 Aleenes Quick Dry in. Tacky in. Glue-4 Ounce (Google Affiliate Ad)
  • Mod Podge
  • Paintbrush or sponge applicator 
  • Packing tape (to seal items that are not color fast)
  • Glue-on magnets (You can use old magnets from business cards and calendars, but they must be a strong magnet, otherwise they will not hold the weight of the glass pebble.)

Pick out the photos or pictures you want to use.  Check how they look by placing the glass pebble over the photo.  The glass tends to act as a lens and magnify the picture a bit.  


 The flower on this chair is very pretty and makes a great focal point!


 Ooooohhhh, who lives in a pineapple under the sea?


The pattern on this shirt is very pretty and would make a wonderful collage of fall themed magnets or a pretty pendant! 

Once you have determined which photos look best, cut out a small portion of the item, leaving enough so that a bit sticks out on the side of the glass. 

Turn your glass pebbles over and coat them with a small bit of the clear tacky glue.  


If you are using photos or other printable items that have ink that would smear or bleed, now is the time to seal those between two pieces of packing tape. These are small photos of family members I printed on my printer and needed to seal so that the ink wouldn't bleed. 
Once the pebble is coated with glue, press it glue side down onto the face of the photo or item.  Press hard so that the glue spreads out and adheres to the entire photo.  Make sure you press firmly enough that there are no bubbles in the glue.  


Once adhered appropriately, flip these over, glass side down, and allow to dry for several hours.  Once completely dry, use scissors to trim away the excess paper.  Using a sponge applicator or paintbrush, apply a couple of thin coats of Mod Podge over the backs of the pebbles, allowing each coat to dry thoroughly.  Several thin coats are better than one large coat of Mod Podge.  Otherwise, strange things happen to the paper once it's very wet. Once dry, glue a magnet to the back.
To turn one of these into a pendant, skip the magnet and instead spray the back of the piece with clear spray paint to provide a waterproof finish.  Unfortunately, Mod Podge is water soluble, so if you sweat and it's next to your skin, the Mod Podge will dissolve.  So a coat or two of clear spray paint will seal this.  Once completely dry, adhere a glue-on bail to the back of the pendant, allow it to set, and string on a pretty chain!


See the photo above of the magazine page with the woman holding the dog.  The pendant above is made from the pattern on the chair in the photo!


Wednesday, November 21, 2012

Simple Gifts - Hardware Store Jewelry


Need a fun, funky, and easy gift idea but don’t want to spend a lot of money?  You may very well have the things you need in your garage or junk drawer!  Here are two necklaces made from components from around the house or that are inexpensive purchases at any local hardware store. 

The first is a metallic, Victorian/steampunk inspired necklace.  Steampunk is known as “industrial Victorian,” as it combines elements of mechanical items, such as gears, wires, and circuitry with Victorian elements such as rhinestones, filigree, and delicate chains. 

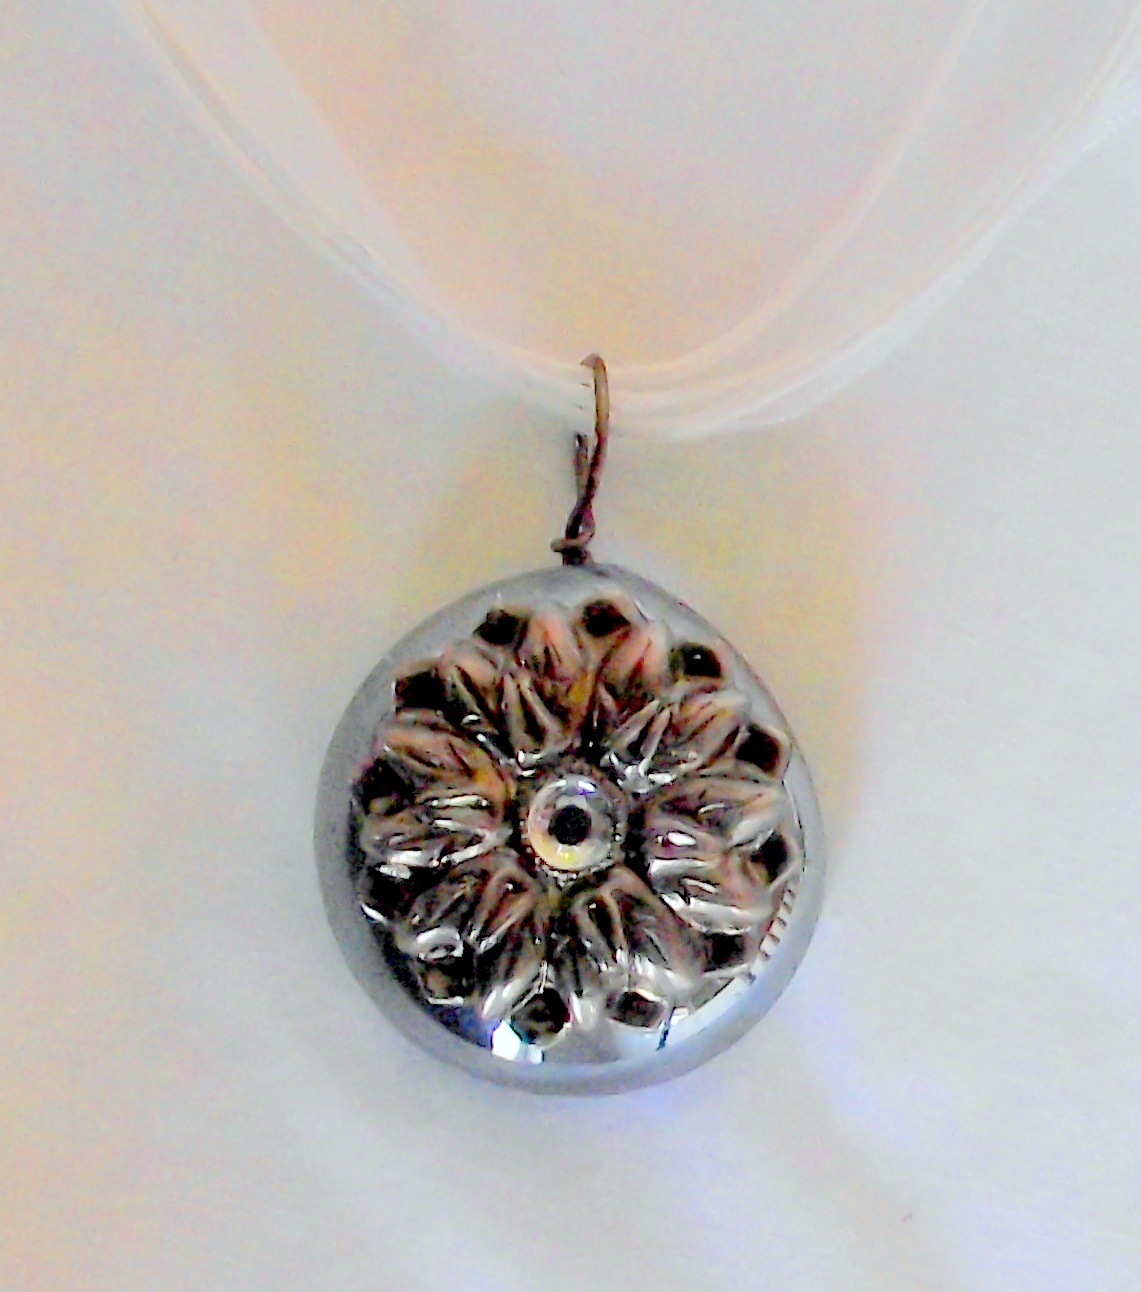
The second is a Victorian pendant made with an iridescent glass pebble and hardware store items.  This is very pretty as a choker or short pendant worn on a ribbon.  

Metallic Victorian/Steampunk pendant
Items Needed
One 2 inch fender washer
One floral mirror mount (these are mounts used to hang mirrors in a bathroom)
One external tooth lock washer
One glue-on rhinestone or other flat-backed pretty item
One glue-on wire bail  (instructions on how to make these HERE)
E6000 glue
Ball chain and connector at least 20 inches (found in hardware or plumbing section)


INSTRUCTIONS:  Place fender washer on flat surface.  Glue mirror mount to washer with E600 glue.  Place glue along bottom of mount, just slightly inward from the outside edges to get a firm seal.  Allow to dry.  


Add lock washer to center of mirror mount.  Place glue along the area which will touch mirror mount the most.  Allow to dry. 


Add flat-backed rhinestone to center of lock washer, and allow to dry.    


Once all components are dry, flip washer over and glue bail to back.  In this photo I have the pendant propped up on a toothpick while drying.  Otherwise, if allowed to dry flat, the bail will tip backward, and pendant will not lay flat when attached to a chain.   


String on ball chain, cut to desired length, and wear!


Victorian Iridescent Glass Pendant
Items Needed
One large iridescent glass pebble (I bought these in a bag at Dollar Tree for $1 in the floral section)
One flower mirror mount
One glue-on flat backed rhinestone or other flat-backed item
One glue-on bail (instructions to make these HERE)
E6000 glue
Ribbon, silk cord, or dainty chain


 INSTRUCTIONS:  Glue bail to flat back of pebble and allow to dry. 


Using sandpaper or a nail file, rough up front domed surface of glass pebble slightly.  Check positioning of mirror mount on front of domed glass and use pliers to bend slightly and contour the mirror mount to the shape of the pebble.  Glue mirror mount to glass pebble and allow to dry.  


Glue flat-backed rhinestone to center of mirror mount and allow to dry. 


Place on ribbon, silk cord, or dainty chain and wear! 

The key to both of these pendants and necklaces is to use what you have on hand.  If you've seen something and the thought popped into your mind that it would make a pretty necklace, use it!  Instead of the mirror mount, you might have a pretty pearl button that came from a coat.  Use that!  Have a length of broken chain?  Use it to wrap the circumference of the button using glue.  Have an old broken watch with an interesting watch face?  Take the watch apart and carefully remove the watch face and use it in the place of the mirror mount.  See an old typewriter key that's flat and has an initial on it or words like "caps lock" instead of a letter?  Use that!   Have old bits of broken jewelry?  Use those.  Snip off broken parts and combine the elements by gluing them to the washer or a glass pebble.  The possibilities are endless and are as interesting as your imagination and junk drawer. 


Monday, November 12, 2012

Wire Wrapped Glass Pebble Pendant - Easy Christmas Gift


Wire wrapped glass pendants are a fun and easy gift you can make with relatively inexpensive items.  The sloppier the design, the prettier it is, and despite how complicated they look, they're really easy to make.  They make beautiful gifts, and you can whip them out in just a few minutes once you get the hang of this.  

I'll give a list of items below, and then try to show step-by-step how it's done.  The only part I do not have pictures of is the actual placement of the wires simply because I needed two hands to hold everything in place and couldn't really take photos.  So here we go! 


Materials Needed 
**or **
  • Needle-nose pliers (may need to wrap the tips with tape if using on jewelry wire so the wire doesn't get scarred)
  • Wire Snips 
  • Tweezers 
  • Necklace chain, silk cord, leather cord, or ribbon, about 24 inches in length.
INSTRUCTIONS (Click on Photos for Larger views):
Cut two lengths of wire approximately 1 foot long.
Begin bending them in a loopy zigzag pattern, leaving tails on either end.  


(Photos show loopy wire and sizes of glass pebbles. )


Lay wires in a cross pattern, and center one pebble in the middle. 

This is the trickiest part of this whole thing, but it will be fine. The glass can be slippery!  

Begin folding the wires up and over the pebble, overlapping the wires, bending and smooshing them together.  The wires need to be enmeshed.  Form a cage around the stone.  Grab the pliers or tweezers and bend the wires around each other.  For example, bring a loop up through another and then bend it back over.  Leave two wires long at the top for use to make the bail later on.  If needed, use the loose ends for the bottom and side pieces to loop back through or snip off and use elsewhere.  Curl the ends of any loose wires, and tuck them in against the glass.  

Cut short lengths of wire from the spool and use to bridge a gap between two loops of wire if there is a space where the glass could "escape."  Again, curl the ends under, then twist the wire and tuck it snug against the glass (see photo below).  The piece is sticking out so that you could see how I passed the short wire piece between the two.  I curled it further and tucked in the pieces.

Once the wire is shaped around the glass the way that you like, it's time to make the bail at the top of the pendant.  

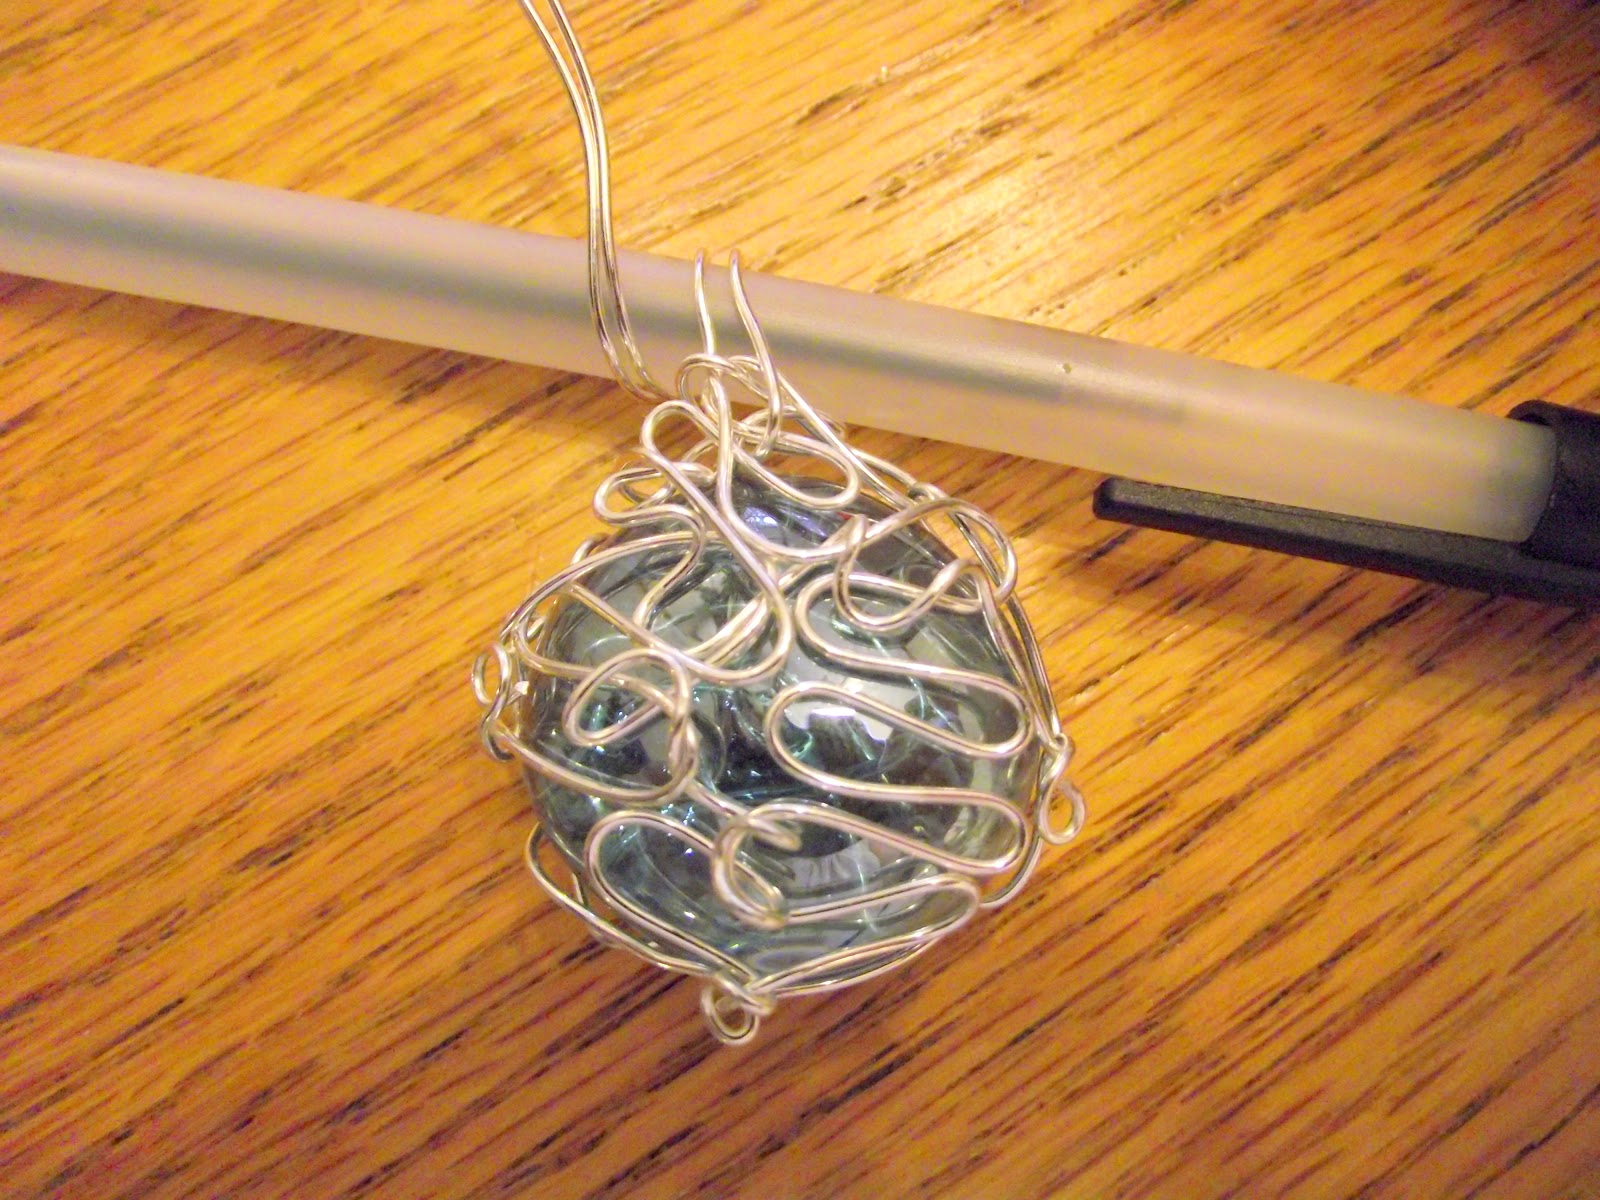
I used a ball-point pen and wrapped the two wires around it one full wrap.  I have exaggerated how the wires come off this so that you can see how they come back around.  You'll want the wire to be as close to the base as possible.  


With the pen still inside the wire loop, begin wrapping the two wires around the base in a concentric spiral fashion until all of the remaining wire has been used.  Curl ends of wire and tuck under the bottom of the bail.  Straighten and center bail as necessary. 

This doesn't have to be neat, just so long as it is held securely. 

If you feel this needs a little more security for the glass, use tiny dabs of E6000 glue on a toothpick.  Place it between the wire and the glass. A little E6000 goes a very long way.  Allow to dry/cure for approximately 24 hours before wearing.  

Another way to "tighten" wires is to put the pliers (or tweezers) in the middle of a piece of wire and twist slightly to form a crook.  See before and after photos below.  This takes up any excess slack in the wire and lends an artistic appearance. 

Suspend this from a chain, ribbon, silk cord, or strip of leather tied off.  These are very pretty, unique, and no two are alike.  

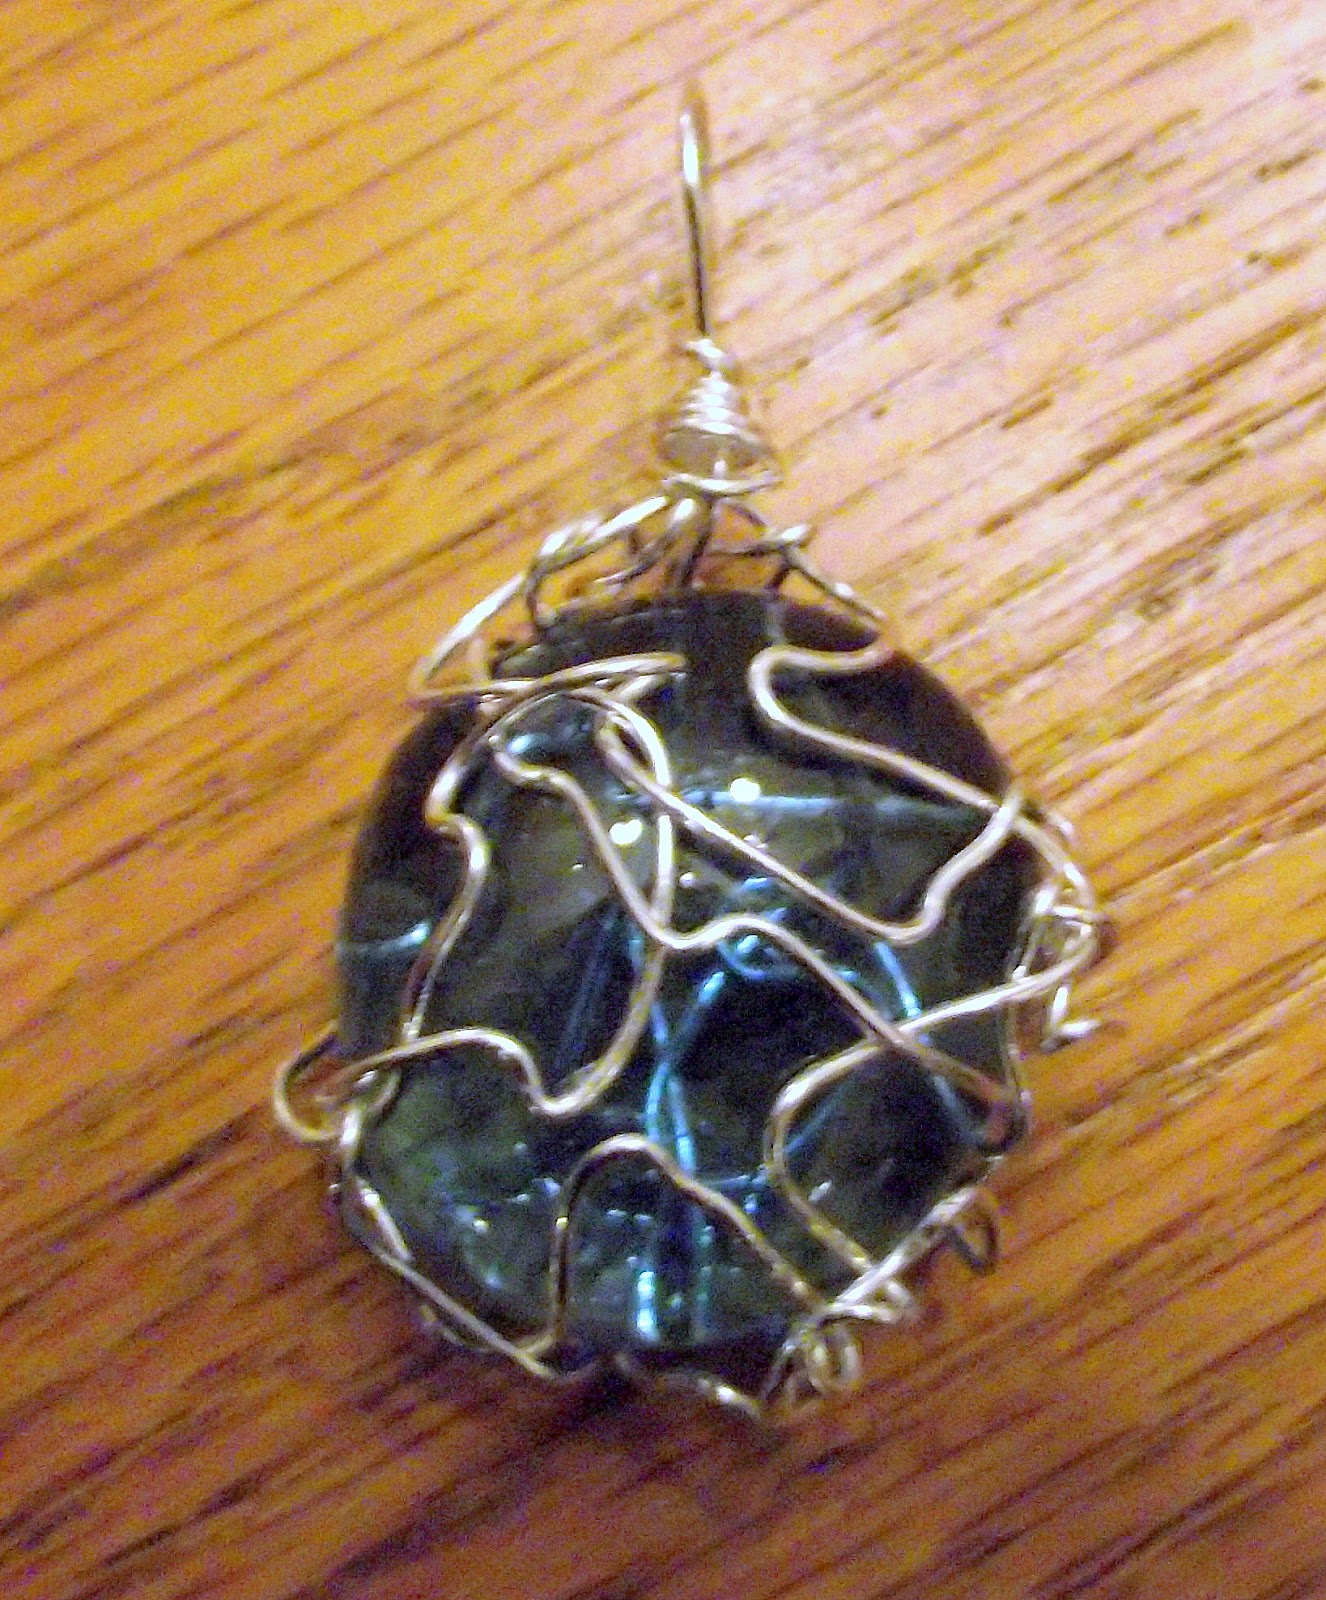
Here is another pendant that I made using one strip of wire in the zigzag pattern, then wrapped around the glass pebble.   It has a single-loop bail.  I made it, thought that it needed a little bit more umph, and put some artistic crooks in the wire with the tightening technique I talked about above.

ONE FINAL NOTE:   You will always be your own worst critic, so do not be overly critical of your design.  If you feel like it doesn't look good, put it away for a day or so, and then look at it again or show someone else to gauge their opinion.  You can always add more wire or bend the wires in a different way that is more pleasing.  Remember, have fun, and don't be afraid to ad lib!

That's it!! 


Wednesday, November 7, 2012

Crock Pot Apple Butter - Easy Christmas Gift!


This year we had an abundance of apples, so my weekends for a couple of months were spent canning apples. The tree was so loaded that we would have to pick apples just to keep the limbs from breaking!  Crock pot apple butter was one of the easiest projects for preserving the apples.   

This is made overnight in a 5 quart crock pot.  It takes very few ingredients.  You just need some time and effort to peel, slice, and core the apples, put the ingredients and apples in the crock pot overnight, and the next morning you'll have a batch of apple butter! A one-piece peeler-corer-slicer makes dealing with the apples a breeze. 

Crock Pot Apple Butter
5-6 pounds tart apples peeled, cored, and sliced/chopped (I use the peeler-corer-slicer like this one:  Peel Away Apple Peeler (Google Affiliate Ad)
4 cups sugar
2 teaspoons ground cinnamon 
1/4 teaspoon ground cloves 
1/4 teaspoon salt 

Instructions:  Place apples in slow cooker.  Combine dry ingredients in a separate bowl then pour over apples and mix well.  Cover and cook on high 1 hour.  Reduce heat to low and cook 9-11 hours (this is why I say to do it overnight!).  Stir occasionally, scraping sides to prevent sticking.  Apples will be thickened and dark brown.  If there is still a lot of liquid, uncover and cook 1 hour longer.  

At this point, the apple butter may be lumpy.  You have three choices:  You can stir/whisk it and leave it with some lumps.  You can use a potato masher to mash it throughly by hand, or you can use a food processor to puree it in batches before preserving it. 

This will keep 2 weeks in the refrigerator, unpreserved.  It will also keep in the freezer or deep freeze for up to a year.  You can also can it in jars by pouring it into sterilized canning jars, topping it with a lid and seal, then processing it in a water bath for 20 minutes.  Apples are one of the easiest things to can because of their acidity, so this is an excellent option. 

Apple butter is excellent served with hot, fresh biscuits.  I also like it stirred into oatmeal, and you can add it to muffin batter or pancake batter for a wonderful spiced apple flavor!  It would be an excellent gift along with a few other goodies in a gift basket. 

This post contains links from affiliates.