Search

Powered by Blogger.

Networked Blogs

Monday, December 31, 2012

Recycle Used Wax Melts/Tarts into a Candle

If you've joined the craze for the wax warmers such as Scentsy or Pink Zebra or even the ones they have at Walmart, you have probably found scents you love.  However, after the wax scent dissipates, you want to change out the wax, but it seems a waste to just toss it out. 

This is an easy way to reuse the wax, and, believe it or not, the scent is still very much there once it burns.  The great thing about making these candles is that you get a slightly different scent as each layer burns through, and oftentimes it makes interesting scent combinations in the process.

I have different jars started for different scents.  I have one jar that is for the woodsy/spicy/kitchen scents such as Mountain Lodge, pumpkin pie, cinnamon spice, etc., and another that is for flowery/citrusy scents such as lavender, fresh cut grass, lemon, etc.  You can make as many or as few as you want, or even just have one jar into which everything gets dumped.  Whatever you choose, it's a great way to reuse the wax!

To make these you will need:
1 empty jar that is relatively heat safe (a Mason jar is perfect)
1 premade wick with base (I got mine at Hobby Lobby $2.99 for 5 click HERE to see)
Some type of adhesive, such as E6000, Super Glue, etc.
Melted wax
Pen, pencil, or dowel to hold the wick in place and steady while the jar is being filled.

Clean the jar and make sure it is dried.  Put a dab of adhesive on the bottom of the metal premade wick and poke it down into the jar, centering it, and then use a long object to press it to the bottom of the jar to make sure it's adhered.  

Once the wick has set, take the dowel, pencil, or pen, and wind the wick around it a couple of times until the dowel sits flush on top of the jar.  This will hold the wick centered until the jar is filled.  Next, begin pouring the melted wax.  

It's not necessary to do this all at once.  You can stick the jar in an out of the way spot and add to it whenever you change out wax in your warmer or if you've come to the end of a candle and need to pour off the remaining melted wax.  Add to this layer by layer.  

When the wax is to approximately the bottom of the threads on the jar, cut the wick off and trim to approximately 1/2 inch in length.  Now it's ready to use! (The photo below is of another candle made this way with darker wax.)


Sunday, December 30, 2012

Top 10 Posts of 2012


It's that time!  Time to reflect on the past year.  Since I just started this blog a little over 3 months ago, I don't have a whole lot of posts, but there have been over 100 of them.  I thought I'd do a recap of the most popular ones.  Click on the title of each numbered post to see the original. 

Four recipes that were made to go straight from the freezer into either the crock pot or to place directly on the grill.  Recipes included Mango Chipotle Chicken, Smothered Pork Chops, Beef Tips, and Pepper Steak. 

Directions on how to use Sharpie markers and plain white mugs or dishes from the dollar store to make gifts.  Decorate and bake at 350 degrees for 30 minutes. 

This was a guest post written by my friend, Kasie Robinson, who is a fellow transcriptionist and jewelry maker.  Check out her awesome story and recipe, and then cruise on over to her Artfire shop HERE for some darling earrings.  

Make a tasty, exotic-tasting meal with simple ingredients from your cupboards.  This recipe features that ever-popular food Ramen noodles but is dressed up in a way that is satisfying to both your taste buds and your pocketbook. 

A list of hints and helps for turning your own recipes into freezer-to-crock pot meals.  

Tips, tricks, and thoughts about saving on groceries that do not normally go on sale or have coupons readily available. 

Want to cook all your food at once but don't want the flavors to mix?  Foil packets for the crock pot may be the answer.  Just wrap up your items, seal in foil, and place in the crock pot!

Use a dollar store glass pebble, wire, and some pliers to make a beautiful, unique, and simple gift. 

This is a recipe for the crock pot that is basically chicken chili but uses chili ingredients rather than the usual white sauce that's associated with chicken dishes. 

This is a tutorial for how to make a glue-on bail that turns almost any object into a pendant for a necklace.  Simple, easy, and very pretty! 

There they are!  The most popular posts for 2012.  Thank you to all my readers who have made this adventure so much fun.  I look forward to seeing what 2013 has to bring!


Saturday, December 29, 2012

Easy Deep Conditioner for Hair

Olive oil is known for its benefits as a food substance because it is flavorful and is known to help lower cholesterol.  It is also terrific as a topical application for skin and hair.  I love making this easy conditioner recipe listed below and using it a couple of times a week for a deep conditioning hair treatment.

Olive oil is biologically closest to sebum, which is the oil naturally produced by our bodies.  Why don't we just leave the natural oils there?  Well, that sounds great, but unfortunately sweat, bacteria, and skin cells tend to collect in the oils present on our body, so it's necessary for us to take a shower or bath, grab our favorite soap, and get squeaky clean.  Unfortunately, soap tends to strip those natural oils and can sometimes leave us with overly dry skin or hair.  That's where conditioners and lotions come in.

This is another beauty tip that was given to me by my brother.  Use this 2-3 times a week (or less, depending on your hair).  Keep it in the shower for easy use, and make sure that you blow dry your hair afterwards to help the conditioner "set."  Otherwise, you may seem to have an oily residue on your hair. 

OLIVE OIL DEEP CONDITIONER:
1 bottle of inexpensive conditioner, your choice
1 teaspoon of olive oil per 8 oz. of conditioner
(Example:  If your bottle is 12 oz., you will need 1-1/2 teaspoons of olive oil.  If it is 16 oz., you will need 2 teaspoons of olive oil, and so on.)

Open the conditioner and squirt out just enough to give you some "shaking room" in the bottle.  Add the olive oil, and shake for 1 minute. Store the conditioner in the shower or wherever you wash your hair.  Apply liberally to freshly shampooed hair and allow to sit for 2-3 minutes.  Try to keep away from scalp.  Rinse well, then blow dry.  Blow drying is a MUST in order for the conditioner to set. 

That's it!  This conditioner will leave your hair silky smooth and well conditioned without spending a ton of money! 

Friday, December 28, 2012

Easy Graham Cracker Coconut Snack Bars - Creative Cooking

This is one of those recipes that has been passed around our family.  It was originally invented by my Aunt Bertie Jo for Christmas candy.  The way it is made is like a snack bar; however, before it "sets up" you can form it into individual balls and roll it in nuts, powdered sugar, coconut, or even dip it in chocolate coating to form a truffle type candy.  

The recipe is really easy, it's addictive, it's delicious, and it's quick!  Why am I just now posting this?  Because I'm just getting around to making it.  It seems like Christmas sneaked up on me this year, so I'm just now making my favorite foods and snacks. 

Aunt Bertie Jo's Graham Cracker Coconut Snack Bars 
16 planks of graham crackers, crushed*  
1 can Eagle Brand milk 
2 cups shredded coconut 
1 quart pecan pieces

*1 plank is one of the solid rectangles of graham crackers that if you broke it on the scored lines  equals 4 individual crackers.  The total amount used usually equals around 2 plastic wrapped packages from a box of graham crackers 

Mix all ingredients in a bowl.  Then pour into a greased 9 x 13 pan and press flat.  Place in the refrigerator and allow to set up for approximately 1 hour.  Slice into 1 x 1 inch squares.  

Alternatively, before pressing this mixture into a pan, you can form it into small 1 inch balls, then roll in powdered sugar, crushed pecans, or coconut, and refrigerate.  If you're feeling really ambitious, form the 1 inch balls of this mixture then dip in candy coating such as CandiQuick. 

Thursday, December 27, 2012

Egg Salad - Broke Food

Normally I reserve egg salad for the time around Easter when we have dozens of boiled eggs, and we're trying to find some use for them.  However, egg salad is also an excellent, tasty, and frugal meal to have any time of year.  

You can make this as a basic recipe with eggs, mayo, a dab of mustard, salt and pepper, or you can turn it into something really exotic by adding ingredients.  I like mine middle of the road, depending on what's lurking in the fridge and my cabinets.  

This is also excellent as a sandwich, or you can eat it alone as a salad.  Serve it with chips, a green salad, or eat on crackers for a change of pace. 

Egg Salad
2-3 hard boiled eggs, peeled and chopped 
1/4 cup mayonnaise (or plain low-fat yogurt)
A dime size squirt of prepared mustard 
salt and pepper to taste 

Mix all ingredients well and refrigerate.  Then serve as you like.  

Additions:  
1 tablespoon dill or sweet relish
1-2 teaspoons minced onion 
chopped celery
chopped green olives 
chopped jalapenos 
chopped green onion 
chopped bell pepper 

Add as many or as few things to your taste and refrigerator can supply! 


Wednesday, December 26, 2012

Crock Pot Cooking for One - Freezer to Crock Pot

I love freezer-to-crock pot recipes because they are such a time saver.  However, most of the recipes make a ton of food.  That's difficult for one person because they either end up eating the dish for several days or have to try to freeze it to keep it for later.  

My mother is nearly 80 and lives alone in a home next to us.  We help her with meals, but if she cooks for herself she tends to eat ready-to-eat meals or a bowl of cereal or whatever is easy because it's hard cooking a bunch of food when only one person is going to eat it. 

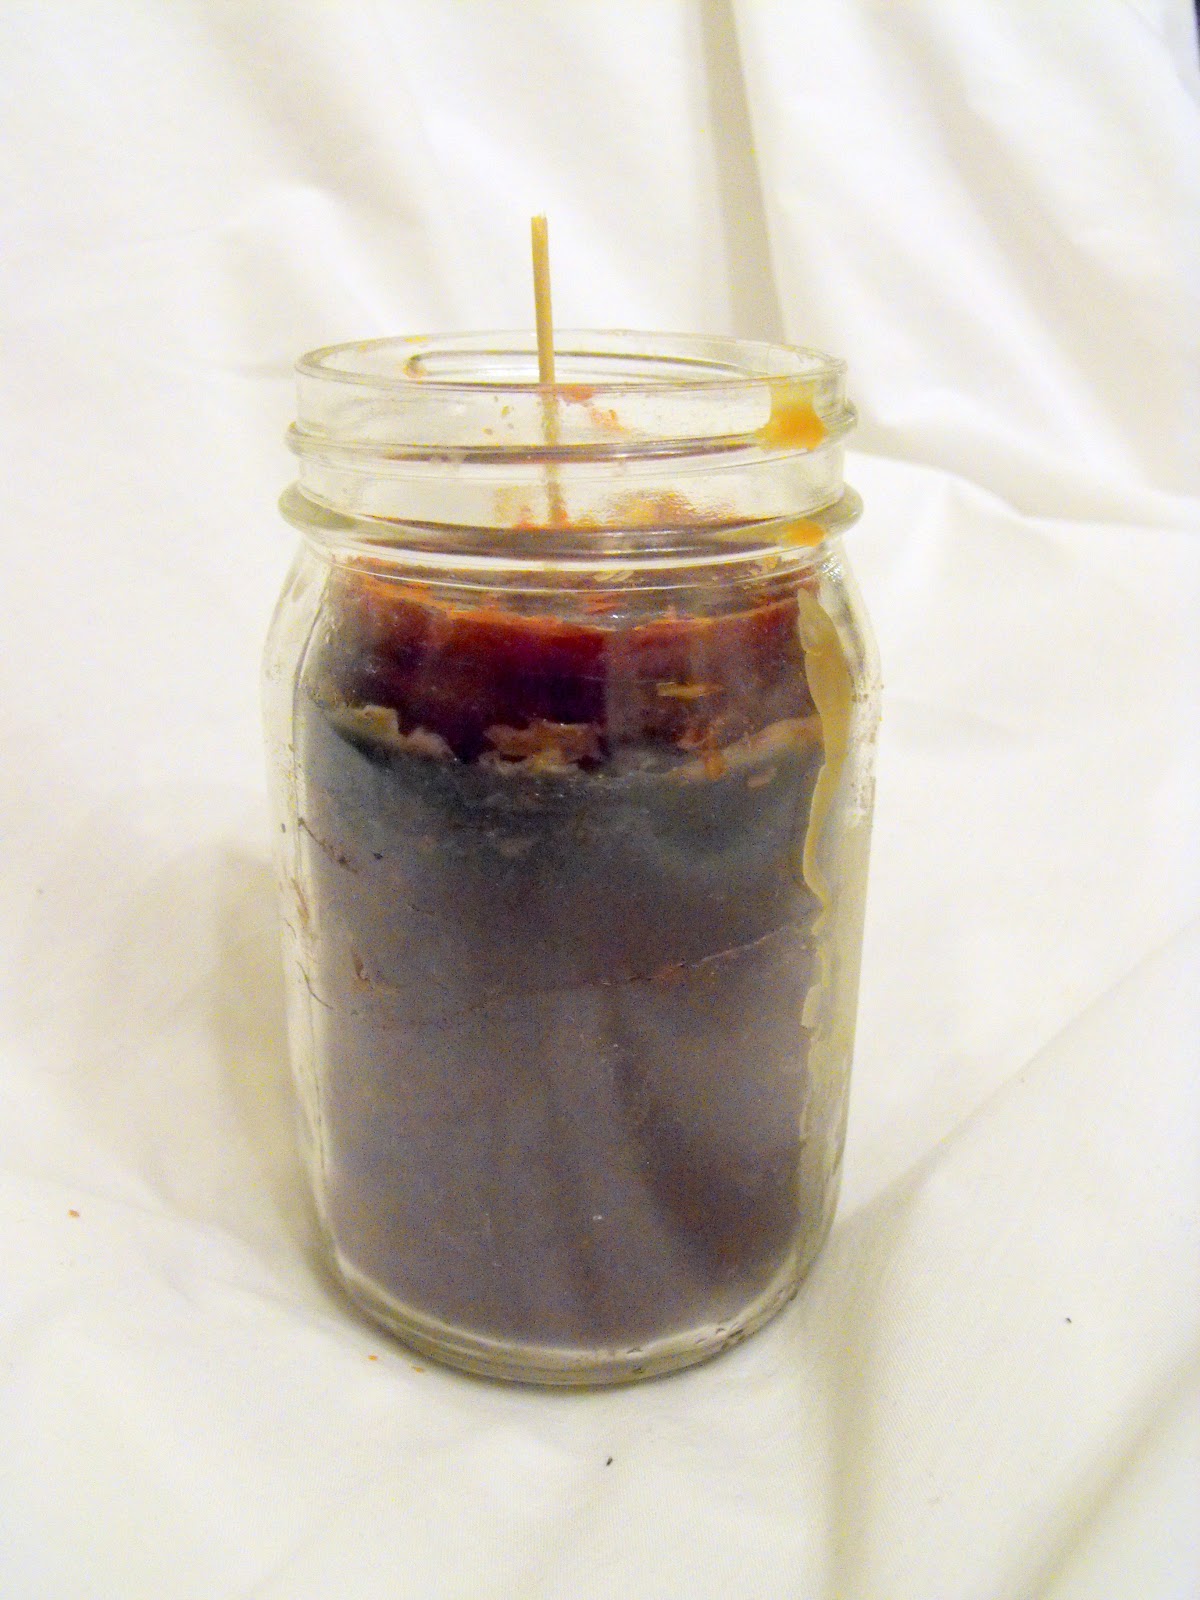
I decided to try my hand at crock pot cooking for one.  I got Mom a 2-quart crock pot with removable crock (pictured above and link HERE).  Then I bought groceries and got to work. I made 12 meals (2 meals per recipe) with each of the recipes listed below.  

I made enough quantities that if she wanted a larger meal, it would be just enough for her, or if she wanted a smaller meal, there would be enough left over for lunch or dinner.  Depending on how much she eats and which meals she chooses, these can stretch anywhere from 2 weeks to a month.  So far, she has been thrilled, and I have peace of mind knowing that she's eating good meals. 

Here are the recipes I made, below. While these are recipes I have posted previously, I had to modify them to take into consideration the smaller amounts.  Click on the title for each recipe to see the original post for a full-size, 5 quart version of this recipe. 

Use quart size Ziploc bags for storage.  I split each recipe between two one-quart bags.

Butter Curry Chicken (Have not posted this as a large recipe yet, so no link)
4 small boneless skinless chicken breasts or 2 very large chicken breast  cut in half to make 4 pieces
1 can cream of chicken soup
3-4 green onions, chopped and including bottoms and green tops OR 2 tablespoons finely minced onion 
1/2 cup tart fruit juice such as pineapple, orange, or white grape OR dry cooking sherry
4 tablespoons of butter 
2 teaspoons of curry
salt and pepper 

Divide ingredients between two quart size Ziploc freezer bags.  Squish to remove air, then seal and massage to distribute ingredients.  When ready to cook thaw in refrigerator or place frozen chunk in crock pot.  Cook on low 6-8 hours.  Serve over noodles or mashed potatoes. 

4 small boneless skinless chicken breasts or 2 very large chicken breasts cut into 4 pieces
1 cup chopped onion
1 cup chopped celery
1 cup chopped carrots
1 14 oz can tomato sauce
1 can diced tomatoes with chipotle peppers 0R 1 can diced tomatoes with 2 tablespoons chopped chipotle peppers in sauce 
1/4 cup lime juice 
2 garlic cloves minced (2 teaspoons of minced garlic if you buy the type in a jar)
1/4 cup dried cilantro

Divide all ingredients between two quart size zippered freezer bags.  Squish out air, seal, and massage bag to distribute ingredients.  Freeze.  When ready to eat, either thaw overnight and place in crock pot the next morning or put entire frozen chunk into crock pot and cook on low for 8 hours.  Serve with rice or steamed vegetables.  This is also great on a tortilla with pico de gallo.

4 pork tenderloins/chops 
1 can cream of chicken soup 
1 package dry onion soup mix 
salt and pepper 

Divide ingredients between 2 zippered freezer bags.  Remove air, seal, and massage bags to distribute ingredients.  Thaw the night before or put frozen chunk into crock pot.  Cook on low 8 hours.  

4 pork tenderloins/chops
1 can cream of chicken soup 
1 package ranch dressing 

Divide ingredients between 2 zippered freezer bags.  Remove air, seal, and massage bags to distribute ingredients.  Thaw the night before or put frozen chunk into crock pot.  Cook on low 8 hours.  

One 4 pound roast cut into 2 pieces that are 2 lbs each
1 package dry Italian dressing mix 
1 package dry onion soup 
1 package dry brown gravy mix
4 potatoes peeled and cut into very small chunks (I prefer red potatoes)
1 cup carrots
1/2 of a medium onion, cut into chunks 

Divide ingredients between 2 zippered freezer bags.  Remove air, seal, and massage bags to distribute ingredients.  Thaw the night before or put frozen chunk into crock pot.  Cook on low 8 hours. Do not add water to this, as the roast will make its own juices.  A note:  Normally I do not put potatoes in the freezer, but if you use small red potatoes, they seem to work well and the recipe comes out fine. 

2-3 lbs stew meat, browned in batches with olive oil 
1/2 medium onion, diced 
1-2 carrots cut into chunks
1/2 clove minced  garlic 
1 stick celery cut into small chunks
3/4 to cup chicken broth  OR 3/4 to 1 cup beer (yes, chicken broth; don't substitute beef)
2 tablespoons bouillon 
1/2 tablespoon worcestershire sauce
1 can RoTel diced tomatoes with chiles 
1 small can (4oz) tomato paste 
1/2 teaspoon paprika
3/4 teaspoon sugar 
2-3 red potatoes peeled and cut into thin/small chunks 

In a skillet, brown meat in oil, in batches.  Pour just enough water in bottom of skillet and stir to deglaze the pan. About 2-3 tablespoons of water. Place meat and deglazed mixture in bottom of 2 quart freezer bags.  Add remaining ingredients EXCEPT POTATOES.   Squish out air and massage to distribute ingredients.  Open then add potatoes to top.  Seal and freeze.  Cook on low for 8-10 hours.  Serve with cornbread, crusty bread, or fry bread. This is best when cooked low and slow. 

To make this a stove top recipe, follow instructions, except you will need to add approximately 1 to 1-1/2  cups of water to the mixture and allow it to simmer on the stove top for 1-1/2 to 2 hours.  Watch carefully and add water if the stew becomes too thick. 
 

Tuesday, December 25, 2012

Crock Pot Bread Pudding with Kahlua Sauce


Bread pudding is such a rich, decadent, and sumptuous treat that it's hard to believe the ingredients are so simple.  I consider bread pudding to be a comfort food.  The sight of the chunks of browned bread along with the scents of vanilla and cinnamon make me think of warm kitchens, good food, and good times. 

I've seen this casserole called crock pot French toast.  Oh heck no!  We southern girls know that this is bread pudding!

Mix this up and put it on to cook before heading to work for a yummy dessert.  Or, if you want to something take for a crowd-pleasing pot luck dinner, put it on to cook at night, turn the crock on low, and in the morning you'll have bread pudding ready to serve.  The Kahlua sauce keeps well in the refrigerator and reheats easily.  Make extra sauce if you like it served over ice cream. 

Bread Pudding
1/2 loaf bread with pieces torn into chunks (the more stale it is, the better)
6 eggs
2 cups milk 
2 teaspoons cinnamon 
1 teaspoon vanilla 
2 tablespoons brown sugar (or 1 tablespoon white sugar and 1 tablespoon maple syrup)
1/2 cup pecan pieces (or raisins, if you prefer)

In large bowl mix eggs, milk, cinnamon, vanilla, and sugar.  Fold in bread.  Allow to sit or rest for 15 minutes.  Pour half of mixture into greased crock pot.  Add half of pecans.  Pour remaining mixture into crock pot and top with remaining pecans.  Turn crock pot on low and allow to cook for 6 hours, minimum. Approximately 15-20 minutes before serving, remove the lid from the crock pot and turn crock on high.  This will "brown" the top of the bread pudding.  When ready to serve, scoop out and top with Kahlua sauce (recipe below).  

Kahlua Sauce 
2 cups sugar
1/2 cup milk 
1/2 stick of butter 
1/2 teaspoon vanilla
1/2 cup Kahlua

In medium saucepan combine sugar, milk, butter, and vanilla.  Heat over medium heat, stirring continuously, until mixture begins to steam and bubbles form.  Add Kahlua, stirring rapidly, and heat through again to near boiling point.  Remove from heat and continue to stir rapidly until no bubbles remain in sauce.  Serve over warm bread pudding.  

For an extra treat, top bread pudding with a dollop of ice cream, then top all with the Kahlua sauce. It is divine!

Monday, December 24, 2012

DIY Ruffled Scarf - Simple Gifts


I love scarves, particularly the ones that that are dressy/frilly.  I also love infinity scarves.  No worrying about how to do some fancy tie, or what do you do with the ends, etc.  

I was in Hobby Lobby recently and saw this ruffled fabric.  I knew I wanted to use it to make scarves.  It is a pre-ruffled fabric that is light and airy.  They had white, black, turquoise, yellow, and hot pink.  I bought 1 yard each of the black and hot pink.  The fabric was 58 inches wide.  If you are lucky, you may be able to find it in a wider width.  The wider the better!  Also, how you make your scarf will depend on the direction in which the ruffles run.  For the fabric I bought, the ruffles ran across the width of the fabric.  Had the ruffles run the length of the fabric, I would have had to adjust how much I bought. 

For the first scarf, I decided to make it an infinity or circle scarf. I decided to make it 12 inches wide, with the length being 58 inches.  I used a cutting board and rotary cutter, as I found that it was necessary to use something very sharp to cut the fabric.  It tends to slip.  Using 12 inches per scarf, I was able to cut three scarves.  

Trim any weird edges or severed ruffles.  Because this is a knit fabric, it is not necessary to hem it or finish the edges. You'll want to watch as you cut so that you can flip the ruffles back away from the cutting edge. 

Once I had the scarf cut that I was going to use for an infinity scarf, I put the short ends together and pinned them face-to-face. I then sewed across these edges in a straight line. 
That's it!  Turn the scarf right side out.  You now have an infinity or circle scarf that is approximately 57 inches in length and can be worn long or doubled for more of a cowl look.  It can also be pulled up over your head as a hood or headscarf in case of bad weather. 

Don't like infinity scarves?  Not to worry.  The selvage edge of the fabric has finished ends for the ruffles.  You can leave the fabric as is, trim up the long edges, and wear it as a tie type scarf! 

Very easy, very chic, and very afforable!  The fabric I purchased was $10.99, and I had a 40% off coupon for Hobby Lobby.  So the cost was approximately $2.20 cents per scarf!

Sunday, December 23, 2012

Best Homemade Stain Remover

Ever been tempted to throw away a perfectly good article of clothing just because it has a stain?  There are times when clothes get grungy looking, or you find yellow armpit stains, or there is a ring-around-the-collar issue.  Maybe you dropped a dollop of tomato sauce on your favorite white shirt.  Or maybe you have a grease stain on that pretty turquoise blouse.  Rather than buying expensive stain removers, you might have everything you need right in your kitchen cabinets. 

I had seen this post at One Good Thing by Jillee for armpit stain remover.  It works great for whites and takes out more than yellowed armpit stains.  BUT, if you have colored clothing, hydrogen peroxide is not the ideal thing as peroxide can bleach colors.  Never fear!  There are alternative solutions.  

Here is the recipe for the original stain remover for white clothing:
  • original blue Dawn dish soap
  • hydrogen peroxide 
  • baking soda
Mix the Dawn dish soap and baking soda to form a paste.  Using an old toothbrush or other type of brush, work the Dawn/baking soda mixture into the stain.  Let it sit for a bit.  Then saturate the area with hydrogen peroxide.  This will bubble like crazy.  Allow this to sit, again, for about 10-15 minutes.  Throw in the washing machine with other whites and launder on the hottest setting the fabric can tolerate.  Stains should be gone.  

I also keep a mixture of equal parts Dawn and peroxide in an opaque spray bottle to use as a pretreatment prior to washing.  An opaque bottle is important, as peroxide begins to break down or deteriorate if exposed to light.  That's why it comes in a dark brown bottle in the store.  

Now, for the color-fast stain remover!

Color-fast stain remover: 
  • original blue Dawn dish soap
  • white vinegar
  • baking soda
Make a paste with the Dawn and baking soda.  Using a toothbrush or other bristled brush, work into the stain.  Allow to sit for about 10-15 minutes.  Once time is up, saturate stained area with white vinegar.  This will bubble considerably.  Once bubbling has stopped, launder clothing as directed.  

There you have it!  These are two inexpensive and easy ways to get stains out of clothing without resorting to expensive laundry pretreatments at the store! 

Saturday, December 22, 2012

Shine Shoes with Antifrizz Hair Serum

What?  Yes, that's right.  You can use antifrizz/straightening hair serum to refresh the shine for your shoes and make them look like new again.  The great thing is, the less expensive the hair serum, the better!

Most hair serums contain a form of silicone such as dimethicone, simethicone, cyclopentasiloxan (cyclomethicone)... anything in the ingredients list that ends with "cone, conol, col, or zane" is usually a form of silicone.  For hair that means that it is used as a conditioner, sealant, protectant, and provides shine. 

The cool thing is, it works the same way for your shoes!  I have not tried this on new, expensive shoes.  Instead, I've used this when I need shoes that might not otherwise look presentable to look nice enough to wear to something like a job interview, business trip, or social gathering. It's a quick fix, and for most women, antifrizz serum is usually something you have in your hair styling products. 

Recently, I was scheduled to attend a craft and food tasting event.  I wanted to look nice, but I wanted to be relatively comfortable, too, because I knew I was going to be on my feet for several hours.  I have this pair of high-heeled mules that look like boots when worn with pants but are, in reality, slip-ons.  These are my favorites because they make me look taller, and they're actually very comfortable for heels.  

Unfortunately, it's obvious they're my favorites because they look like it!  The toes were scuffed, and the exterior, while still in good shape, was rather dull. 
Hopefully you can see on the nearer shoe that the toes were scuffed and dull.  There were even a few white scuff marks.  

I cleaned the shoes thoroughly and made sure that all dirt was gone and dried them well.  I then used a black Sharpie to cover up the discolored marks.  Dot the marker over the scuffs to just barely tint them.  They make other colors of Sharpies that usually blend with any type of shoe (red, blue, brown, green, etc.).  

Once you have the shoes cleaned, dried, and touched up, it's time to apply the serum.  Use a dampened paper towel and begin at the toes.  Place a dot of serum on the toes and begin wiping the shoes, going from front to back.  You may have to add more serum.  Here's an example in the photo below.  I liberally coated the toe to show how to apply the serum.  You can also see the difference between the shoe on the left and the one on the right. 
Once the entire shoe has been coated with serum, use your damp paper towel and buff the shoe until it is shiny and the finish is even.  Repeat with the other shoe.  This will leave a nice, soft sheen, any flaws and scuffs will be decreased or hidden enitirely, and your shoes will look presentable if not like new.   Voila!
Now you're ready to head out the door and you've saved a bit of money by being able to have a pair of shoes last a little longer by making them look nice again. 


Friday, December 21, 2012

Homemade Chicken Salad - Creative Cooking


This past Tuesday, I made Lemon Rosemary chicken in the crock pot (recipe HERE).  There was some chicken left over, and even though the original dish was awesome, I was ready for something different.  I didn't want to waste the leftovers, though, so I decided to use the remaining chicken to make chicken salad. 

I love Arby's chicken salad with pecans.  So I decided to make a semi-copycat chicken salad using what I had around the house.  It turned out extremely well, and it was exactly what my tastebuds were wanting. I also tend to be the type who throws in everything but the kitchen sink. You do not have to use chicken for this.  As a matter of fact, turkey or even tuna would also make an excellent version, and as long as a person sticks to the basic recipe, there could be several tasty variations. 

Chicken Salad
1-1/2 to 2 cups cubed/shredded chicken
2/3 to 3/4 cup mayonnaise (substitute nonfat plain yogurt for a lower-fat version)
2 tablespoons chopped onion
2 tablespoons relish (dill or sweet)
1-2 tablespoons chopped celery
About 1/4 cup chopped pecans
1/4 cup fruit (I used dried cranberries, but you could also use seedless grapes, chopped apples, or even chopped pineapple) 
Salt and pepper to taste 

Mix all ingredients together.  Serve on whole-wheat bread, wrapped in a tortilla, or with lettuce if you prefer just the salad.  Makes 2-4 servings, depending on how thick you spread the chicken salad.  


Thursday, December 20, 2012

Beans and Franks - Broke Food

Ever have one of those days where you walk to the fridge, open it, there's nothing there... and then 20 minutes later you walk back and repeat the action?  As if somehow something appealing magically appeared during that 20 minute interval.  Then maybe you go to your pantry and do the same thing, and still find nothing?  This old-fashioned favorite might be the solution. 

This is definitely a comfort mood in addition to being broke food.  Plus, tell me you don't have the movie Something About Mary going through your head right now!  Beans and franks are fun, they're delicious, and best of all, they're easy to make and qualify as broke food. 

Beans and Franks 
2 16 oz. cans pork and beans
1 package hotdogs, franks, weenies, wieners, whatever you call them (about 6-8)
1/2  to 2/3 cup barbecue sauce, your choice
1 tablespoon brown sugar or maple syrup
1 tablespoon prepared mustard
1/2 medium onion, chopped, or 1 tablespoon minced dried onion (optional)

For the oven version of this, place all items in a casserole, combine, and cook at 350 degrees for 1 to 1-1/2 hours or until sauce thickens.

For the stovetop version, add all ingredients to a large saucepan.  Heat until bubbles form in mixture, then reduce heat to low, cover, and simmer for 15-20 minutes, stirring periodically to keep mixture from sticking. 

For the microwave version of this, place in a microwave safe casserole.  Cover and microwave on high for 15 minutes, stirring at 5 minute intervals or until heated through and mixture has "boiled down." 


Alternative Recipe 
2 14.5 to 16 oz. cans white beans, navy beans, or pinto beans (in a pinch), drained and rinsed
1/2 cup ketchup
1 to 1-1/2 tablespoons prepared mustard or spicy brown mustard
2 tablespoons brown sugar
1/2 teaspoon cider vinegar
1/2 teaspoon Worcestershire sauce
1/2 medium onion chopped/minced or 1-2 tablespoons minced dried onion
1 package hotdogs cut into medallions
salt and pepper to taste

Mix all ingredients and follow baking, stovetop, or microwave directions noted above.


Wednesday, December 19, 2012

Chocolate Dipped Marshmallows - Simple Gift


You know you've found a winning combination when your teenage son says, "Mom, these are awesome!"  These are so easy to make and the payoff is huge!  I first made these for a food and craft show that I was attending.  I made the larger chocolate dipped marshmallows to sell and we had tiny mini marshmallows dipped in chocolate for samplers.  Both were a hit!  

Make these, then either wrap them in individual plastic sacks over the top and secure with curly ribbon or do as we did and place Styrofoam in a container, arrange like a flower arrangement, then surround with plastic wrap and top with a bow.  These make a decadent, unique gift that is destined to be a favorite.  

Chocolate Dipped Marshmallows:   
  • 1 package candy coating such as Candiquick or Chocolate Bark  
  • OR 1 package milk chocolate morsels with 1 tablespoon solid shortening or coconut oil added
  • 1 package marshmallows 
  • toppings such as candy sprinkles, crushed peppermint/candy canes, colored sugar, crushed nuts, etc. 
  • lollipop sticks (I bought Wilton, located in the cake decorating aisle at Walmart)
  • microwave safe bowl 
  • styrofoam covered with plastic wrap (a must!)
Melt candy coating or morsels and oil in microwave at 30 second intervals, stirring between times.  Place marshmallows on lollipop sticks, then swirl in coating.  Allow to cool for a moment or two, then dunk in toppings.  Stick these in Styrofoam covered with plastic wrap.  This is a must so that these dry right side up.  If you place them coating side down to dry, they do not come out very pretty.  Allow to cool.  Then either secure in individual 2 x 3 inch plastic sacks secured with ribbon or place floral foam into a container and arrange as you would a flower arrangement.  

You can also use white chocolate/almond bark coating or use colored candy melts found in the candy making section of craft stores to make different colored marshmallow coatings.  

My mother and I spent a Saturday making these and arranging them, then delivering them to relatives.  All of them loved the uniqueness and were even more pleasantly surprised that they were so yummy!  The hardest part is not eating all of them yourself! 


Tuesday, December 18, 2012

Lemon Rosemary Chicken - Freezer to Crock Pot

This is the time of year where it seems like heavy meals abound.  There's the office party with prime rib or steak.  There's the blustery days with chili and stew.  Sometimes you're sick of heavy meals and just want something good, filling, but not too heavy.  Lemon Rosemary chicken is a wonderfully light meal that can easily be made in the crock pot.  The citrusy flavor is the perfect compliment to the rosemary.  This tastes great served with rice or served alongside a salad and crusty bread.  

I used chicken tenders in this recipe, but you can use boneless, skinless chicken breasts, or even a whole, cut up chicken to make this recipe.  If you use bone-in chicken, be sure to place it in the bottom of the crock pot, bone side up, so that the meat cooks through.  

Lemon Rosemary Chicken
1-1/2 to 2 pounds boneless skinless chicken breasts or tenders
1/2 C lemon juice 
1 teaspoon rosemary
1 Tablespoon vegetable oil or olive oil 
1 garlic clove, minced
1/4 teaspoon salt
1/4 teaspoon pepper

Lightly brown chicken in a nonstick pan or pan coated with nonstick cooking spray.  Place in bottom of 1 gallon zippered freezer bag.  Combine remaining ingredients and pour over chicken.  Remove air, seal, and then massage to distribute ingredients.  To cook in crock pot, either thaw in the refrigerator for 24 hours or place entire frozen contents of zippered bag into crock pot.  Cook on low 6-8 hours or high for 4-6 hours.  If cooking from frozen, increase cooking time by 1-2 hours. 


Monday, December 17, 2012

Homemade Gift Baskets - Simple Gifts

Ever have that person who's next to impossible to buy for?  A gift basket can be the perfect solution!  There are loads of themes that can be used to make a personalized and fun basket that will be perfect even for the toughest-to-buy-for friend or relative.  Items don't have to be expensive.  They just need to fit the same theme. 

This is one I made for kitchen items.  Everything in it came from Dollar Tree!  The base is a small plastic utility bucket.  In the bottom I placed some crumbled up tissue paper for bulk.  The back items are a scrub brush, long-handled serving spoon, slotted spatula, and rubber spatula.  Then there is a red oven mitt, wash cloths, tea towels, red chip/utility clips, red scrub sponges, and a set of salt and pepper shakers.  Perfect for the person who loves to cook! 

Of note, you can either purchase a container for a base or use wrapping paper or tissue paper to cover a recycled box such as one from powdered laundry detergent, a cereal box that has been cut down and covered in wrapping paper, or tape together boxes of candies in a rectangle to make a gift within a gift. 

Other ideas for themes:  

Car Care:  A utility bucket, microfiber cloths, window cleaner, car wax, Armor All, sponges, Rain-X, and a car air freshener. 
Movie Night:  Single microwave popcorn packets, candies such as Sugar Daddies, M&Ms, Reese's Peanut Butter Cups, Twizzlers, jelly beans, single bottles of sodas, colorful napkins, 3D glasses, a jar of nacho cheese dip, and a sack of tortilla chips.  
Nail Care:  This is great for a smaller gift idea.  It can be as simple as a bottle of nail polish tied together with a nail file or as large as including several bottles of nail polish, nail polish remover, cotton balls, nail clippers, files, foot care lotion, and bath salts.  
Candy:  Create a base with taped-together boxed candies.  Then use other colorful candies to fill the basket. Suckers, pixie sticks, Twizzlers, Red Hots, Sour Patch Straws, bubble gum, or anything else you can find! 
Home Repair Kit:  This is terrific for a housewarming gift.  Find a small bucket and add a hammer, a Philips and flat-head screwdriver, masking tape, duct tape, nails, medium-watt light bulbs, a picture-hanging kit, Goo Gone, and drop cloths. 
Get Well Soon:  Aspirin (Tylenol or Advil), cough drops, heating pad, can of chicken soup and a cute bowl, cloth napkins, place mat, puzzle books (word search, crossword puzzles, Sudoku), pens, notepad, hot tea, bottle of honey, and a cute mug. 

You can customize just about anything into a gift basket.  Use crumbled newspaper, plastic bags, or tissue paper as basket fillers, then begin at the back with taller items, and add things as you move forward, rearranging to make items more visible and pleasing.  Once everything is in place, use either bags made for gift baskets or very long pieces of plastic wrap (placed in an X fashion), place item in the middle, and bring plastic around.  Tie closed with a twist tie, then add a pretty bow.  


Sunday, December 16, 2012

The Multiple Uses for Castile Soap

Rarely is there truly one all-purpose cleaner.  One of my favorite cleaning agents is castile soap.  Not only is it wonderful to use to clean your home, it is also an excellent gentle, nontoxic, and soothing soap to use for body wash or shampoo.  It is that versatile!  It is also very economical in that one small bottle can be used to create many different cleaning products, and it is ultra concentrated, so a little bit goes a very long way. 

Castile soap is made from oils obtained from plant origins (as opposed to those from animal origins) such as coconut, hemp, or olive oil, to name a few.  It has been prized throughout history as being a gentle but effective cleaner. It is also considered to be "green" in that it contains natural cleaners as opposed to harsh chemicals.

My preference is Dr. Bronner's Pure Castile Soap liquid, and I like the lavender scent, although they have many other scents including citrus, peppermint, tea tree, and even a scent for babies.  There are also bar forms of this soap that can either be used in their solid form or grated into flakes for use in other items. 

My favorite use is in the laundry.  It only takes a relatively small amount of the soap added to your wash to get your clothes clean and soft.  It is an excellent pretreatment for stains, particularly oily stains.  There have been some spots on clothing that seemed to be set in, and I've saturated them with a small amount of the liquid Castile soap, worked it into the cloth fibers with a toothbrush, and then laundered, and the stain has come right out.   

Mix a tiny amount of the soap with water and place into a spray bottle then use to clean countertops.  Follow with a light white vinegar and water rinse for a sparkling clean surface.  (Of note, do not mix white vinegar and castile soap together, as the vinegar desaponifies the soap, rendering it ineffective.  More information HERE.) 

Here are some other uses and recipes below. 

Body wash:  Place a few drops of liquid soap onto a bath pouf and work into a lather, then use all over body.  Rinse thoroughly.   You can make your own body wash by grating 1 bar of Dr. Bronner's or Kirk's Castile Soap and mixing it with 6 cups hot water in a large pot, then heat and stir until combined.  Pour into bottles to use as body wash.

Laundry Spot Treatment: Use as a spot treatment for tough stains, or add 1-2 squirts to your laundry for a cleaning boost.  

Liquid Laundry Detergent:  3/4 cup Dr. Bronner's liquid castile soap, 1/2 cup super washing soda (not baking soda), 1/2 cup 20 Muleteam Borax, 1 gallon HOT water plus 1 gallon cold water.  Place dry ingredients in a large bucket and add 1 gallon of water.  Mix until borax and washing soda are dissolved.  Add liquid castile soap, stir well, and then add remaining cold water.  Allow to cool, stirring periodically.  Pour cooled liquid soap into containers and use 1/3 to 1/2 cup per wash load.  (Recipe found HERE.)

Homemade Shaving Cream:  Mix 2-3 drops of castile soap with baby lotion, then slather on prior to shaving, shave, and rinse.  Skin will be silky smooth. 

Homemade Soft Scrub:  Mix 1 part castile soap to 3 parts baking soda, then use as a nonscratching scouring powder for skins, stoves, bathtubes, etc.

Homemade Liquid Hand Soap:  Mix 1 teaspoon castile soap with 1 cup water and place in old soap dispenser.  This particularly is particularly fun in foaming soap dispensers. 

Dog Wash:   Add a few drops of castile soap to Fido's bath to get him clean and leave his hair silky smooth. 

Shampoo:  I have heard that this can be diluted and used as a shampoo.  However, I understand it is necessary to use white or cider vinegar diluted with water as a rinse, otherwise it will leave a residue on hair.  I have not tried it myself, but I have heard others rave about it, especially those prone to seborrheic dermatitis.  

Floor Cleaner:  Mix 2-3 Tablespoons of liquid castile soap with 1 gallon of water and use to mop floors. 

Garden Pest Treatment:  Mix 1-2 tablespoons of castile soap with water and place in a spray bottle.  Use to spray on plants to kill pests such as aphids.

To find Dr. Bronner's Liquid Castile Soap, check link hereOrganic Castile Liquid Soap Lavender - 32 oz (Google Affiliate Ad),or Soap.com, drugstore.com, or Amazon.