Search

Powered by Blogger.

Networked Blogs

Tuesday, January 29, 2013

Soap Nuts for Laundry

I am always searching for new ways of doing things, less expensive things, things that are also ecologically friendly, and things that are just awesome.  Soap nuts are delightful natural cleaning product that is excellent for use in the laundry or for making all-natural cleaning products! Ever since I saw mention of them on an internet forum which I visit, I've been curious, so I did some research and decided to give them a try. 

Soap nuts are berries, or technically a drupe, from the Sapindus tree or shrub (Sapindus Mokorossi).  They grow naturally in the Himalayas and produce saponin.  That is a natural surfactant that changes the surface tension of water and allows the water to get into the fibers of clothing, break down dirt, and float it away.  If you use soap nuts in your laundry, there are no suds.  Instead, the dirt breaks down, the water looks dirty, but the clothes are clean.  The dirt simply goes down the drain with the rest of the waste water.  There is no smell/scent, and soap nuts are very gentle, so they're perfect for baby clothes, diapers, or for those who have sensitivities to soaps, detergents, or fragrances. They are "green," eco-friendly, and are safe for septic and sewage systems. 

The best part is that you can get multiple uses from just a few of the berries.  They can be reused up to 10 times before they disintegrate and need to be replaced.   Just remove the berries from the load of laundry once it's finished, leave them in their bag, allow them to dry, and reuse with your next load.  When the berries become very thin and crumble, it's time to replace them.

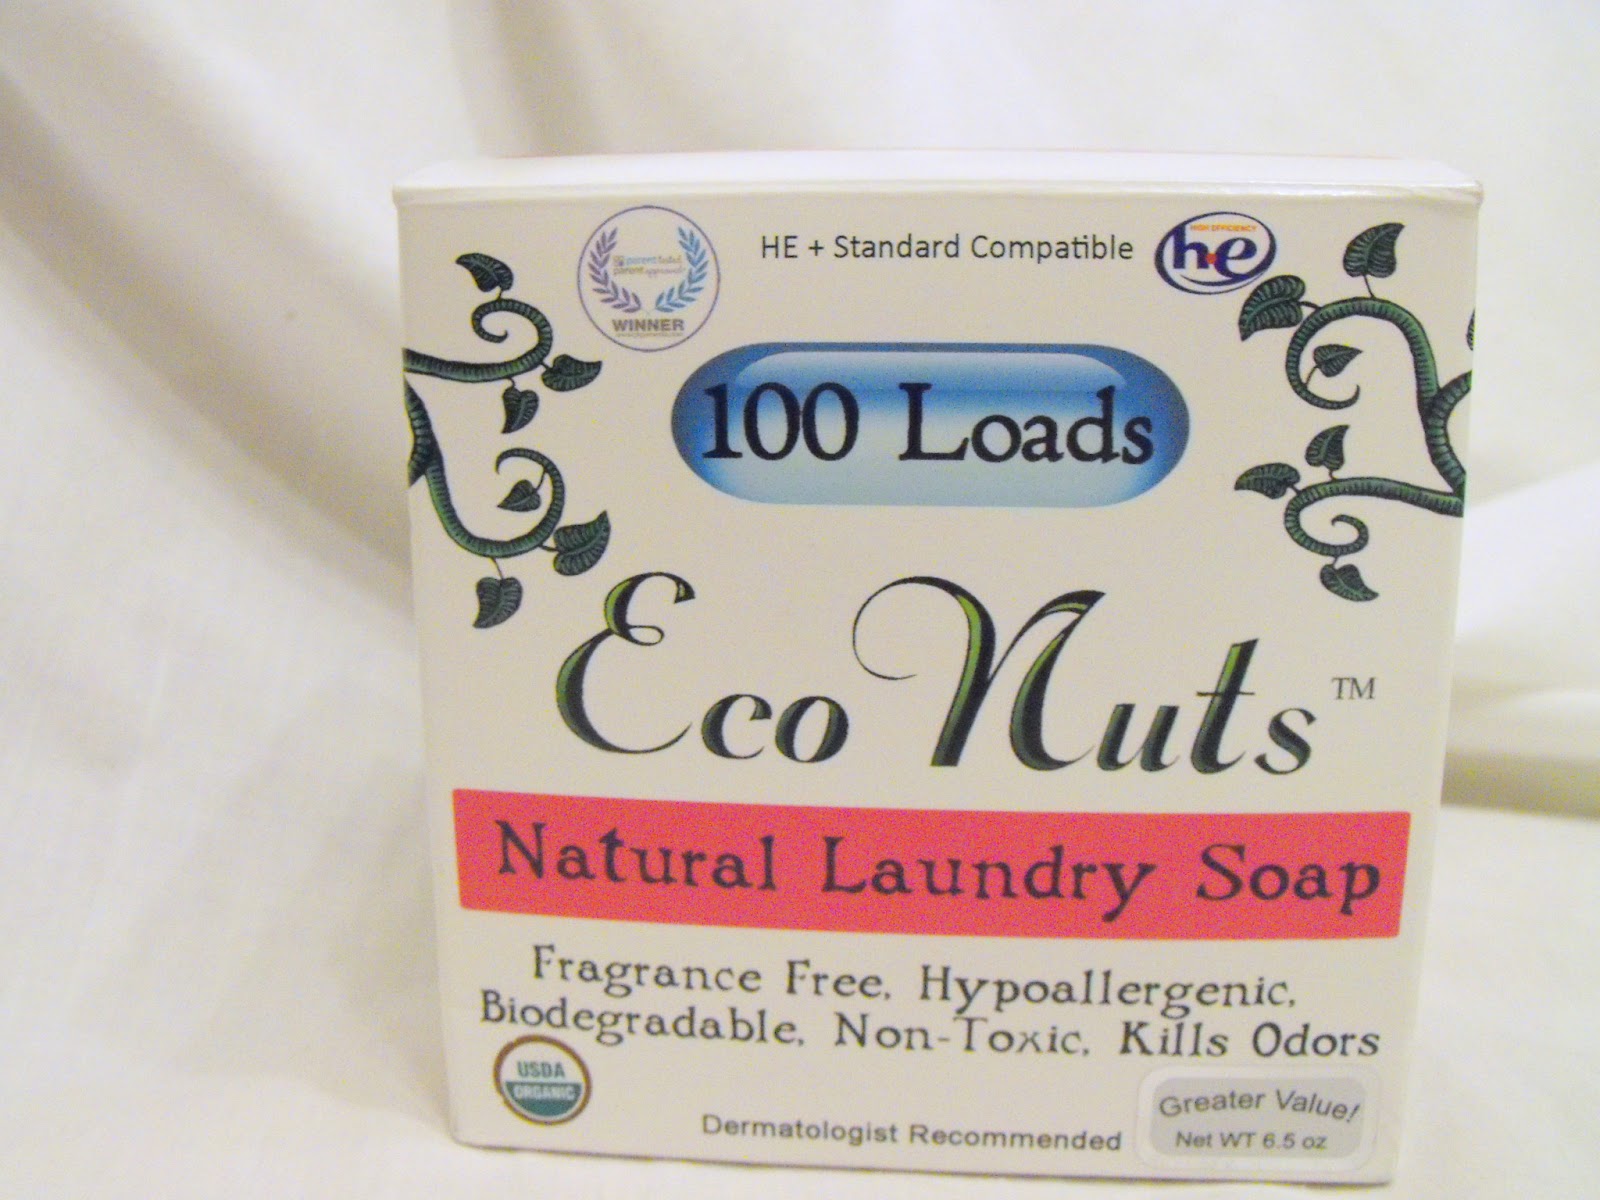
I bought my first batch of soap nuts from Amazon.  I had a $5 credit that was burning a hole in my pocket, so I purchased the 100 load box of Eco-Nuts.  It's a relatively small box packed full of these shiny, brownish-tan dried berries, along with 2 muslin sacks in which to place the berries. 
 
I just tried my first load of laundry, and I must say that I'm impressed!  The clothes came out clean, soft, and scent free straight out of the washing machine.  I did add a Gain fabric softener sheet to the dryer.  This is not necessary, as the saponin in the berries acts as a natural fabric softener; however, I have guys in my household, and let's just say that sometimes you NEED scented laundry. 

The berries work best in hot water or warm water but will also work in cold water, although there may not be as much saponin released.  So if you want to do a load of laundry in cold water but want to make sure there's enough saponin to ensure a clean load, try soaking or steeping the bag of berries in a cup of hot water for about 10 minutes prior to starting the wash load.  Then add the entire batch of water plus the bag containing the berries to the wash and proceed as usual.  

Overall, I thought they worked very well for a first- time use, and I am curious to see how well they work using them numerous times.  Regardless, this is a very economical and eco-friendly way to do laundry! 

Sunday, January 27, 2013

Laundry and Dishwashing Additives to Help Combat Hard Water


Have you ever done a load of dishes in the dishwasher only to have them come out spotty and with bits of food still on them after using your favorite dishwasher detergent?  Or have you done a load of laundry only to discover that your items just were not as clean as they need to be?  It's not a problem with your dishwasher or your washing machine.  It's also not a problem with your favorite dishwasher soap or laundry detergent... well, not technically.  

In 2010, a ban went into effect prohibiting the use of phosphates in dishwasher detergent.  It began in 17 states.  The phosphates were getting into the water supply and causing the growth of algae, so they were banned.  (Link HERE.)However, because of the expense associated with trying to manufacture one type of detergent for some states and a different type of detergent for other states, the manufacturers made the decision to just make one type of dish detergent:  phosphate free.  Phosphates were removed from laundry detergents in 1993.  

It's a win for the environment, but it's a loss for trying to get your dishes and laundry clean. Trisodium phosphate is a degreaser, soap scum buster, and left sparkling clean dishes and fresh laundry.  Unfortunately, once that was removed from these soaps, things were not good.  Pans came out dingy, aluminum turned black, fingerprints and lipstick were still present on dishes and glasses.  Some laundry soaps left clothes looking like they'd not even been washed.  Water could have done as good a job.  What's worse, if you live in an area of the country that has hard water, your dishes may have begun showing a filmy, milky, powdery residue, and your whites may have begun to be dingy.  

What can a person do?  Short of adding trisodium phosphate to these soaps, there are other options for combating these problems.  They are additives that can combat the minerals, metals, and other compounds found in water, allowing the detergents and soaps to do their jobs.  Here are some of them. 
 
Citric Acid -Citric acid is what makes lemon juice tart.  It has many uses not only in cleaning but in food and food preservation.  For cleaning, it serves as a chelating agent, binding to minerals and especially metals in hard water.  It makes an excellent additive to both the washing machine and the dishwasher.  It is the main active ingredients in dishwasher rinse aids such as LemiShine (If you want to read a fun chemist's breakdown of LemiShine, read the link HERE.)  Add 1-2 tablespoons to laundry to help laundry get cleaner, or add 1-2 teaspoons to your dishwasher for crystal clear glassware and spot-free dishes.  You don't have to buy LemiShine.  Instead, you can buy straight citric acid from places like Amazon.com, or find it in the canning aisle of your favorite grocery store, although buying it that way is quite expensive.  You can also buy it in bulk from Soap.com.  

Lemon Juice - Nature's own citric acid. (See note above.)  Add 1/4 cup to your laundry or dishwasher. 

White Vinegar - Acetic acid in water.  This is an excellent mild acid that dissolves calcium and makes it water soluble.  It is excellent for adding to laundry to increase the water's acidity.  It breaks down minerals contained with hard water, and it also helps to dissolve any residual soap scum left from laundry.  It is an excellent substitute for a fabric softener by adding it to the final rinse of a load of laundry.  Use anywhere from 1/2 to 1 full cup.  It is also a wonderful substitute for spotfree treatments in your dishwasher.  Just fill the rinse compartment with white vinegar and use as you normally would the rinse solution. 

Washing Soda - Sodium carbonate or soda ash.  Not to be confused with baking soda, which is sodium bicarbonate. Sodium carbonate bonds with magnesium and calcium ions in hard water and prevents them from bonding with detergent.  This allows the detergent to do its job and for your clothing to get cleaner.  It also raises the pH of water.  If you're a pool owner, you are familiar with The pH Plus product sold in stores to raise the pH.  Raising the pH also allows detergents to clean better.  (Link HERE.) Add approximately 1/4 to 1/2 cup to your laundry to help soften water and achieve better detergent results. 

Borax -  Sodium borate, sodium tetraborate, or disodium tetraborate.  Prevents calcium and magnesium from binding with detergent and rendering it ineffective.  (Link HERE.)  However, unless you use hot water, borax can be difficult to dissolve and can leave powdery granules in your washing machine, so it may not be your first choice to use if you have hard water.


Friday, January 25, 2013

Using Reason When Following Blog Posts

I have several bloggers and websites that that I follow, and I enjoy their posts and insights.  I am particularly fond of do-it-yourself or make-it-from-scratch posts.  I like the thrill of making something that is just as good as or comparable to something that is store bought.  It's even more thrilling if that item is significantly less expensive than store bought.  However, I've noticed a few things about some of these blogs.  The bloggers and writers find an idea on the internet, and they repeat it.  On and on and on.  If you were to do an internet search about making an item and use your favorite search engine, you will find post after post all repeating the same "recipe" or idea. 

Very few posts show much research to go along with the post.  No links to what an ingredient does, what purpose the whatchamacallit serves, how it mimics another product, etc.  In some posts, the recipe or item du jour seems like it would be a good idea but hasn't been truly tested.  Yet it gets passed on.  One blogger posted it, people raved about it, and then the next blogger posted it to rave reviews, and so on.  These posts talk about how brilliant the idea is, but there are very few commentators who actually post AFTER they tried whatever is mentioned in the post.  If they do, most are met with criticism and backlash from other commentators or even the writer of the post.  How dare they not follow the crowd?!!  Also, oftentimes a blog post may not be complete but simply links back to an original post on another blog.  I understand doing that.  We all want to give credit where credit is due and avoid presenting an idea as our very own.  That's honorable. However, many times the reposter hasn't tried the idea/item.  They just think it sounds neat so posted the idea themselves with a link back to the original.  It's as if back linking absolves them of any responsibility if the item/technique/recipe/whatchamacallit doesn't work.  

It's easy to jump on a bandwagon, though.  A reader looks at all those positive comments, rave reviews, and kudos for a popular post and thinks that it MUST be true.  It MUST work.  Sometimes a post is believed even when a reader has this little niggling doubt in the back of his/her mind.  That little voice might be saying, "This doesn't sound right," but we see all these positive comments and praise.  Then we shove that little voice aside and jump right in. 

My advice?  Listen to that voice!!  Do NOT take what is on a blog as gospel truth.  Be skeptical.  Seek truth. Research!  Even for MY POSTS here, please, be skeptical.  I am not an expert nor is anyone else out there unless they have a Ph.D. in whatchamacallits along with 40 years experience.  While I try to research and show my own personal outcomes via photos and such, some bloggers don't.  They repeat prior posts, and oftentimes don't show failures.  It takes other blogs showing failures to get an idea of how well some of these things don't work.  I can also personally attest to the fact that just because it appeared on a blog doesn't mean it really works!

I can think of two recent examples.  The first is a post by a local blogger/website owner that explained how to make your own fabric softener.  This recipe called for vinegar, baking soda, and essential oils.  The directions said to mix the vinegar and baking soda, wait until the bubbling stops, then add the essential oils for scent.  Store this concoction in a glass jar, then add to your laundry for a clean, fresh, softening scent in the place of liquid fabric softener. 

Sounds great and easy, right?  But wait!  Have you ever mixed baking soda and white or cider vinegar?  Besides creating a great volcano of froth and foam, do you know what you have left when the chemical process stops?  Water.  That's right.  Water with a very small amount of sodium acetate.  Here is a great article from Everyday Einstein that explains this process and how, really, you're not accomplishing much other than making some really neato, very mildly buffered water that has some smelly-good stuff in it.  You could have saved yourself some time and just put the essential oils in the laundry, but that wouldn't be as fun! 

Now, sometimes this bubbling/volcanic action is what you're looking for.  It's great for unclogging a drain, and it's also great for getting stains out of clothing or carpeting.  The bubbling action can work debris loose as a prewash.  I have no problem with that. It's the implication that the processed solution does anything snazzy.  Because, after all, you just created water, albeit fizzy water, and water is the best cleaner of all! It was just created in a rather spectacular way. 

Then I saw another post from another popular online blogger talking about how Epsom salts combined with essential oils makes a great substitute for Purex scent crystals.  NO!!!  Dear sweet crying baby Jesus... no!   Purex crystals contain scent, sodium chloride (table salt), bentonite (clay), and color.  List of ingredients HERE (click on the +fragrances, sizes, and ingredients link). Epsom salts are made up of hydrated magnesium sulfate.  As you can see, Purex crystals and Epsom Salts are definitely not the same!  

If you add Epsom salts to water, you are, in essence, creating hard water.  Hard water contains calcium and magnesium and other dissolved minerals and metals.  Your detergents, soaps, and other things you add to your laundry to get items clean will not work very well in hard water. Why would you want to create hard water?  Especially if you already have hard water?   Adding Epsoms salts to the laundry will do just that! It will worsen an issue, not make it better.  With a little research, the blogger would have known that.  However, there was the post, bigger than daylight, with all these comments praising the brilliance of this new use for an old product. 

These are just two examples of blog posts that look like they are fantastic but when researched reveal that they either won't do much, if anything, and might even make things worse. Why these bloggers, both of whom are very popular, failed to actually research is beyond me.  Now, maybe they just like what they made and like using it.  That is perfectly fine.  I'm all for it because everyone has a right to do as they please.  However, I think it's also a great example of reader beware.  Just because you read it on the internet doesn't make it true! 


Thursday, January 24, 2013

Beer Bread - Broke Food

Beer bread is an excellent quick bread that has just a few ingredients.  Bake it, allow it to cool, and it is great to have with sandwiches or make an egg batter and turn it into French toast.  We like this as just a bread to snack on with real butter and honey.  It also is a great budget stretcher if you're coming up on the end of the week and need bread to go with meals or make sandwiches. 

The recipe calls for Bisquick, but you can also use a substitute for that, which I will list below.  There are only 3 ingredients (my favorite kind!), and it's easy to whip up a batch and have it ready for your next meal.  

Beer Bread 
4 cups Bisquick (this equals one 20 oz. box)*
4 teaspoons sugar 
1 12 oz. can of beer

*If you do not have Bisquick, use 4 cups all-purpose flour, 1 Tablespoon baking powder, 1 teaspoon salt.  

Mix ingredients in a  mixing bowl until it forms a sticky batter. 
Pour into a loaf pan and allow to set for approximately 30 minutes.  This may or may not rise.  Your mileage may vary.  
Bake at 375 degrees for approximately 30-40 minutes or until loaf has risen and turned a golden brown.   
Allow to cool for approximately 10-15 minutes, then remove from pan and allow to cool completely before slicing. 

Wednesday, January 23, 2013

Homemade Aromatic Rub Like Vicks Vapor Rub

Normally I make things from scratch because they are less expensive.  However, sometimes I make them out of necessity.  Such is the case with this aromatic rub.  Our entire family has been ill.  I've had a respiratory illness, my hubster had it, and then our son got it.  While we were using lots of good old fashioned Vicks Vapor Rub, nobody had time to get any from the store!  

Homemade to the rescue!  I looked up the ingredients for the original, and discovered that they consisted of camphor, menthol (peppermint), and eucalyptus in a petroleum base.  A ha!  I had all that!  I mixed some up, experimented with quantities, and came up with a mixture that looked, smelled, and worked exactly like the name brand stuff. 

I like this because you can add as much or as little of the scent as you like.  If you find the name brand is too strong, you can cut back slightly on the oils and then add them in a mixture that is pleasing to you.  I have known people who have also substituted lavender, rosemary, or other oils for the camphor listed because they liked a different scent. 

Homemade Vapor Rub:  
Approximately 1/4 cup unscented petroleum jelly (like Vaseline)
10-12 drops eucalyptus essential oil
10-12 drops peppermint oil 
1/8 teaspoon Campho-Phenique ointment or liquid (this is camphor and makes it more authentic)
OR 
10-12 drops rosemary essential oil  

In a microwave safe bowl, microwave the petroleum jelly in 30 second increments, stirring until melted.  When melted enough, add essential oils and stir well to combine.  Pour into container, place lid on, and allow to cool.  

Use as you would Vicks Vapor Rub!  

Medical Disclaimer:  This post is not a substitute for medical care, advice, or consultation.  Please use these recipes and tidbits with common sense, and please be aware of your own allergies and sensitivities and use (or don't use) accordingly.  Thank you! 

Tuesday, January 22, 2013

Easy Broccoli Cheese Soup

I love broccoli cheese soup.  It's warm, it's comforting, it's tasty, and it makes a great lunch.  I have seen so many recipes that call for an elaborate cooking process for making this yummy soup.  Upon examining the ingredients, I discovered that it was a cream soup base with broccoli, cheese, and other spices added in.  It didn't take me long to figure out there was an easier way!  So here it is.  My "recipe" for easy broccoli cheese soup. 

And it has only two pre-packaged ingredients! Actually three if you include the milk. 

Here's how it you make it. You use the two items shown above. Yes, that's really it!  It's so easy, and it tastes wonderful. 

EASY BROCCOLI CHEESE SOUP
1 box frozen broccoli and cheese sauce (10 oz.)
1 can cream of chicken soup (10 oz.) 
1 can milk 
Milk to thin to desired consistency 

Microwave broccoli and cheese sauce as directed on package.  While that is cooking, in a medium saucepan over low heat, begin preparing cream of chicken soup.  I recommend using milk because water will make the cheese and cream separate.  Whisk soup in sauce pan until thoroughly mixed.  Once broccoli and cheese are finished cooking, open the plastic package and add broccoli and cheese sauce to soup.  Stir thoroughly to combine.  Thin with more milk to desired consistency.  Serve with bacon bits, fresh ground pepper, salt, and crusty bread. 

If you would like to make this a little more homemade tasting, prior to making soup, you can sautee about 1 tablespoon minced onion in butter.  Then add soup and prepare as usual. 

That is it.  The easiest broccoli-cheese soup you will ever make!


Thursday, January 17, 2013

Tuna Croquettes - Broke Food

While tuna croquettes are listed as today's broke food, they are secretly one of my favorite things to eat.  Most people know salmon croquettes, but if you're really trying to save, croquettes made with tuna are just the ticket.  

I learned this recipe from my late mother-in-law, Judy, and it's been a favorite of ours ever since.  Most people have tuna in their cupboards, and oftentimes if you match coupons with sales, you can get tuna for a great price.  It keeps well, and it's versatile.  

These also make great mock filet-o-fish sandwiches.  Save a patty, and the next day heat in the microwave and serve with lettuce and tartar sauce as a sandwich. 

The recipe below is for 1-2 people.  If you need to feed more people, double or triple the recipe to suit your needs.  Now, on with the recipe! 

Tuna Croquettes (Makes 2-3)
One 2.6 oz. pouch of tuna (or an equivalent size can), drained 
1/2 cup crushed saltine crackers or bread crumbs
1 egg, beaten 
1-2 tablespoons finely minced onion or 1-2 teaspoons dried minced onion 
Salt and pepper

Combine all ingredients.  Allow to rest for about 10 minutes so the crumbs soften a bit.  Form into patties and fry in oil over medium-high heat.  Serve with tartar sauce or cocktail sauce (recipes below). This will make 2 large patties, 3 medium patties, or 4 very small patties.

Homemade Tartar Sauce
1/4 cup mayonnaise 
1 tablespoon sweet or dill relish
Dash onion powder 
Salt and pepper to taste 

Combine all ingredients and serve with fish.  My very first job was in a local fish house restaurant, and this was how they made their tartar sauce and their cocktail sauce.

Homemade Cocktail Sauce
1 cup ketchup
1/2 to 1 teaspoon Worcestershire sauce (to taste)
dash of garlic powder 
dash of Tabasco hot sauce

Mix all ingredients and chill before serving. 


Tuesday, January 15, 2013

Asian Chicken Ramen - Creative Cooking

This is one of those recipes that is relatively inexpensive and makes a TON of food.  It's great to feed a lot of people, and the ingredients are flexible enough that you can make more of less of it  depending on your resources.  
We used to live in Colorado, and on more than one occasion, we would have a house full of people.  When that happened, I had certain go-to recipes that I knew would be tasty, filling, make large quantities, and were usually something that everyone would like.  Add a salad and drinks, and this is enough to feed a crowd. 

 Asian Chicken
4 pkgs. Ramen noodles
4 C. water
¼ C. soy sauce
1 tsp. crushed red pepper flakes (may omit)
2 (16 oz.) pkgs. mixed vegetables, preferrably Asian stirfry, but any will do
6 cups cooked chicken of your choice (can reduce to as little as 2 cups, if desired; 6 cups is a lot of chicken)

In very large pot bring 4 cups water to boil. Stir in seasoning packets from Ramen noodles, soy sauce, and pepper flakes. Add noodles. Cover and cook for 2 minutes. Do not drain noodles. Add veggies. Cover; cook until noodles and veggies are tender, 3-4 minutes. Stir in chicken. Makes almost 2 gallons.

HINT: To decrease the cost of this dish, you can decrease the chicken and add 2-3 scrambled, chopped up eggs.

Monday, January 14, 2013

Survival Kit in a Pill Bottle


Survival kits are something we all should have, but it's hard to know not only what to put into one but how to store it.  Putting the contents in a pill bottle is an excellent way to make sure you have items on hand, and it's small enough that you can stick it in a purse, jacket pocket, backpack, or toss it in your glove compartment. We like to hike and usually have a couple of these to take with us in case we become injured or get stranded.  Also, since it is winter, and a person may get lost or their car stalls and they become stranded, these are nice to have in your car.  

These are not all inclusive, and they can be customized for your specific area, outing, or sport.  I tend to pack them for use in a cold climate, as that is when people are most likely to be stranded.  I have made one and listed the contents below.  The pill bottle is just a tiny one that holds approximately 2 oz.  The larger the pill bottle you use, the more you can get into it.  The items included are just enough to get you through and fortified until you can be rescued.  

Some of the items are not in the photo as I began adding things if I still had room.  You may also do the same and add more items if you have a larger pill bottle available.  Keep in mind that pill bottles are not usually waterproof, so you may wish to use a ZipLoc bag instead.  

One addition that I would suggest are chlorine water purifying tablets.  I do not have these but plan to add them to the bottle in the future, once I can get some.  See explanation of uses and photos below. Also a magnesium fire starter is an excellent thing to have on hand; however, most are too big for my pill bottle.  Again, I suggest having one of these in your glove compartment, in a back pack, or carry one with you if you are hiking.  Finally, a razor blade can be useful, but pack with care.  You don't want to slice your finger open trying to get items out of your kit. 

My survival kit includes: 
A 2 foot piece of aluminum foil, folded into a tiny rectangle
A 3 foot piece of duct tape, rolled up
1 sealed alcohol swab in foil
One birthday candle 
2 Benadryl tablets (in plastic wrap)
2 Aleve tablets (in aluminum foil)
4 matches with a strike strip (waterproof are recommended if you can find them)
1 wire twist tie
1 safety pin 
2 small paper clips
Dental floss (several feet) wound around cardboard
1 package of Neosporin 
1 tiny package of salt 
1 needle in a strip of cardboard
Thread wound around needle 
1 beef bouillon cube 
1 band-aid 
1 small piece of cotton batting 
 Uses of items: 
Aluminum foil:  Can be used as a reflector or mirror for a signal.  It can be used to line your clothing to reflect heat back onto your body.  It can be formed into a cup or bowl in order to melt ice.  It can also be used as a reflector for a fire, flashlight, or candle.  Use it over a fire to cook items. 

Duct tape:  .... enough said.  What can't you use duct tape for?  

Alcohol Swab:  Use for first aid or use to assist with lighting a fire.  Save the foil packet for use with cooking or other storage. 

Birthday candle:  Use as a light or to start a fire.   The wax comes in especially handy if wood or other material is wet. 

Benadryl tablets:  Can thwart an allergic reaction from  stings, bites, or encounters with plants or other substances that cause an allergic reaction. 

Aleve tablets:  Aleve is an anti-inflammatory and analgesic that lasts for 12 yours.  Ibuprofen, Tylenol, or aspirin may be used but do not provide relief for as long a time as Aleve. 

Matches and Strike strip:  Use to start a fire for warmth, to melt water, for cooking, or as a signal.  

Wire Twist tie:  Use to secure other times, suspend things, tie items, etc. 

Safety Pin:  Can be used to repair clothing, secure items together, or can be formed into a makeshift fish hook. 

Paper Clips:  Ditto safety pin and can be bent and reformed for other uses, such as a fish hook. 

Dental Floss:  Can be used to stitch items, used as fishing line, and can be braided together to form more of a rope type item.  

Neosporin:  Use for first aid for cuts and since it is petroleum based can be used as a fire starter, in a pinch.  The inside of the package is foil and can also be used as you would aluminum foil.

Salt:  Can be used to melt ice, provides sodium content for water retention in the body, and can be used as a preservative for raw meat/food.  

Needle and thread:  Can be used to repair clothing or stitch items together to provide more protection or warmth.  

Beef (chicken, vegetable) Bouillon Cube:  Add to 1 cup of water to make broth.  Can be sipped alone or used as a base to add herbs, plants, or other game for a meal. 

Band-Aid:  Use to cover a wound. 

Small piece of cotton batting:  Can be used in bandaging or can be used as fluff to start a fire.  

I am sure there are other items that can be used, but those are the things that are in my personal pill bottle survival kit.  Customize them to your activity.  You might want salt pills and sunscreen for a desert trek or mosquito repellent cream if you're headed into the deep woods.  Whatever fits in your bottle is wonderful.  Hopefully what I have listed above will be a start for designing your own kits for your family.  

Sunday, January 13, 2013

Headache/Migraine Relieving Aromatherapy Lotion

Ever have a horrific headache or even a migraine?  If you have, you'll never forget it.  I suffer from them as do many members of my family.  Luckily, I only get a migraine about once a month (more often if I am sleep deprived), but I also get terrible tension headaches.  Working at a computer 8+ hours a day, I tend to hold tension in my shoulders and neck. This can result in excruciating tension headaches.  

One way that I have discovered for relieving headaches is through a combination of aromatherapy and acupressure.  I'm going to share my solution here. The lotion uses peppermint (menthol) and eucalyptus essential oils.  Peppermint used topically and as aromatherapy is known to help relax muscles and increase circulation.  This makes it excellent for headaches, particularly tension headaches. 

I have included the recipe below for making your own headache relieving lotion.  This is for use on your hands in combination with acupressure.  See instructions, below the recipe, for how to use this lotion in combination with acupressure for headache relief.  My hubby loves acupressure so much that if he has a headache, he will wave his hand at me and ask me if I'll rub it to relieve a headache!

Headache Relieving Aromatherapy Lotion:
 4 oz. (1/2 cup) of lotion of choice or homemade hand lotion (recipe HERE or dollar store vitamin E lotion is also excellent for this)
15-20 drops peppermint essential oil
10 drops eucalyptus essential oil 

Combine all ingredients, mix well, and store in air-tight container. 

To use:  Place a small amount of lotion on both hands and massage all over hands.  Concentrate on the part of your hand where your thumb joins to your hand.  Put pressure on both sides of this area by placing the thumb on the top part of the area and your fingers underneath (see link below for photo).  Use firm pressure and massage in a circular motion.  You may even find that, surprisingly, it is sore and that the degree of soreness directly relates to the severity of your headache.  Continue to massage this area for 5 minutes.  If you are experiencing nausea with your headache, place three fingers together (as if you were going to show someone you're 3 years old), place your fingers on the inside of your wrist, and measure 3 fingerbreadths down from the base of your hand.  Begin massaging at that point on the inside of your wrist/forearm.  This is an acupressure point to relieve nausea.  Alternate these massages, using the lotion liberally.  Relax, breathe deeply, and your headache should ease. 

For further information on the use of peppermint for headaches, see link HERE

For further information on the use of acupressure to relieve headaches, see link HERE

Medical Disclaimer:  The information provided here is for personal use only.  It is not a substitute for professional medical advice, treatment, or consultation.  

Saturday, January 12, 2013

Homemade Disinfecting Sprays Like Lysol

It's that time of year again.  Time for colds, flu, and just general crud.  Everybody is cooped up, and it's easy to spread germs and viruses.  All three of us have been sick.  I started it, and the hubster and my son now have it.  We've tried hard to wash hands, keep everything swabbed with disinfecting wipes and sprays, but somehow we still managed to pick up a bug.  

The most important thing to remember is that good old soap and water do the best job of removing germs.  The surfaces are clean, and any remaining germs or viruses can be killed with disinfectants and other sanitizing agents.  While I love disinfecting wipes, they can't get everywhere.  That's when disinfecting sprays come in handy.  They form a fine mist that gets into nooks and crannies and can be sprayed so that there is even coverage.

Most disinfecting sprays do their best job when they are allowed to sit for a few minutes.  The optimal time is 5 minutes in order to kill everything.  Unfortunately, some of those sprays are not only expensive, they stink!  No matter how they are fragranced, it seems they still smell like chemicals. Blech! 

You can make your won disinfecting sprays at home and make them suited to your liking.  There are two recipes listed below.  One is an alcohol-based disinfecting spray.  The other is a paracetic acid spray.  The alcohol-based one is easier to make, is very effective at killing the flu virus, and is reasonably safe for all surfaces.  The paracetic acid mixture is acidic and contains peroxide so is not recommended for use on items that will bleach, such as fabrics. The CDC has deemed alcohol, peroxide, iodine-based products, and detergents as suitable substances for killing the influenza virus (link HERE). 

Finally, if you can stand the smell, a simple mixture of 1 tablespoon of bleach to 1 quart water or 1/4 cup bleach to 1 gallon of water is an effective germ and virus killer.  However, it is not safe for all surfaces, and... it stinks.  

Here are some alternative recipes for homemade disinfecting spray.  

Alcohol-Based Disinfecting Spray:
1 spray bottle 
isopropyl (rubbing) alcohol 70% (the regular stuff you buy in the store)
essential oils such as tea tree oil, lavender oil, rosemary oil, or peppermint oil 
OR
1 teaspoon Lysol cleaner or other disinfecting liquid cleaner

In spray bottle put either 15-20 drops of essential oil or 1 teaspoon of disinfecting cleaner.  Fill with alcohol and insert sprayer.  Shake gently to combine.  Spray on surfaces and allow to sit until dry.  

Paracetic Acid Based Disinfecting Spray:  
1 spray bottle
1/4 cup 5% white vinegar
1/4 cup 3% peroxide 
5 drops essential oil 
(Do not use cleaner with this solution.) 

Mix ingredients and carefully pour into a spray bottle and set sprayer to fine mist.  Spritz on hard surfaces that are not easily bleached or prone to damage from liquids.  Allow to sit until dry.  

Note:  This makes a small quantity.  If you need larger amounts, adjust ingredients accordingly by using 1 part vinegar to 1 part peroxide. 


For tips on preventing flu see this post from the CDC:  http://www.cdc.gov/flu/protect/stopgerms.htm


Thursday, January 10, 2013

Unusual Uses for Common Household Things


We all have little tips and tricks that we use.  I love finding unusual uses for items beyond their normal use.  Some of these may be obvious, some may be new, but they are fun and interesting.  

What little item do you use that is out of the ordinary?  I'd love to know what those are.  Here are some of mine: 


1.    Nail polish remover to take labels off plastic containers.  Saturate a paper towel with nail polish remover.  Wrap it around the item that needs the label or printing removed.  Allow to sit.  Periodically redampen the paper towel, then wipe off the label!  May also use furniture-grade acetone, for this, as well, but be sure to wear gloves. 

2.    Use an antiscratch scrubber kitchen sponge (the kind with a loofa on one side and sponge on the other) in the shower to remove calluses from feet.  If it gets icky, either put it on the top shelf of the dishwasher and run through with a load or put it in a zippered bag and wash it with a load of towels to get clean. 

3.    Aspirin, salt, and water paste for canker sore cure.  This is an old trick that my dentist gave to me long ago to treat canker sores.  Crush an adult aspirin into a powder.  Add an equal amount of salt.  Add enough water to make a paste.  Using a dampened Q-tip, dab a little on the canker sore.  This will burn like crazy, but it “cauterizes” the sore, and it will oftentimes be gone the next day.   (See medical disclaimer below.) 

4.    Make a paste of cooking oil and baking soda as a homemade “Goo Gone” to remove stains and other greasy residue. 

5.    Use white vinegar in your dishwasher’s rinse dispenser in stead of expensive commercial rinse products to stop hard water and soap spots.

6.    A crumpled piece of aluminum foil makes an excellent scrubber if no steel wool pads are available. 

7.    A muffin tin with each compartment filled halfway makes an excellent extra ice tray.  Fill with fruit punch, juice, tea, or Kool-aid for ice that won’t dilute in your drink. 

8.    Use Rain-X meant  to use for windshields on shower doors.  Water spots won’t form, and the shower glass will be easier to clean.

9.    Use car wax to wax sinks and showers.  Clean shower stalls and sinks, then apply a coat of car wax and buff.  This will leave a shiny surface, and soap scum won’t stick to it.

10. Use a sheet of Contact paper with the backing removed for furniture, clothes and car seats to make dog hair and lint pickup an extra quick task. 

11. Want extra long eyelashes?  Clean an old mascara wand, and use it to apply either mineral oil, baby oil, or Vaseline to your eyelashes each night.  This will condition them and help them grow. 

12. Aluminum foil makes a great connector/contact point  if a spring breaks inside a battery compartment of a piece of electronics or a toy. 

13. Mix coffee grounds (used or fresh) and olive oil and use for a facial or body scrub.  The grounds provide an exfoliating effect, the caffeine will help tighten skin and improve circulation, and the olive oil provides moisture.  Rinse well after use.

14. Spray Static Guard on your hair brush to relieve static in your hair or use a fabric softener sheet gently rubbed over your hair to help detangle it.

15. Got stuck-on, burned-on food in a pan or casserole dish?  Place a fabric softener sheet in it, then fill the pot or dish with hot water, and allow to sit overnight.  The gunk will wash off!

16. Got an old T-shirt that is a little on the snug side?  Use it to dry your hair!  Pull just the neck over your head, with the shirt going in the wrong direction, then use the remaining T-shirt to wrap up your hair.  This will dry your hair quickly, hold your hair up while you apply makeup, and is even more gentle than a bath towel. 


Medical disclaimer:  Material on this Website is provided for informational purposes only. It is not a substitute for medical care, consultation, or advice.

Easy Kitchen Cleanup while Cooking


Some friends and I were having a discussion recently about whether or not we like to cook.  A couple said they wouldn't mind cooking if it didn't make such a mess.  I piped up because one thing that I learned, when I was learning to cook, was how to clean as you go. 

Now, let's get one thing straight.  I... AM... A.. SLOB.  No ifs, ands, or buts.  I would rather do anything that clean, my house is a disaster, and a scatter bomb going off would be an improvement.  As someone once said, "A lazy person will find the fastest way to do something."  That would be me.  

However, one thing I'm weird about is my kitchen.  While there might be clutter around, the kitchen itself will be clean.  I cannot start cooking unless the kitchen is clean first.  Weird, huh? 
I told them my tips for cleaning as I go while I cook, and a friend suggested a blog post.  So here we go! 

Steps to Cleaning while Cooking: 
  • Put away any clean dishes in the dishwasher.
  • Empty the sink and counter spaces and put all dirty dishes in the dishwasher.
  • Plug the sink and squirt in a little dish soap.  Run the sink about half full of soapy water. 
  • As you cook and use bowls, utensils, etc., put them in either the sink or the dishwasher.
  • Hang a Walmart sack or trash sack over either a cabinet drawer or cabinet door to secure it.  Hang it near where you are cooking. Dump empty cans, packaging, or scraps in as you cook so that you are not moving back and forth between the trash can. 
  • Open any cans needed for a recipe.  Drain, if needed.
  • Save an empty can into which you can pour drippings from cooked meat, such as hamburger meat. Toss the can when contents are cool. 
  • Chop any veggies that need to be chopped.
  • Cut up and/or rinse any meat needed in the recipes. 
  • Use a spoon rest or folded up dampened paper towel on which to lay any utensils while you cook to prevent drips and spots.  
  • As you use something, put it either in the soapy water in the sink, or put larger items in the dishwasher.
  • When finished cooking and serving your meal, you can empty the sink and either place soaked items in the dishwasher or give them a quick scrub, rinse, and dry to put them away.  
  • Collect trash sack full of items and discard. 
  • Wipe down stove/oven, counters, let water out of sink and scour. 
You're done!